
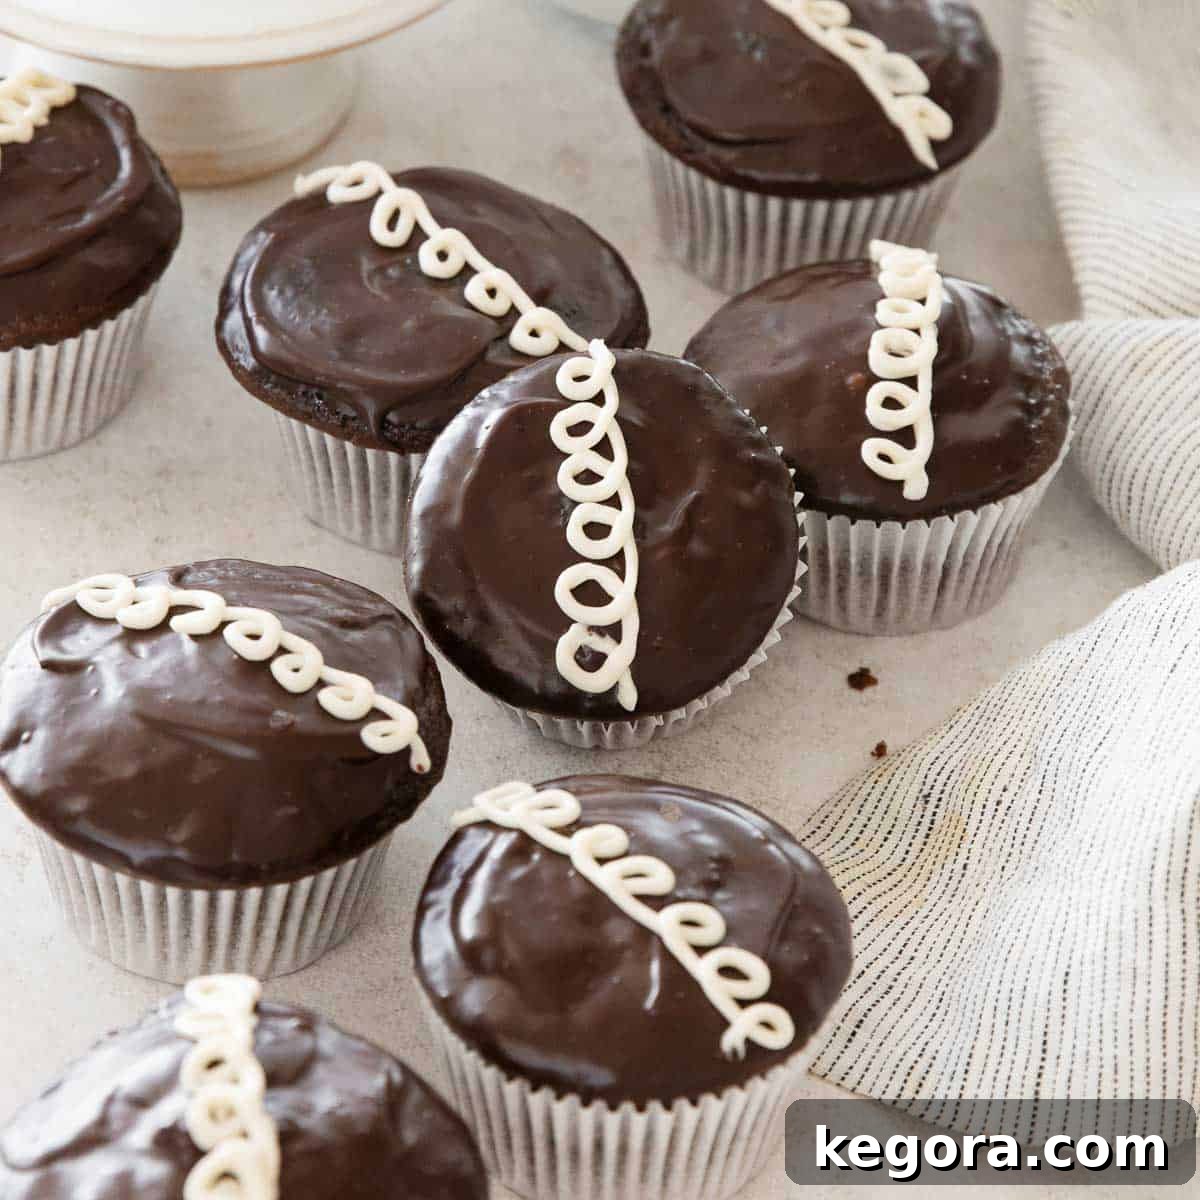
The Ultimate Gluten-Free Hostess Cupcakes: A Nostalgic Delight
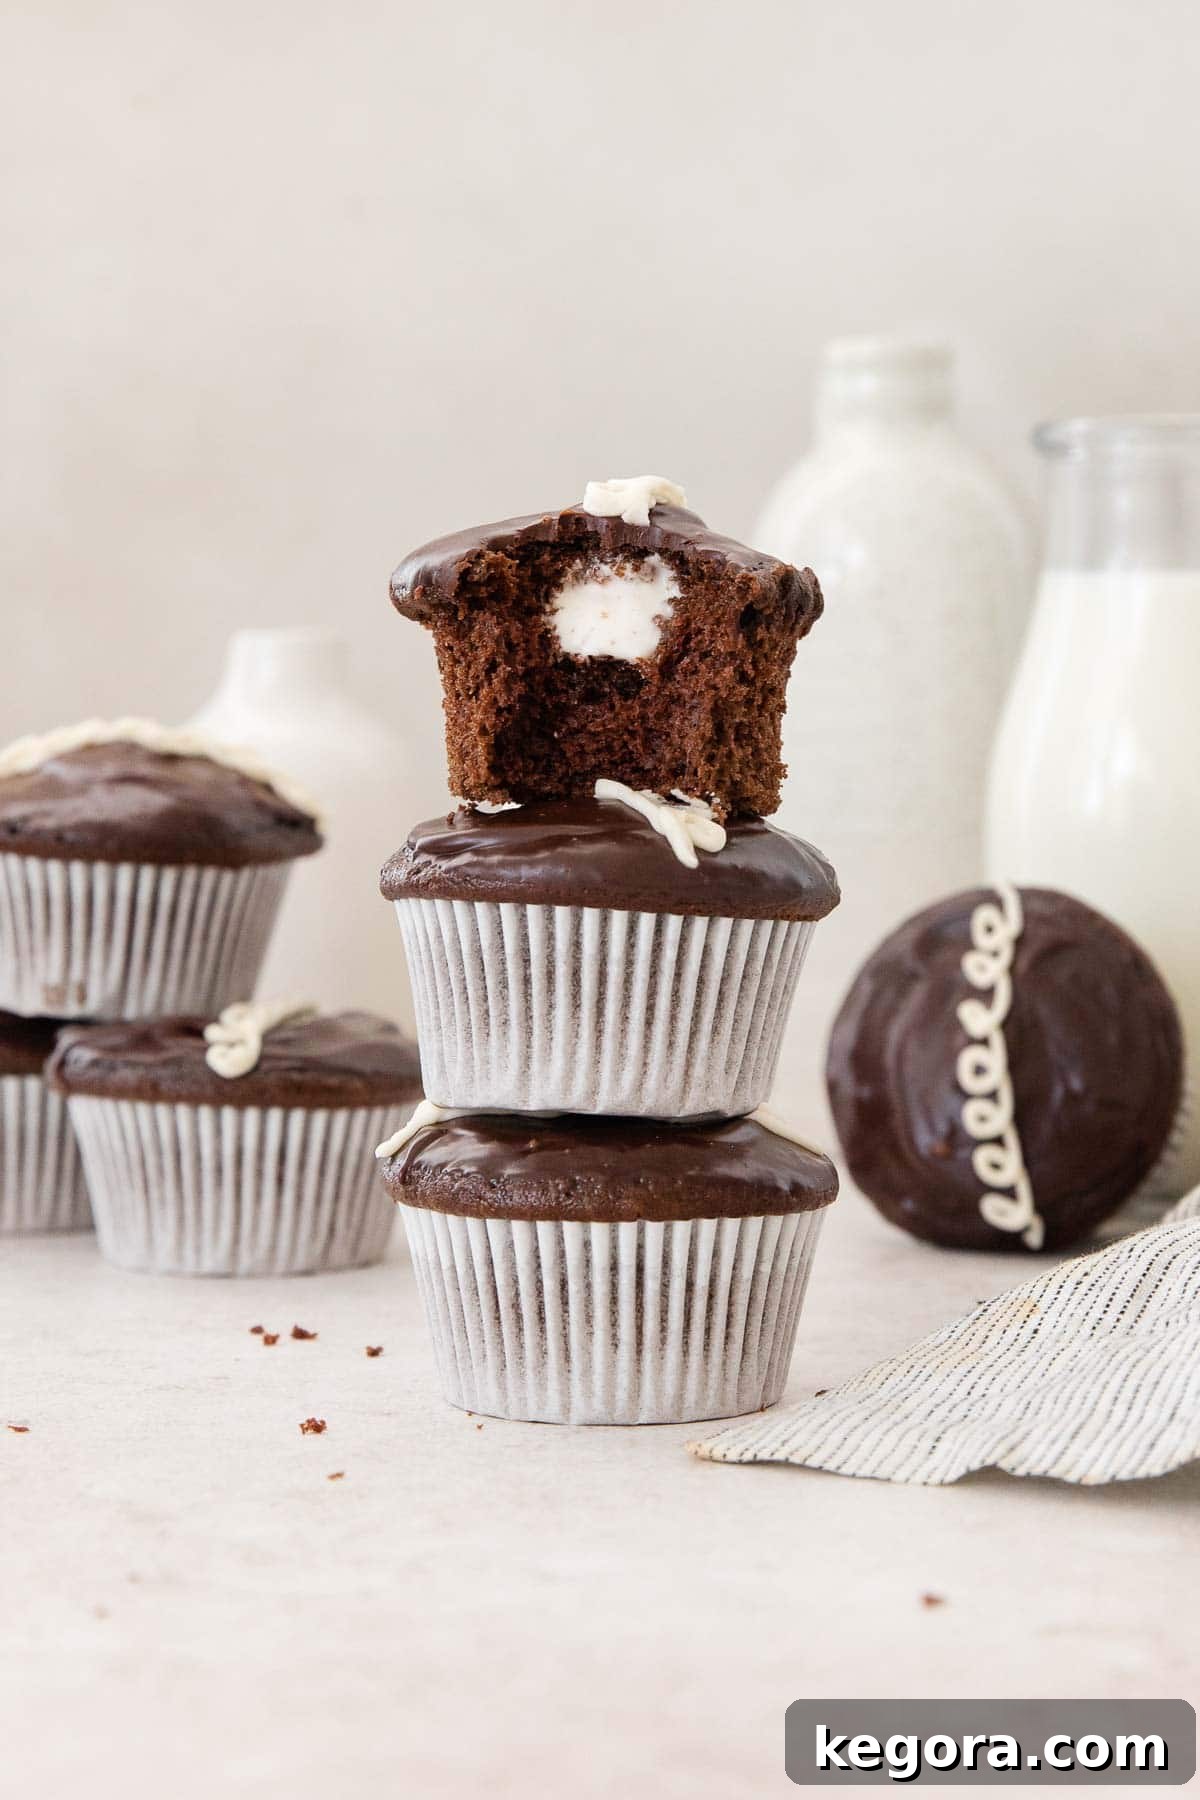
Step into a world of pure chocolate bliss with these incredible gluten-free Hostess cupcakes. Recreating a beloved childhood classic, these homemade treats are not just a copycat – they’re an elevated experience. Imagine sinking your teeth into a supremely soft, moist chocolate cake, discovering a creamy, fluffy marshmallow filling, all enrobed in a rich, glossy chocolate ganache, and crowned with that iconic vanilla swirl. It’s an **unforgettable flavor combination** that perfectly balances sweetness and deep chocolate notes.
What makes these cupcakes truly special is their delightful simplicity. While they look impressive, the process of making them at home is surprisingly straightforward, allowing you to indulge in this nostalgic favorite without the gluten. Perfect for parties, special occasions, or simply a sweet everyday indulgence, these cupcakes will become a cherished recipe in your gluten-free baking repertoire.
Why You’ll Fall in Love with This Recipe
- Unmatched Moisture & Flavor: Experience an intensely moist chocolate cake with a tender crumb, thanks to carefully selected ingredients like sour cream and hot water that bloom the cocoa.
- Irresistible Texture Contrast: The light, airy marshmallow filling provides a delightful textural counterpoint to the dense chocolate cake and the smooth ganache.
- Iconic & Impressive Look: Achieve the signature Hostess swirl and glossy finish, making these cupcakes look like they came straight from a professional bakery, but with the pride of homemade.
- Easier Than You Think: Despite their gourmet appearance, the steps are broken down to be manageable for home bakers of all skill levels.
- Dietary Friendly: Naturally gluten-free with simple dairy-free modification options, ensuring everyone can enjoy this classic treat.
Expert Tips for Perfect Cupcakes
To ensure your gluten-free Hostess cupcakes turn out perfectly every time, keep these essential tips in mind:
- Complete Cooling is Key: Before you even think about filling or glazing, make sure your cupcakes are *completely* cool. Any residual warmth will cause the marshmallow filling to melt and the ganache to become a messy puddle instead of a smooth, firm coating. Patience is a virtue in baking!
- Chocolate Quality Matters: For the silkiest, most professional-looking chocolate ganache, always opt for high-quality chocolate bars (bittersweet or semi-sweet) rather than chocolate chips. Chocolate chips contain stabilizers that prevent them from melting as smoothly, often resulting in a duller, thicker ganache. Chopped chocolate bars melt beautifully, giving you that enviable glossy finish.
If you’re looking to explore more delightful gluten-free copycat recipes, don’t miss our gluten-free oatmeal cream pies, gluten-free iced oatmeal cookies, gluten-free Oreo Crumbl cookies, and gluten-free Starbucks-style cake pops. Happy baking!
Warmly, Erin
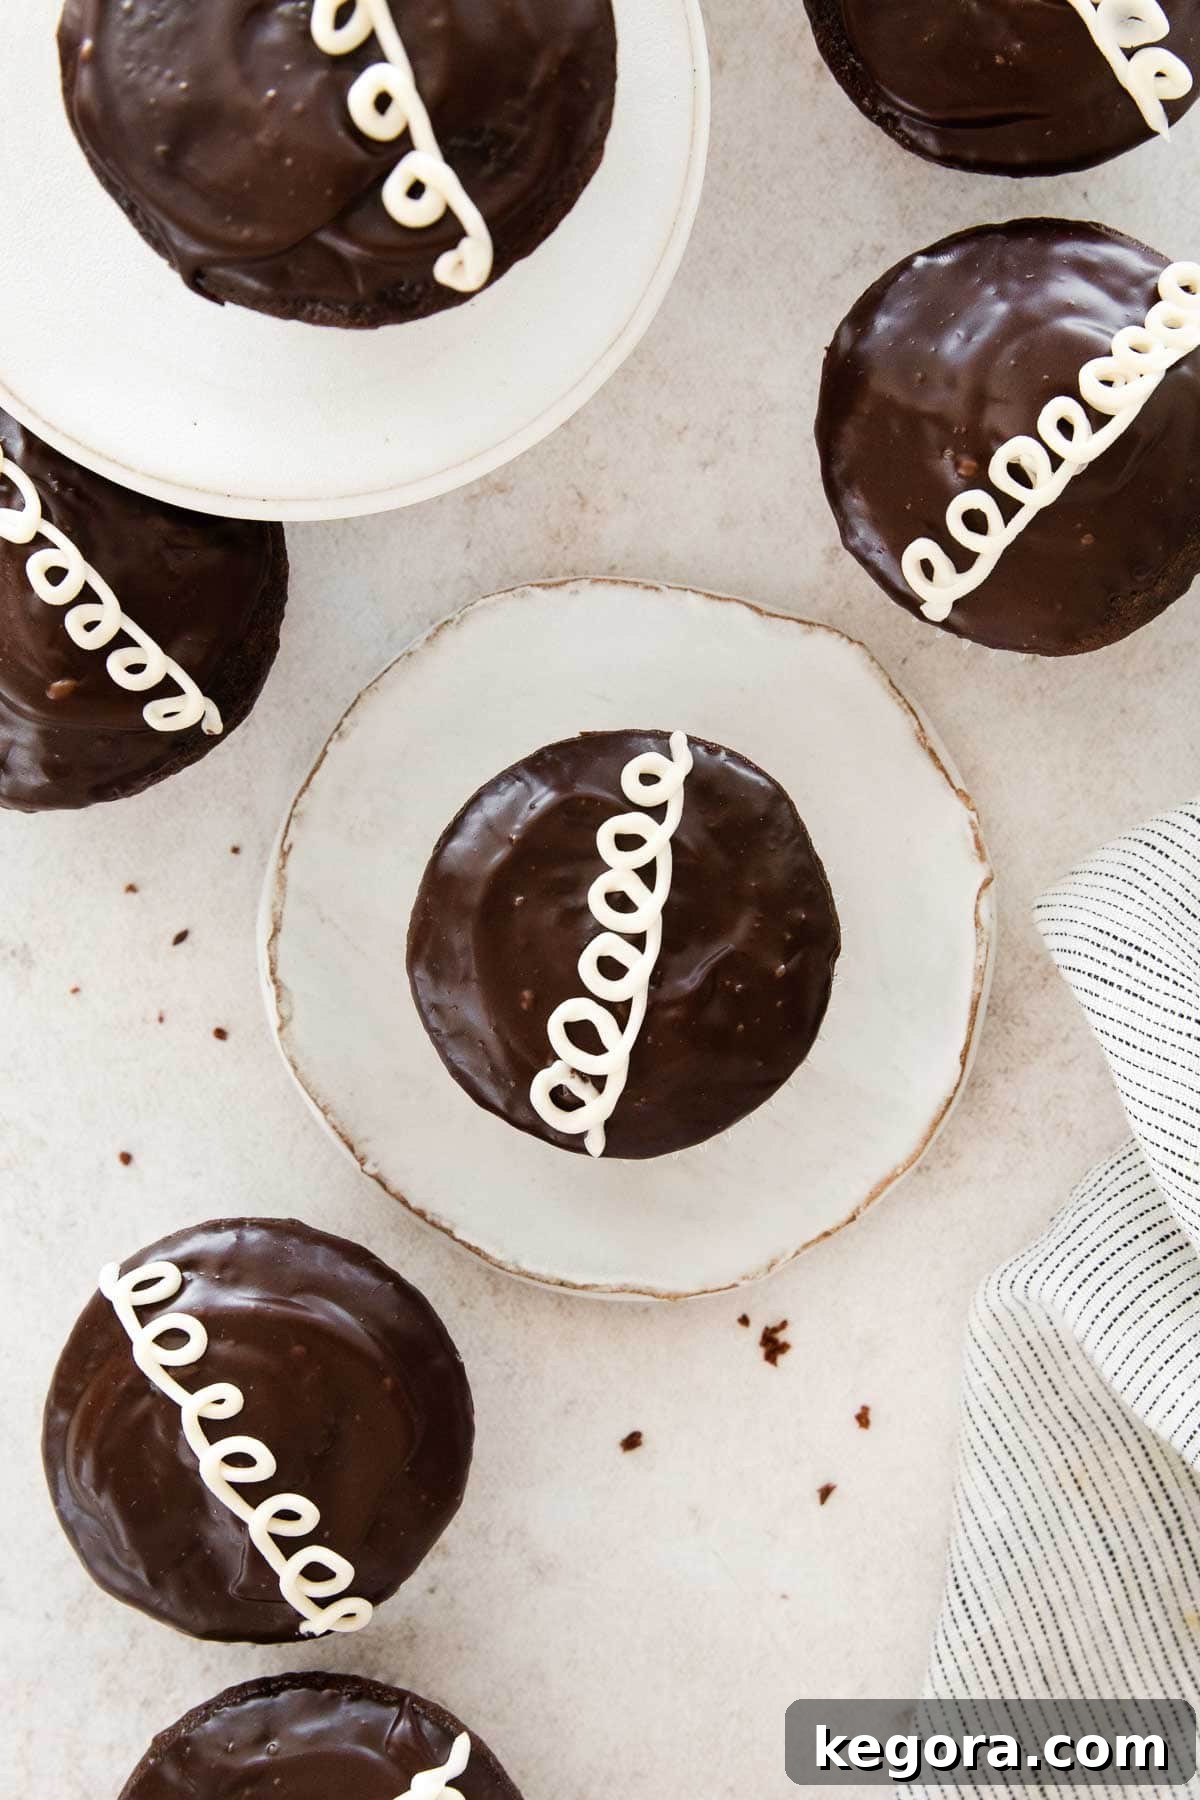
Essential Ingredients for Your Gluten-Free Hostess Cupcakes
Crafting the perfect gluten-free Hostess cupcake starts with understanding the role of each ingredient. Here’s a detailed look at the key components that contribute to the exceptional taste and texture of these nostalgic treats. For precise quantities, please refer to the full recipe card below.
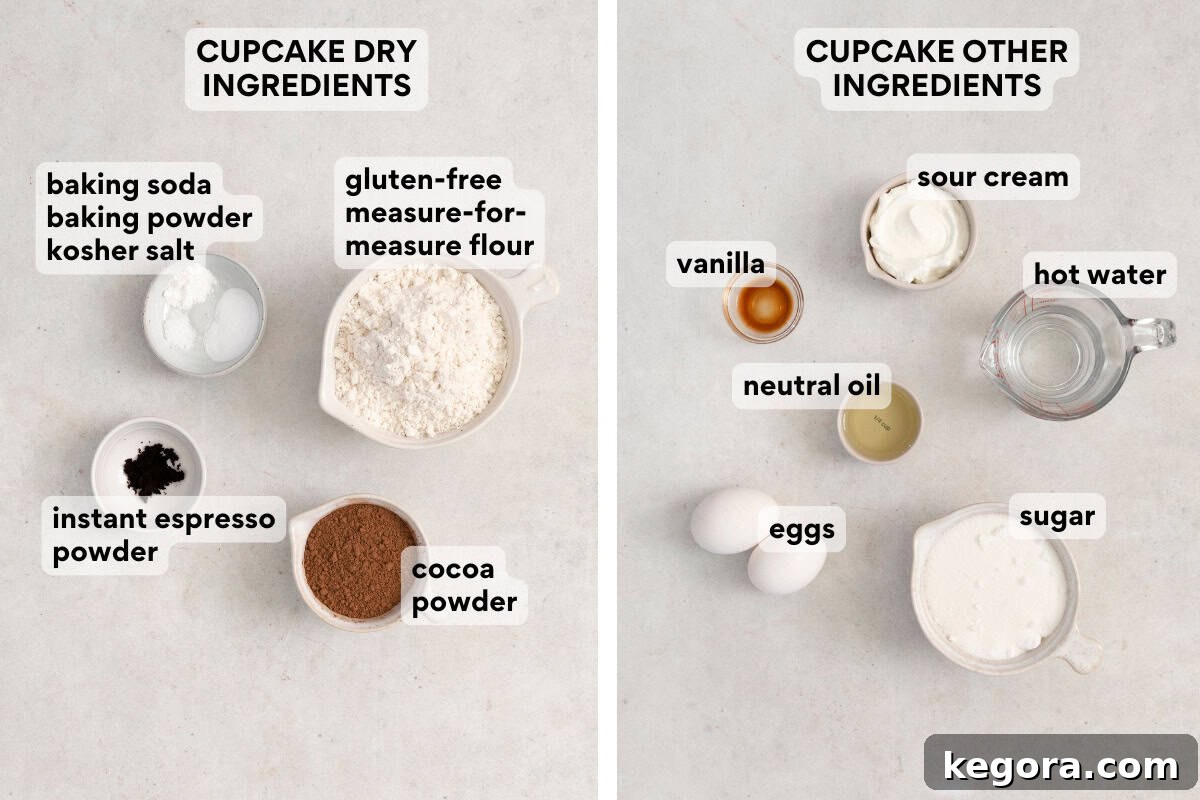
Gluten-Free Measure-for-Measure Flour: The foundation of our gluten-free cake. For optimal results, select a high-quality “measure-for-measure” or “1:1” gluten-free flour blend that already contains xanthan gum. Xanthan gum is crucial for providing structure and elasticity to gluten-free baked goods, mimicking the role of gluten. Our top recommendations are King Arthur Flour Gluten-Free Measure-For-Measure Flour and Bob’s Red Mill Gluten-Free 1:1 Baking Flour, both of which consistently yield excellent results, creating a tender and moist cupcake every time. Using a blend specifically designed for 1:1 substitution ensures the correct balance of starches and flours for a consistent bake.
Instant Espresso Powder: While entirely optional, a small amount of instant espresso powder is a secret weapon for enhancing chocolate flavor. It doesn’t make your cupcakes taste like coffee; instead, it deepens and intensifies the chocolate notes, making them richer and more complex. It’s an easy addition that makes a noticeable difference in the overall flavor profile of your chocolate cake.
Cocoa Powder: For this recipe, natural cocoa powder (like Hershey’s brand) is essential. Unlike Dutch-processed cocoa, natural cocoa is acidic, which reacts with baking soda to create carbon dioxide, helping the cupcakes rise beautifully and achieve that light, airy texture. Using Dutch-processed cocoa, which is neutralized, would disrupt this chemical reaction and result in flatter, denser cupcakes. Ensure you’re using unsweetened cocoa powder to control the sweetness of the recipe.
Sour Cream: This ingredient is a game-changer for cupcake moisture and tenderness. Full-fat sour cream adds richness and a delicate tang that complements the chocolate perfectly, while its acidity helps to activate the baking soda, contributing to a wonderfully soft and tender crumb. Do not skip this ingredient, as it significantly impacts the texture of the final cupcake. For dairy-free versions, a good quality dairy-free sour cream alternative works just as well.
Hot Water: Adding hot water to the batter serves a crucial purpose: it “blooms” the cocoa powder. This process releases the full spectrum of cocoa’s flavor compounds, resulting in a much deeper, more intense chocolate taste. It also helps to create a thinner, silkier batter consistency, which contributes to the cupcakes’ moist and tender texture.
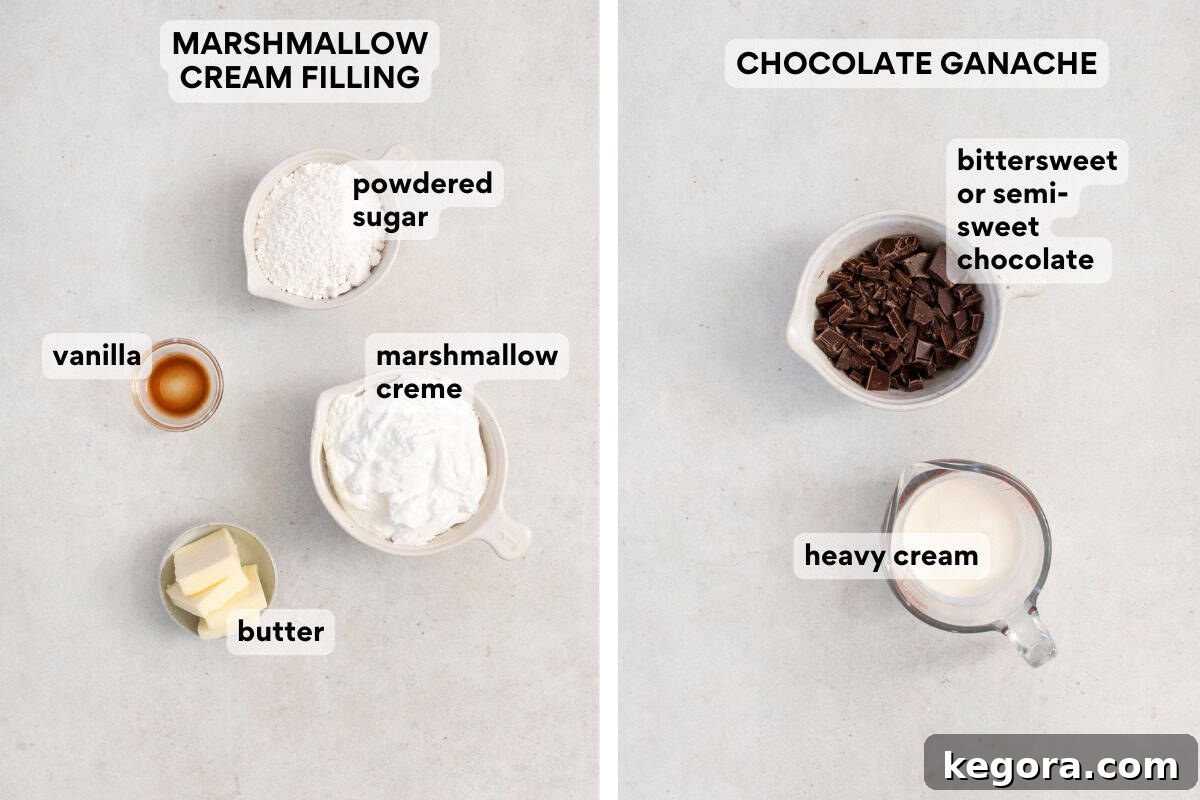
Marshmallow Creme: The heart of the classic Hostess cupcake is its distinct marshmallow filling. You can use widely available brands like Marshmallow Fluff or any similar marshmallow creme. This sticky ingredient can be a bit challenging to work with, so a helpful trick is to lightly butter your spatula and the opening of your piping bag. This simple step will prevent excessive sticking and make filling your cupcakes much easier and cleaner, ensuring that signature fluffy center.
Chocolate (for Ganache): Achieving a truly glossy and smooth chocolate ganache is paramount for these cupcakes. For the best results, use high-quality bittersweet or semi-sweet chocolate bars, finely chopped. Avoid using chocolate chips, as they contain emulsifiers that prevent them from melting into a perfectly smooth, shiny consistency. The finely chopped chocolate bars will melt seamlessly into the hot cream, creating a luxurious, mirror-like glaze. Bittersweet chocolate offers a deeper, more sophisticated flavor, but semi-sweet works wonderfully if you prefer a slightly sweeter ganache.
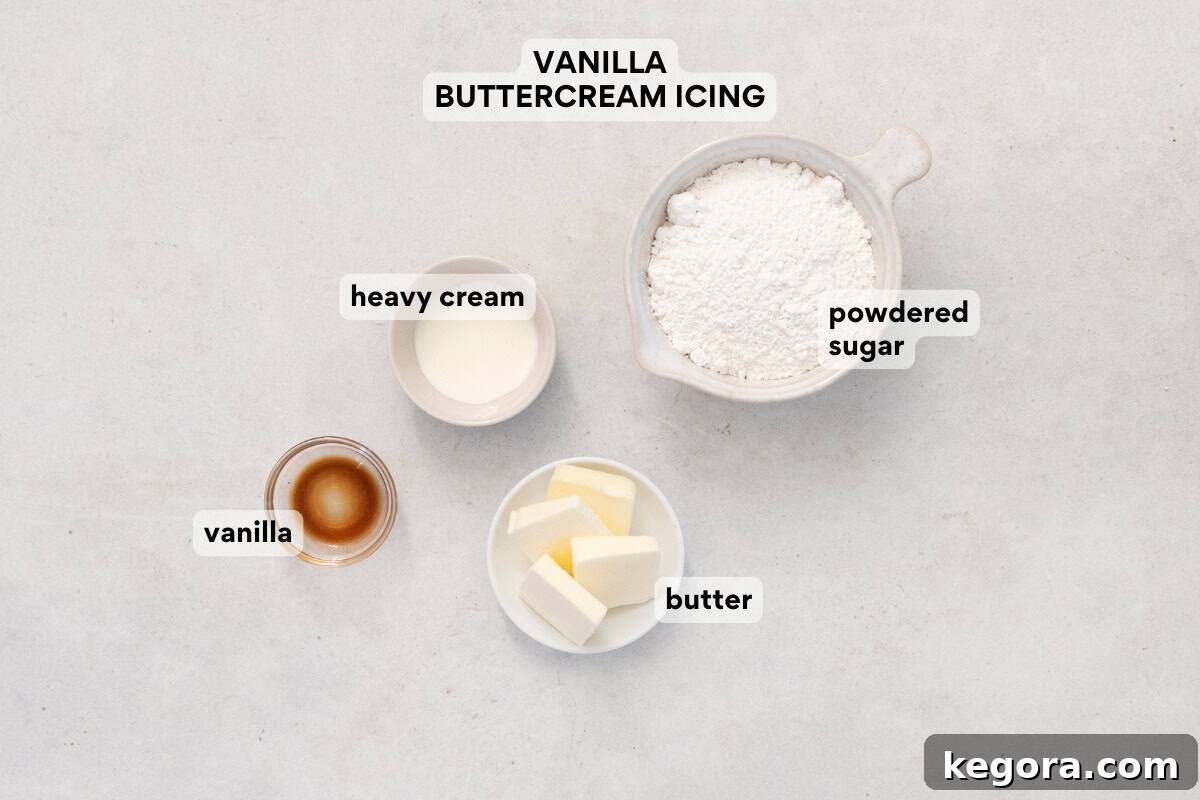
Butter (for Icing): When preparing the vanilla buttercream icing, we always recommend using salted butter. The hint of salt doesn’t make the icing salty; rather, it beautifully balances the sweetness and adds depth to the overall flavor, preventing it from tasting one-dimensional. Ensure your butter is at room temperature for easy blending and a smooth, lump-free consistency.
Heavy Cream (for Icing): Just a tablespoon of heavy cream in the vanilla buttercream is enough to achieve a wonderfully smooth, pipeable consistency. This is crucial for creating those neat, clean, and classic Hostess swirls on top of your glazed cupcakes. While whole milk can be used as a substitute, heavy cream provides a richer texture and helps the icing hold its shape better, making your swirls picture-perfect.
How to Master Homemade Gluten-Free Hostess Cupcakes
Creating these iconic gluten-free Hostess cupcakes is a rewarding baking project. Follow these step-by-step guidelines to achieve perfect results. For the complete, detailed instructions with measurements, jump to the recipe card at the end of this post!
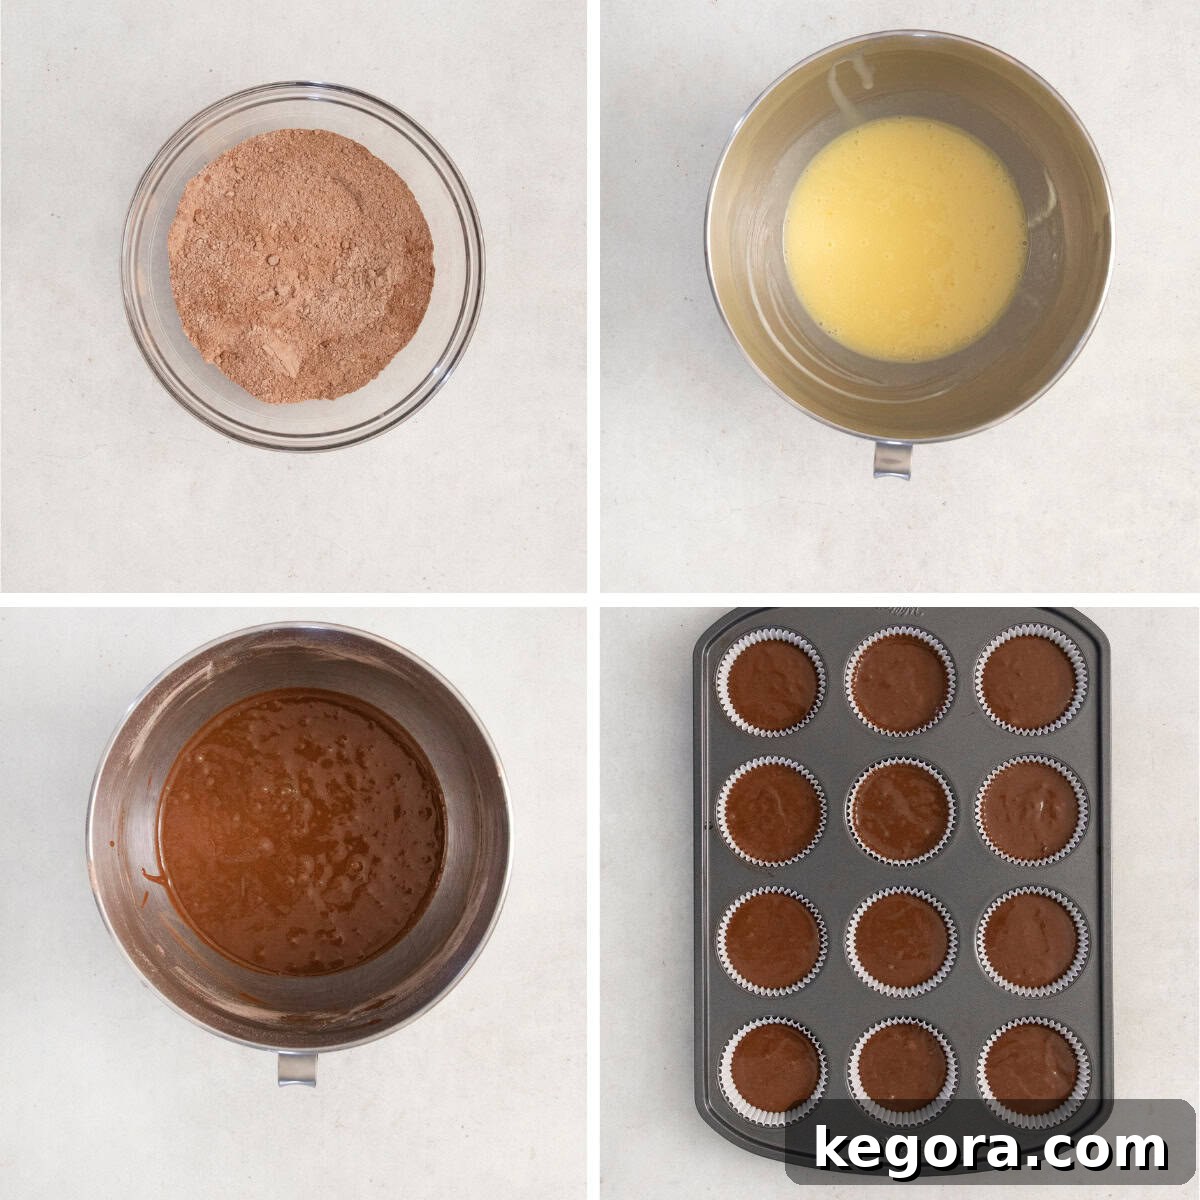
1. Prepare the Dry Ingredients: Begin by thoroughly whisking together your gluten-free flour blend, cocoa powder, baking soda, baking powder, optional espresso powder, and salt in a medium bowl. This step ensures all leavening agents and flavorings are evenly distributed, preventing pockets of unmixed ingredients and guaranteeing a consistent rise and flavor in every cupcake. Make sure there are no lumps left in the mixture.
2. Combine the Wet Ingredients: In a separate, larger bowl (ideally a stand mixer bowl), combine the granulated sugar, neutral oil, room-temperature eggs, sour cream, and vanilla extract. Beat these ingredients together on medium-high speed until the mixture is smooth, well-blended, and slightly lighter in color. This aeration is important for a fluffy cupcake texture.
3. Gradually Incorporate Wet and Dry: With your mixer set to low speed, gradually add the dry ingredients to the wet mixture in three separate additions. Mix just until each addition is incorporated before adding the next. Overmixing at this stage can lead to tough cupcakes, so stop as soon as the flour streaks disappear. The batter will appear quite thick at this point.
4. Add Hot Water for Bloom and Smoothness: Gently pour the hot water into the thick batter while the mixer is still on low speed. Continue to beat for a few minutes. You’ll notice a beautiful transformation as the hot water blooms the cocoa, intensifying its flavor, and thins the batter into a silky-smooth consistency. This step is crucial for the deep chocolate flavor and moist crumb.
5. Bake to Perfection: Divide the silky batter evenly among your lined muffin cups, filling each approximately two-thirds full. This ensures they have enough room to rise without overflowing. Bake in your preheated oven until a toothpick inserted into the center of a cupcake comes out with a few moist crumbs attached, but not completely clean. This indicates they are perfectly baked – moist and tender, not dry.
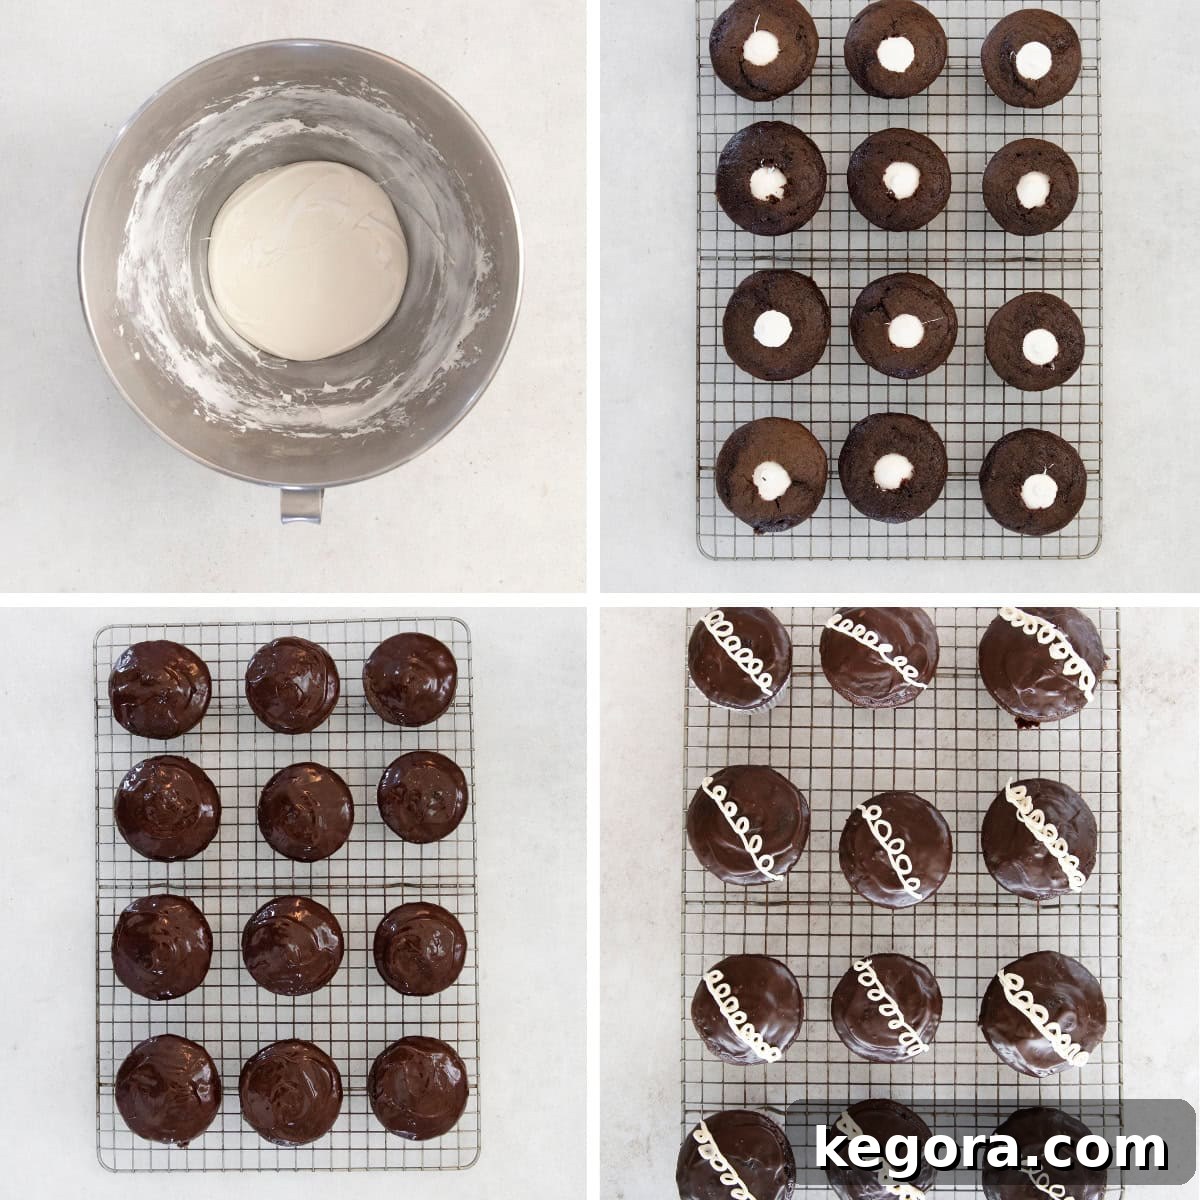
6. Prepare the Marshmallow Filling: While the cupcakes cool, prepare the marshmallow cream. In a clean bowl, beat together the room-temperature butter, powdered sugar, marshmallow creme, and vanilla extract until the mixture is light, fluffy, and smooth. Transfer this delightful filling into a piping bag, or for a convenient alternative, a sturdy zip-top bag with one corner snipped off.
7. Core and Fill the Cupcakes: Once your cupcakes have completely cooled, use a cupcake corer or a small paring knife to carefully remove the center of each cupcake, making sure to stop about half an inch from the bottom. Don’t discard these cake centers; you’ll use them! Pipe about a tablespoon of the marshmallow cream into each hollowed-out cupcake, then gently press the reserved cake center back on top to seal the filling. This creates the classic hidden surprise.
8. Craft the Silky Ganache: Place your finely chopped chocolate into a heat-proof bowl. In a separate microwave-safe bowl, heat the heavy cream until it’s barely simmering, about one minute. Pour the hot cream over the chopped chocolate and let it sit undisturbed for one minute. This allows the heat to melt the chocolate. Then, stir gently until the mixture is completely smooth and beautifully glossy. If any small chocolate chunks remain, microwave the ganache in very short bursts (5-10 seconds) at 50% power, stirring thoroughly after each interval, until perfectly melted. Be cautious not to overheat, as burned chocolate will become dull and crumbly.
9. Glaze with Perfection: Carefully spoon the warm, glossy ganache over the top of each filled cupcake. Allow the ganache to drip slightly down the sides, creating an elegant, professional look. Let the chocolate glaze set completely at room temperature or in the refrigerator until it is firm to the touch. This provides a stable surface for the final swirl.
10. Pipe the Signature Vanilla Swirl: For the iconic Hostess swirl, prepare your vanilla buttercream. In a medium bowl, beat together the room-temperature butter, powdered sugar, and a tablespoon of heavy cream until the icing is thick, smooth, and holds its shape well. Transfer the buttercream into a piping bag fitted with a small round tip (a Wilton #3 tip is ideal for this). Pipe a series of small, connected loops across the top of each glazed cupcake to create the classic, recognizable design. Now your masterpieces are ready to be enjoyed!
MORE GLUTEN-FREE CHOCOLATE DESSERTS
Easy, Gluten-Free Chocolate Cake
Gluten-Free Chocolate Mousse Cake
Gluten-Free Oreo Crumbl Cookies
Gluten-Free Chocolate Bundt Cake
Gluten-Free Hostess Cupcakes (Copycat Recipe)
Comments
Ingredients
Chocolate Cupcakes
Dry Ingredients
- 1 cup (150g) gluten-free measure-for-measure flour
- ⅓ cup (27g) unsweetened cocoa powder
- 1 teaspoon baking soda
- ½ teaspoon baking powder
- ½ teaspoon instant espresso powder optional
- ¼ teaspoon kosher salt
Other
- 1 cup (200g) granulated sugar
- ¼ cup (60ml) neutral oil
- 2 large eggs at room temperature
- ½ cup (120g) sour cream
- 1 teaspoon vanilla extract
- ½ cup (120ml) hot water
Marshmallow Cream Filling
- 4 tablespoons (56g) butter at room temperature
- ½ cup (60g) powdered sugar
- 7 oz (198g) marshmallow creme
- ½ teaspoon vanilla extract
Chocolate Ganache
- 4 ounces (113g) bittersweet or semi-sweet chocolate finely chopped
- ½ cup (120ml) heavy cream
Vanilla Buttercream Icing
- 2 tablespoons butter at room temperature
- 1 cup (120g) powdered sugar
- 1 tablespoon heavy cream
Instructions
-
Preheat your oven to 350°F (175°C). Line a standard 12-cup muffin pan with paper liners.
-
For the Cupcakes: In a medium bowl, whisk together the gluten-free flour, cocoa powder, baking soda, baking powder, optional espresso powder, and salt until uniformly combined and free of lumps.
-
In the bowl of a stand mixer fitted with a paddle attachment, or using a hand mixer, combine the granulated sugar, neutral oil, eggs, sour cream, and vanilla extract. Beat on medium-high speed until the mixture is smooth and well blended, about 1-2 minutes.
-
Reduce the mixer speed to low. Gradually add the dry ingredients to the wet ingredients in three separate additions, mixing just until incorporated after each addition. Avoid overmixing.
-
Slowly pour in the hot water while mixing on low speed. Continue to beat on medium speed for 2 to 3 minutes, scraping down the sides of the bowl halfway through, until the batter is smooth and silky.
-
Divide the batter evenly among the prepared muffin liners, filling each about two-thirds full. Bake for 18 to 20 minutes, or until a wooden toothpick inserted into the center comes out with only a few moist crumbs attached.
-
Let the cupcakes cool in the muffin pan for 5 minutes before transferring them to a wire rack to cool completely. This is crucial before proceeding to filling and glazing.
-
For the Marshmallow Cream Filling: In the bowl of a stand mixer fitted with a whisk attachment (or using a hand mixer), combine the room-temperature butter, powdered sugar, marshmallow creme, and vanilla extract. Beat on medium speed until the mixture is light and fluffy, usually about 1 minute.
-
Transfer the marshmallow cream filling to a piping bag (or a zip-top bag with a corner snipped off). For easier handling of the sticky creme, lightly butter your spatula and the opening of the piping bag.
-
Once the cupcakes are fully cooled, use a cupcake corer or a small paring knife to carefully remove the center of each cupcake, stopping about ½ inch from the bottom. Reserve these cake centers.
-
Pipe approximately 1 tablespoon of marshmallow cream into the hollowed center of each cupcake until the filling is just below the top edge.
-
Gently place the reserved cake centers back over the marshmallow filling to cover it.
-
For the Chocolate Ganache: Place the finely chopped bittersweet or semi-sweet chocolate in a small, heatproof bowl. In a separate small, microwave-safe bowl, microwave the heavy cream until it is just simmering (about 1 minute on high). Pour the hot heavy cream over the chopped chocolate and let it sit undisturbed for 1 minute. Then, stir with a whisk until the ganache is completely smooth and glossy. If any chocolate chunks remain, microwave the ganache for additional 10-second intervals at 50% power, stirring well after each, until smooth. Be careful not to overheat.
-
Spoon the warm ganache over the top of each filled cupcake, allowing it to gently drip down the sides for a classic look. Let the ganache set until firm before proceeding. This can be done at room temperature or in the refrigerator.
-
For the Vanilla Buttercream Icing: In a medium bowl, using a hand mixer, beat together the room-temperature butter, powdered sugar, and heavy cream until the icing is thick, smooth, and holds its shape well. This consistency is perfect for piping.
-
Transfer the vanilla buttercream to a piping bag fitted with a small round tip (a Wilton #3 tip is ideal for the signature Hostess swirl).
-
Pipe the classic wavy swirl design across the top of each ganache-glazed cupcake. Serve and enjoy your homemade gluten-free Hostess masterpieces!
Notes for Success
Nut-Free: This recipe is naturally nut-free, making it a safe and delicious treat for those with nut allergies. Always double-check ingredient labels to confirm.
Make Ahead Tips: You can bake the chocolate cupcakes up to 1 day in advance. Once completely cooled, store them in an airtight container at room temperature. The next day, proceed with coring, filling, glazing, and piping the vanilla swirl.
Storage Instructions: Store any leftover gluten-free Hostess cupcakes in an airtight container in the refrigerator for up to 4 days. For the best, softest texture, allow the cupcakes to sit at room temperature for 20 to 30 minutes before serving.
Freezing for Later: To enjoy these delights at a later date, freeze the baked but unfilled and uncored cupcakes in an airtight container for up to 3 months. When ready to serve, thaw them at room temperature, then proceed with the coring, filling, and glazing steps.