
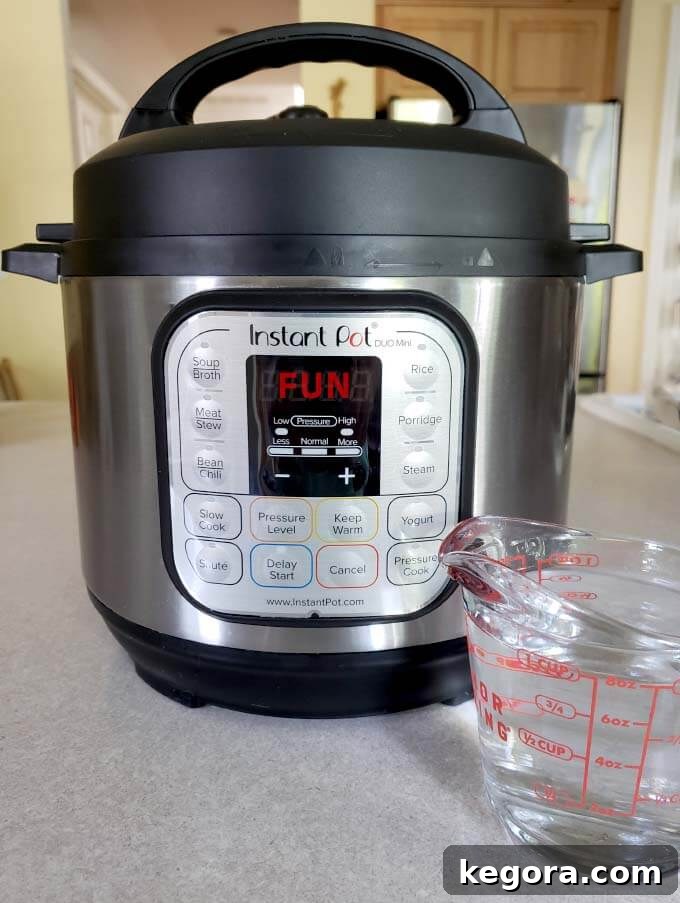
Congratulations on your new electric pressure cooker! Whether it’s an Instant Pot, Ninja Foodi, or another popular brand, you’re about to unlock a world of quick, delicious, and convenient meals. Before you dive into your first recipe, there’s a crucial initial step that every new owner should undertake: the Instant Pot Water Test (or Electric Pressure Cooker Water Test). This simple procedure isn’t just about ensuring your appliance works correctly; it’s a vital orientation that familiarizes you with its essential functions, safety mechanisms, and the exciting process of pressure cooking.
Think of the water test as your first hands-on lesson. It allows you to observe how the pot builds pressure, how it maintains it, and most importantly, how to safely release it. This foundational experience is invaluable, boosting your confidence before you entrust your dinner to its capabilities. It also helps you verify that all components are installed correctly, especially the critical sealing ring, and that there are no manufacturing defects. By completing this test, you’ll be well-prepared to embark on your pressure cooking journey with peace of mind.
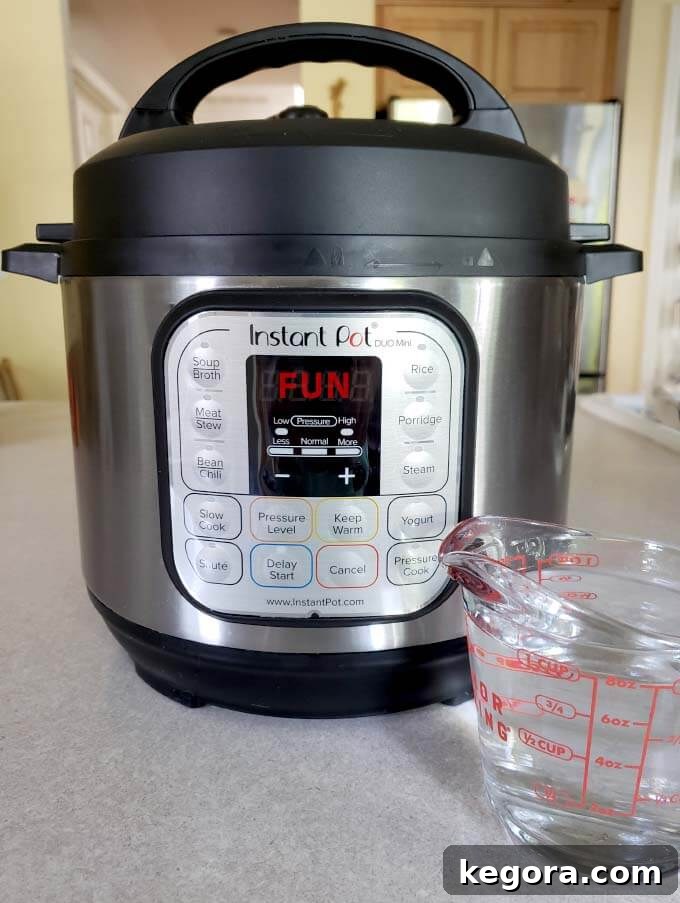
Mastering Your New Electric Pressure Cooker: The Essential Water Test
At its core, a pressure cooker, whether electric or a stovetop model, operates by heating water or a thin liquid to create steam. As this steam accumulates within the sealed pot, it builds significant pressure. This elevated pressure, combined with high temperatures, dramatically reduces cooking times and tenderizes food in a way conventional cooking methods cannot. The Electric Pressure Cooker (EPC) is a marvel of modern kitchen technology, and performing an easy water test is the best way to confirm its readiness and your understanding of its operation.
Why is the Water Test So Important for Your Instant Pot?
- Familiarization: It’s your first guided interaction with the appliance, helping you understand the buttons, display, and sounds.
- Safety Check: Ensures that the lid seals properly, the float valve engages, and steam is released safely.
- Functionality Confirmation: Verifies that the heating element works, pressure builds correctly, and the timer functions as expected.
- Problem Identification: Helps you identify potential issues or defects before you cook actual food, saving you frustration and wasted ingredients.
- Confidence Building: Successfully completing the test empowers you to confidently tackle your first recipes.
The Instant Pot water test is a quick and straightforward process that takes just a few minutes of active setup, followed by a brief period of observation. Follow these step-by-step instructions to ensure your new kitchen appliance is ready for action.
1. Prepare and Inspect Your Electric Pressure Cooker
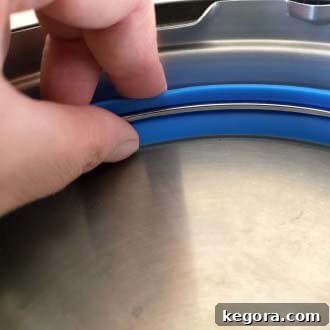
Before starting, it’s essential to properly clean and inspect your new pressure cooker. Take out the inner pot and the lid. Give them a thorough wash with warm, soapy water, then rinse and dry them completely. This step removes any manufacturing residues or dust. Next, carefully inspect the lid. The silicone sealing ring (often called a gasket) is critical for creating an airtight seal, which is necessary for pressure to build. Ensure it is securely and properly seated in the designated groove on the underside of the lid. If it’s not installed correctly, your pot will not come to pressure. Consult your EPC’s manual for specific instructions on how to install and maintain the sealing ring for your particular model, as designs can vary. Always check that the float valve and steam release valve are clear of any obstructions.
2. Connect the Power Cord Securely
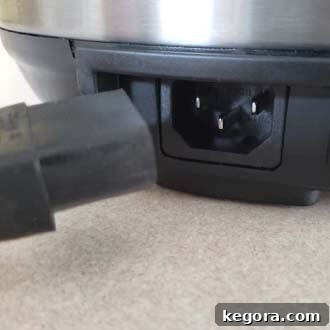
Plug your Electric Pressure Cooker into a grounded wall outlet. For models that feature a detachable power cord (often located at the back of the main housing), make sure it is firmly inserted into the pot’s receptacle as well as into the wall. A loose connection can prevent the unit from powering on or heating effectively. Ensure the cord is not pinched or obstructed, and that the unit is placed on a stable, flat surface away from the edge of the counter.
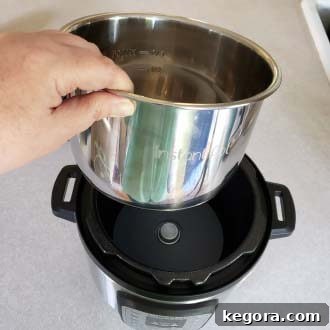
3. Insert the Inner Pot
Carefully place the stainless steel inner pot (liner) into the main Electric Pressure Cooker housing. Ensure it sits correctly and makes full contact with the heating element at the bottom. The inner pot should fit snugly and be level. Never operate your EPC without the inner pot in place, as this can damage the heating element and create a safety hazard.
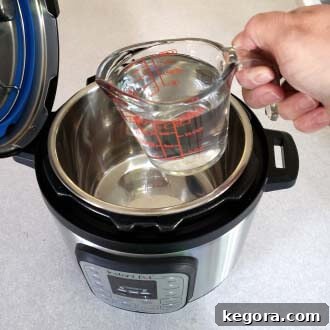
4. Add Water to the Inner Pot
Pour 1 cup of plain tap water into the inner liner. If you have a larger 8-quart or 10-quart model, it’s advisable to use 2 cups of water to ensure there’s enough liquid to generate sufficient steam. This water is solely for the purpose of creating steam to test the pressure functionality; it’s not for consumption. Avoid adding too much water, as only a small amount is needed for the test.
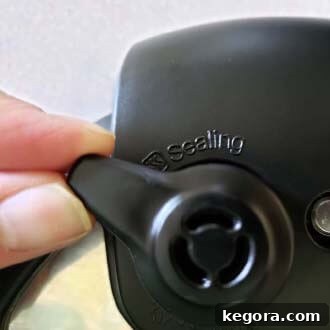
5. Secure the Lid and Set to Sealing
Carefully place the lid on the pot. Align the arrow on the lid with the arrow on the base of the cooker, then twist it clockwise until it locks into place. You should hear a chime or an audible click indicating it’s secure. Next, locate the steam release knob (often a wobbly, loose component) and turn it to the Sealing position. This closes the vent, allowing pressure to build inside the pot. Note that some advanced EPCs, such as the Instant Pot® Ultra or Duo Evo Plus, automatically seal when the lid is closed, simplifying this step. Double-check that the sealing ring is still properly seated before locking the lid.
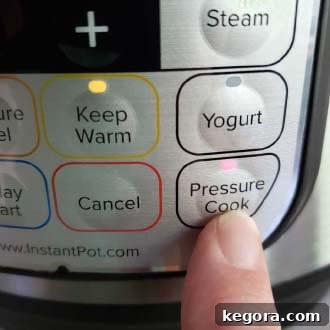
6. Select the Pressure Cook Function
On most Instant Pot models, you will press the Pressure Cook button. Some older or different brand EPCs may have a dedicated Manual button, or a rotating dial that you turn to select the Pressure Cook (or High Pressure) setting. The display will typically show a default cooking time, often 30 minutes, or “OFF.”
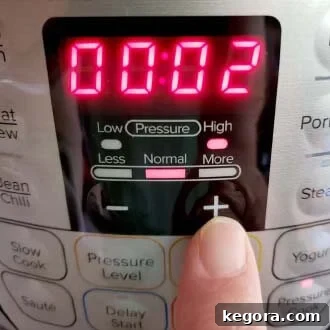
7. Set the Cook Time to 2 Minutes
Once the Pressure Cook function is selected, you’ll usually have about 10 seconds to adjust the cooking time before the pot automatically begins to preheat. Press the + or – button to decrease the time. For this water test, we will choose a short duration of 2 minutes. If your model uses a dial, rotate it to set the time. On some highly specialized models that might lack fine-grained time control, you might need to select a preset program with a very short cook time, such as “Eggs” or “Fish,” and then manually adjust it to 2 minutes if possible. The goal is simply to have the pot come to pressure and run for a brief period.
8. Observe the Pressurization Process
Now, let the pot work its magic. Initially, the display will show “On” or “Heat,” indicating that the heating element is active and warming the water inside. This pre-heating phase can take anywhere from 5 to 15 minutes, depending on the amount of water, its starting temperature, and the pot’s size. As the water heats, it will begin to produce steam. This steam will build up within the sealed inner pot, creating the necessary pressure.
During the pressurization process, it’s completely normal to hear some hissing sounds and see small wisps of steam escaping from the steam release knob or float valve. This is the pot releasing excess air and ensuring a proper seal. Do not be alarmed by this; it’s a sign that the pot is functioning as designed and working towards sealing completely.
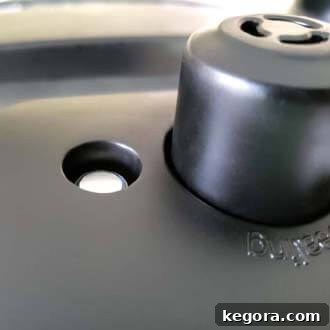
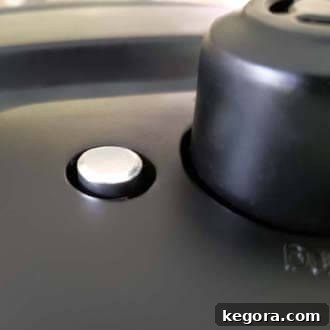
The most definitive sign that your Electric Pressure Cooker has reached full pressure is when the float valve (a small metal pin, usually silver or red) on the lid pops up. Once this pin ascends and locks into place, it signifies that the pot is fully pressurized, and the cook time will officially begin. The display will then transition from “On” or “Heat” to counting down the set time (in our case, from 2 minutes to zero). This is a critical safety feature, indicating the lid cannot be opened.
Important Safety Precaution: Never attempt to disturb, move, or open a pressure cooker that is currently pressurized or actively building pressure. Keep children and pets away from the appliance during operation to prevent accidental burns or injuries.
9. Await the Completion Beep
Once the set cook time (our 2 minutes) has elapsed, most Electric Pressure Cookers will emit several audible beeps to signal that the cooking cycle is complete. Following this, many models automatically switch to a “Keep Warm” setting, which might be indicated by an “L” followed by a number counting up (e.g., L0:01, L0:02), indicating the time since the cooking finished.
10. Safely Release the Pressure
Before you can safely open the lid, it is absolutely imperative to release all of the built-up pressure and steam from the pot. Never attempt to force open the lid before all pressure has been fully released and the float valve (pin) in the lid has dropped back down to its original, unpressurized position. This is a crucial safety measure to prevent serious injury from scalding steam or hot contents.
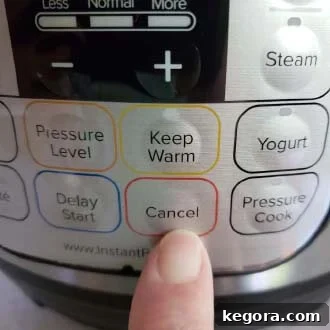
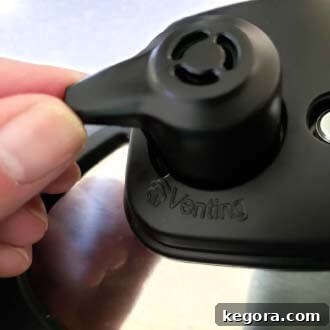
To perform a Quick Release (QR) for this test, first, turn off the machine. On most models, this is done by pressing the Cancel button. Then, carefully turn the steam release knob from the “Sealing” position to the “Venting” position. It’s highly recommended to use a long-handled wooden spoon, a kitchen towel, or another utensil to nudge the knob. This keeps your hands and face safely away from the immediate path of the hot, forceful steam that will immediately burst out of the vent.
Be prepared for a sudden, loud burst of steam when you first turn the knob to vent. This can be quite startling, especially for first-time users or nearby pets! The steam will continue to release forcefully for a minute or two until all pressure has dissipated. Do not try to open the lid until the float valve has completely dropped.
11. Carefully Open the Lid
Once the pressure has been fully released (no more steam escaping) and the float valve pin has dropped back down flush with the lid, you can safely open your Electric Pressure Cooker. Twist the lid counter-clockwise until it unlocks, and then lift it away. Always open the lid carefully, tilting it away from your face to allow any residual steam to escape safely without scalding.
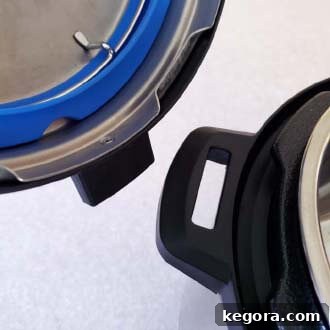
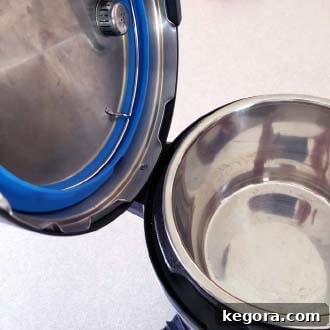
Be mindful of any hot water droplets that might condense and drip from the underside of the lid as you remove it. Many Instant Pot models, like the popular DUO series, feature a convenient lid holder built into the base handles, allowing you to rest the lid without it dripping onto your countertop. Take a moment to appreciate this feature if your model has it!
12. Congratulations! Test Complete!
You have successfully completed the Instant Pot Electric Pressure Cooker Water Test! You’ve navigated the process, understood the safety mechanisms, and confirmed that your appliance is working perfectly. You’re now ready to move on to exciting culinary adventures with confidence.
Troubleshooting: If Your Instant Pot Doesn’t Come to Pressure
Occasionally, a new Electric Pressure Cooker might not build pressure as expected during the water test. Don’t panic! Most issues are minor and easily resolvable. Here are common reasons and quick fixes:
- Is the EPC plugged in securely? Double-check both the wall outlet and the connection at the back of the pot (for models with a detachable cord).
- Is the silicone sealing ring properly inserted? This is the most common culprit! Ensure the ring is seated all the way around the rim of the lid’s inner groove, with no twists or gaps.
- Is the lid fully locked and the steam release valve in the “Sealing” position? The lid must be twisted until it clicks and the valve must point to “Sealing” (unless your model automatically seals).
- Did you press Start (if your model has this option)? Some older models or specific brands require a separate “Start” button press after setting the time.
- Is there enough water in the inner liner? Ensure you have at least 1 cup (or 2 cups for 8qt+ models) of water to generate sufficient steam.
- Is the float valve clean and free of debris? A sticky float valve can prevent pressure from building.
- Are you observing steam escaping continuously from somewhere other than the steam release valve during pressurization? This indicates an improper seal. Check the sealing ring again.
- Consult your User Manual: Your manual is an invaluable resource for model-specific troubleshooting tips and error codes.
Now that you have successfully completed the Electric Pressure Cooker Water Test and are confident in its operation, you’re undoubtedly eager to start cooking! We recommend beginning with simple, beginner-friendly recipes to further build your skills and confidence.
Discover our curated collection of The First 10 Recipes to Make in Your Instant Pot, perfect for new users looking for easy and delicious meals to kickstart their pressure cooking journey.
Watch the Instant Pot Water Test Video Tutorial
For a visual guide to supplement these step-by-step instructions, watch our comprehensive Instant Pot Water Test video. Seeing the process in action can clarify any doubts and provide a clearer understanding of each step, from sealing the lid to releasing the steam.
Don’t forget to connect with us for more recipes, tips, and inspiration! Follow our Simply Happy Foodie Pinterest board for a constant stream of delicious ideas.
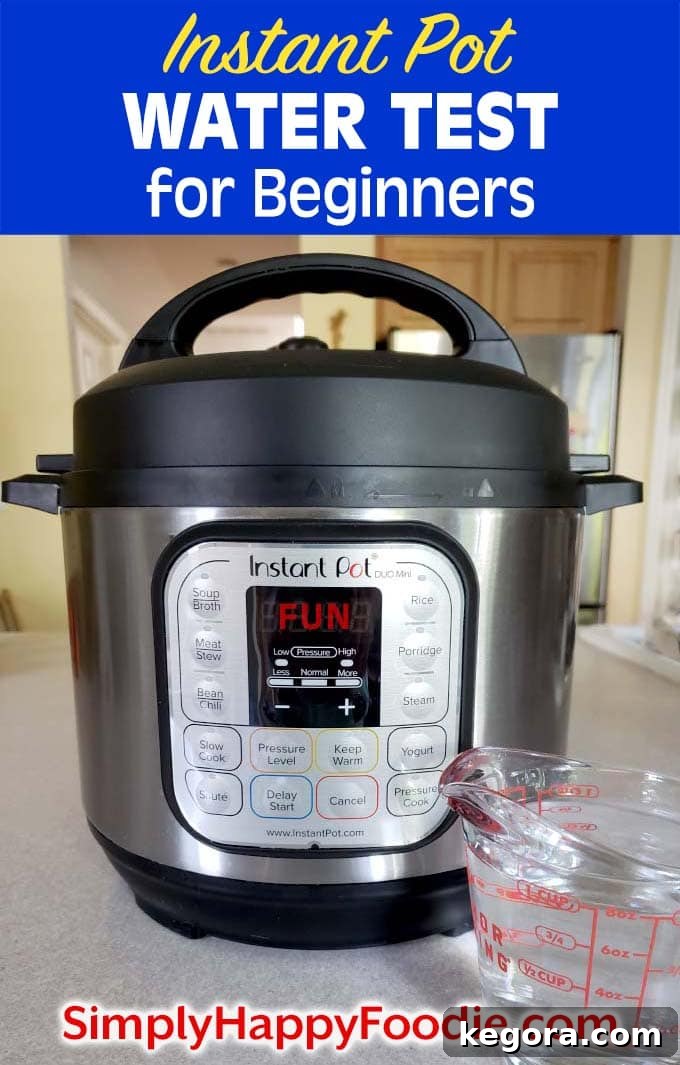
Pin This Essential Instant Pot Water Test Tutorial for Future Reference!
Help other new Instant Pot owners by sharing this valuable guide! Pin this tutorial to your favorite Pinterest board so you can easily refer back to it and others can discover these important first steps.
Helpful Resources & Affiliate Disclosure
This post contains affiliate links. As an Amazon Associate, I earn from qualifying purchases made through these links. This comes at no extra cost to you and helps support the creation of valuable content like this tutorial. Thank you for your support!