
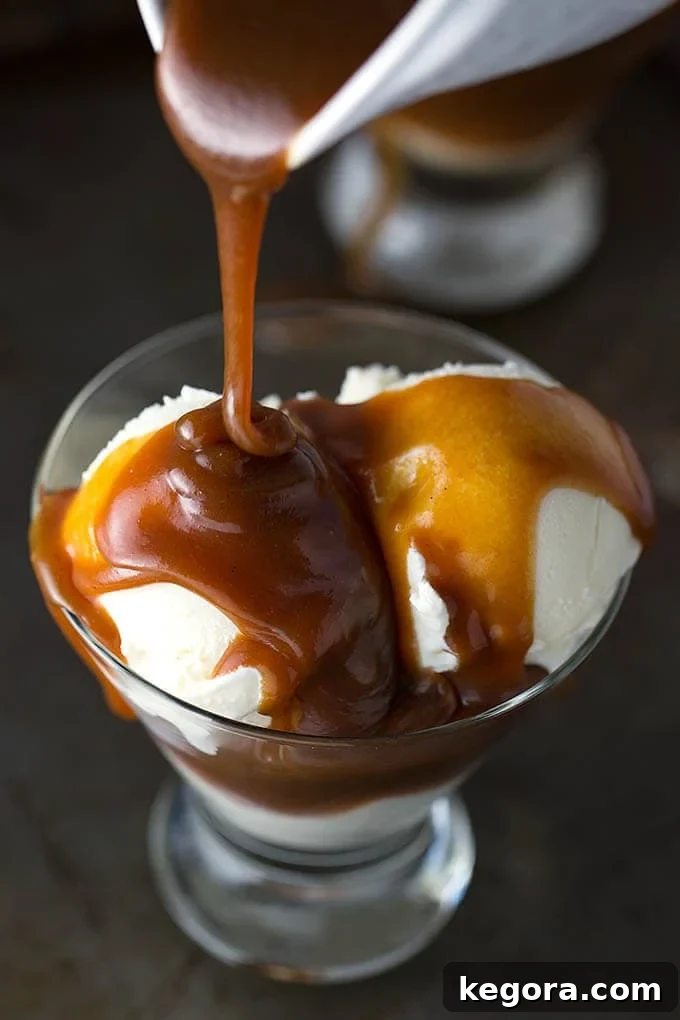
The Ultimate Homemade Caramel Sauce Recipe: Rich, Buttery, and Irresistible
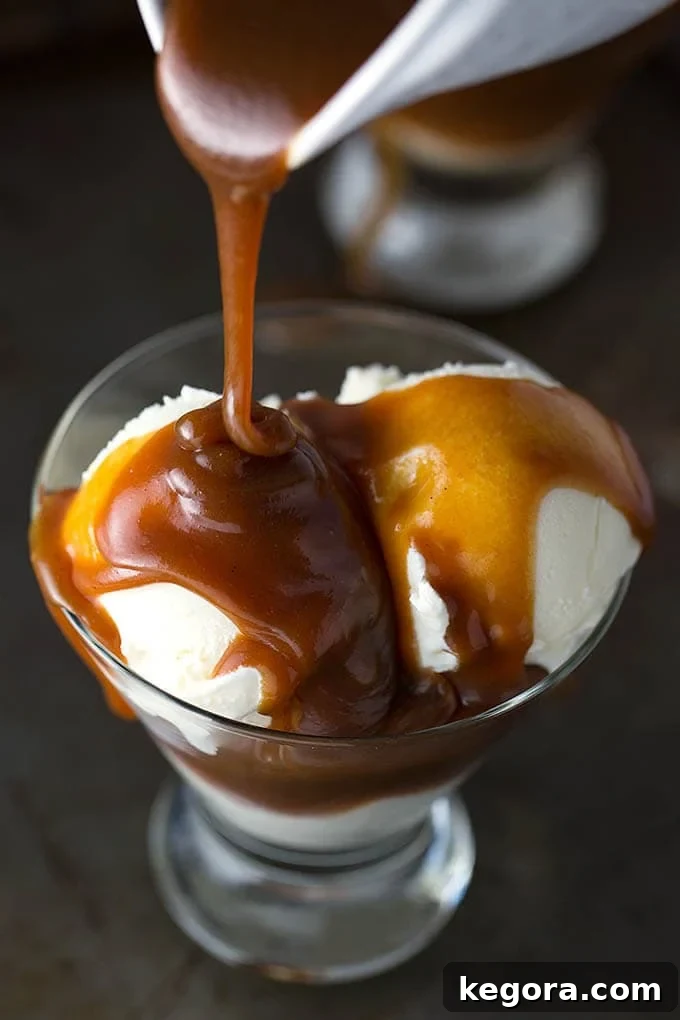
There’s nothing quite like the luscious, golden embrace of a perfectly made caramel sauce. This easy homemade caramel sauce recipe is designed to deliver a rich, buttery, and utterly decadent experience that will elevate any dessert. Forget store-bought options; in under an hour, you can create a truly marvelous confection right in your own kitchen. Whether drizzled over creamy ice cream, swirled into a rich cheesecake, or simply enjoyed as a dipping sauce for crisp apples, this recipe promises pure bliss with every spoonful. Prepare to impress your taste buds and those of your loved ones with this simple yet sophisticated treat.
Why Make Your Own Caramel Sauce?
While convenience often calls for pre-made sauces, crafting your own caramel offers numerous undeniable advantages. The most significant benefit is the unparalleled flavor profile. Homemade caramel boasts a depth of buttery richness and a nuanced sweetness that mass-produced versions simply cannot replicate. You have complete control over the quality of ingredients, ensuring no artificial flavors or preservatives sneak into your delicious creation. This allows for a fresher, purer taste that shines through in every application. Furthermore, the process itself, though requiring a touch of patience, is incredibly rewarding. Watching simple sugar transform into a glistening, amber liquid is a culinary alchemy that’s both fascinating and satisfying. Plus, a batch of homemade caramel makes for a thoughtful and impressive gift!
Essential Ingredients for Perfect Caramel Sauce
The beauty of caramel sauce lies in its simplicity, requiring just a few common pantry staples. Each ingredient plays a crucial role in achieving that perfect balance of flavor and texture:
- Water: Primarily used to dissolve the sugar, helping to prevent crystallization and ensuring even cooking. It evaporates as the sugar cooks, leaving behind pure caramel.
- Granulated Sugar: The star of the show. White granulated sugar is ideal as it provides a clean, neutral sweetness, allowing the pure caramel flavor to develop. The amount of sugar directly influences the final yield and sweetness.
- Kosher Salt (or other coarse salt): A vital flavor enhancer. Salt balances the intense sweetness of the sugar, adding complexity and depth. Kosher salt is preferred for its pure flavor and larger crystals, but a good quality sea salt can also be used. Adjust to taste for a more pronounced “salted caramel” effect.
- Vanilla Bean (optional): For an extra layer of gourmet flavor. A vanilla bean, split and scraped, infuses the caramel with aromatic, warm notes. If using, it’s typically added at the initial cooking stage with the sugar and water.
- Heavy Cream: This is what transforms the cooked sugar into a smooth, luscious sauce. The high-fat content of heavy cream provides richness and helps to stop the caramelization process, preventing it from hardening. Ensure it’s at room temperature or slightly warmed to prevent the caramel from seizing.
- Vanilla Extract: A final flourish of flavor. Added at the very end, vanilla extract brightens and complements the deep caramel notes. Use a good quality pure vanilla extract for the best results.
Step-by-Step Guide: Crafting Your Decadent Caramel Sauce
Making homemade caramel sauce might seem intimidating, but by following these detailed steps, you’ll achieve a perfect, buttery sauce every time. Patience and a watchful eye are your best tools!
- Prepare the Initial Mixture: To a medium-sized, heavy-bottomed saucepan, add the water, granulated sugar, and kosher salt. If you’re opting for the exquisite flavor of a vanilla bean, scrape the seeds from half a bean and add both the seeds and the pod to the saucepan. Stir these ingredients thoroughly over medium to medium-high heat until the sugar completely dissolves. This initial stirring is crucial for preventing crystallization.
- Begin the Caramelization Process: Once the sugar is dissolved, stop stirring. Allow the mixture to come to a gentle simmer. Continue to cook for approximately 10-15 minutes, or until the mixture begins to transform. You are looking for a beautiful golden-brown color to develop. Keep a close watch to ensure it doesn’t boil too vigorously or, worse, burn. A darker brown will yield a more robust, almost smoky flavor, while a lighter golden hue will result in a milder, sweeter caramel. This stage requires patience; resist the urge to stir! Swirling the pan gently can help distribute the heat if needed.
- Incorporate Cream and Vanilla: As soon as your sugar mixture reaches your desired golden-brown shade, immediately remove it from the heat. Carefully, but quickly, stir in the heavy cream and vanilla extract. Use a long-handled wooden spoon or a heat-resistant silicone spatula. Be extremely cautious during this step, as the hot sugar mixture will bubble and foam up rapidly when the cooler cream is added. Continue to stir vigorously until the mixture calms down and is well combined, becoming smooth and homogenous.
- Cook to Perfection: Return the saucepan to low heat. Attach a candy thermometer to the side of the pan, making sure the tip doesn’t touch the bottom. Continue to cook the caramel, stirring occasionally, until the candy thermometer registers 225°F (107°C). This temperature is ideal for a pourable sauce consistency. Cooking it to a higher temperature will result in a firmer, thicker caramel.
- Quick Cool for Optimal Texture (Optional): For a quicker cooling process and to ensure optimal texture, you can carefully pour the hot caramel into a heat-proof bowl. Place this bowl into a larger bowl filled with ice water, ensuring the water level isn’t so high that it can splash into your caramel. Stir the caramel gently as it cools. This rapid cooling helps to stop the cooking process and prevent over-thickening.
- Store and Serve: Once the caramel has cooled to room temperature, it will thicken to a perfect sauce consistency. Pour your luxurious homemade caramel sauce into an airtight glass jar or container. It’s now ready to be enjoyed over your favorite treats!
Pro Tips for Homemade Caramel Success
Achieving perfect caramel is a rewarding culinary skill. Here are some expert tips to ensure your success:
- Clean Pan is Key: Start with a sparkling clean saucepan. Even tiny sugar crystals on the side of the pan can cause the entire batch to crystallize, turning your smooth caramel gritty.
- Don’t Stir While Boiling: Once the sugar solution comes to a boil, resist the urge to stir. Stirring can introduce sugar crystals back into the solution, leading to crystallization. If you see crystals forming on the sides of the pan, you can gently brush them down with a wet pastry brush dipped in water.
- Use a Heavy-Bottomed Pan: A heavy-bottomed saucepan distributes heat more evenly, preventing hot spots that can burn the sugar in certain areas while others are still cooking.
- Watch the Color, Not the Clock: While a time range is provided, the exact timing can vary. Rely on the visual cue of the color – a beautiful amber or golden brown – rather than strictly adhering to the clock.
- Safety First: Hot sugar is extremely hot and can cause severe burns. Always exercise extreme caution. When adding the cream, stand back as it will bubble up vigorously. Never taste the caramel while it’s hot.
- Have Ingredients Ready: Measure out and have your heavy cream and vanilla extract ready to go before you start cooking the sugar. The caramelization process happens quickly, and you’ll need to add the cream immediately once the desired color is reached.
- Room Temperature Cream: Using slightly warmed or room temperature heavy cream minimizes the temperature shock when it’s added to the hot sugar, reducing the intensity of the bubbling and helping to prevent seizing.
Troubleshooting Common Caramel Sauce Issues
Even experienced cooks can encounter challenges with caramel. Here’s how to address common problems:
- Crystallization: This is when your caramel turns gritty or solidifies into sugar crystals instead of remaining smooth.
- Cause: Stirring the sugar syrup once it starts boiling, or stray sugar crystals on the side of the pan.
- Fix: Unfortunately, once significant crystallization occurs, it’s often best to start over. To prevent it, ensure your pan is clean, don’t stir after the boil, and if crystals appear, brush them down with a wet pastry brush. Using a little more water at the start can also help prevent this.
- Burnt Taste:
- Cause: Cooking the sugar for too long or at too high a heat. Caramel can go from perfectly golden to burnt in a matter of seconds.
- Fix: There’s no salvaging burnt caramel; it will always have a bitter taste. Discard and start fresh, being more vigilant about the color and heat. Remove it from the heat *immediately* when it reaches the desired color.
- Caramel Too Thin:
- Cause: Not cooking the mixture to a high enough temperature (below 225°F/107°C) after adding the cream, or adding too much cream.
- Fix: Gently reheat the sauce on low heat, continuing to cook and stir until it reaches 225°F (107°C) on a candy thermometer. Be careful not to go too far beyond this, or it will become too thick.
- Caramel Too Thick:
- Cause: Overcooking the mixture (above 225°F/107°C) or chilling it too much.
- Fix: When cold, caramel naturally thickens. To thin it, gently reheat it in the microwave (15-30 seconds at a time, stirring between) or on the stovetop over very low heat. If it’s still too thick, stir in a splash of warm heavy cream or milk, one teaspoon at a time, until you reach your desired consistency.
- Caramel Seizes/Hardens When Cream is Added:
- Cause: Adding cold cream to very hot caramel causes a drastic temperature drop, shocking the sugar and making it seize.
- Fix: Don’t panic! Return the mixture to very low heat and continue to stir gently. The hardened sugar will gradually dissolve back into the cream, and the mixture will smooth out again. Ensure your cream is at room temperature or slightly warmed next time.
Delicious Ways to Enjoy Your Homemade Caramel Sauce
The versatility of homemade caramel sauce is truly incredible. Here are even more delightful ways to savor your decadent creation:
- Drizzle over Ice Cream: The quintessential pairing! Warm caramel sauce cascades beautifully over a scoop of vanilla, chocolate, coffee, or butter pecan ice cream, creating a classic and heavenly dessert.
- Top Brownies or Blondies: Transform warm, gooey brownies or chewy blondies into an irresistible treat by generously drizzling them with this rich sauce. Add a sprinkle of sea salt for a perfect sweet-and-salty contrast.
- Dip for Apples or Bananas: A healthy-ish indulgence! Thick caramel is ideal for dipping crisp Granny Smith apples, sweet fuji apples, or even banana slices. It’s a fantastic snack or party appetizer.
- Mix into Milkshakes: Elevate your favorite milkshake by blending in a few tablespoons of caramel sauce. It adds a luxurious texture and deep caramel flavor to vanilla, chocolate, or even coffee-flavored shakes.
- Filling for Cupcakes: After baking, core the center of cupcakes and fill them with a spoonful of caramel sauce before frosting. It creates a delightful gooey surprise with every bite.
- Spread on Pancakes or Waffles: Move over, maple syrup! Warm caramel sauce makes an extraordinary topping for fluffy pancakes or crisp waffles. Pair it with toasted nuts and a sprinkle of flaky sea salt for a gourmet breakfast or brunch.
- Swirl into Cheesecake or Cheesecake Bars: Incorporate caramel into your cheesecake batter before baking or generously swirl it on top of a finished cheesecake or cheesecake bars for an elegant and rich caramel flair.
- Top Bread Pudding or Banana Bread: Just before serving, a warm drizzle of homemade caramel over bread pudding, banana bread, or even pound cake adds an extra layer of indulgence and moisture.
- Stir into Coffee or Lattes: Skip the expensive coffee shop drinks! Stir a spoonful of your homemade caramel into your morning coffee or use it to create your very own gourmet caramel lattes at home.
- Garnish for Fruit Tarts or Pies: A artistic drizzle of caramel can enhance the presentation and flavor of fruit tarts, apple pies, or other baked goods.
- Layer in Parfaits: Create stunning dessert parfaits by layering caramel sauce with yogurt, granola, fruit, or whipped cream.
- Dunk Pretzels or Cookies: A quick and easy snack! Dip crunchy pretzels, shortbread cookies, or even graham crackers into the warm, luscious caramel.
Storing and Reheating Your Caramel Creation
Proper storage ensures your homemade caramel sauce stays fresh and delicious for as long as possible. It also allows you to enjoy it at a moment’s notice!
Storage Tips
- Refrigerator: Store your cooled caramel sauce in an airtight glass jar or container. It will keep beautifully in the refrigerator for up to 3 weeks.
- Thickening When Cold: It’s completely normal for the caramel to thicken significantly when refrigerated. Don’t worry; this is expected and easily remedied.
To Reheat
- Microwave: For quick reheating, spoon the desired amount of caramel into a microwave-safe bowl. Warm gently in the microwave in 15-30 second intervals, stirring well between each interval, until it reaches your preferred pourable consistency.
- Stovetop: Alternatively, you can reheat the caramel sauce on the stovetop over very low heat. Stir continuously until it loosens up and becomes smooth.
- Adjusting Consistency: If your caramel becomes too thick after reheating, or if you prefer a thinner sauce, simply stir in a splash of heavy cream or milk (start with a teaspoon and add more as needed) until the desired consistency is achieved.
To Freeze (Yes, you can freeze caramel sauce!)
Freezing homemade caramel is a fantastic way to extend its shelf life and have it on hand for future cravings.
- Container: Pour the cooled caramel sauce into a freezer-safe container. Ensure you leave a little headspace at the top, as liquids can expand slightly when frozen.
- Freezer Life: Properly stored, homemade caramel sauce can be frozen for 2-3 months without a significant loss in quality.
- To Use: When you’re ready to enjoy your frozen caramel, simply transfer it from the freezer to the refrigerator and let it thaw overnight. Once thawed, reheat gently using the microwave or stovetop methods described above, adding cream or milk if necessary to adjust the consistency.
The Recipe Card: Homemade Caramel Sauce
This comprehensive recipe card details all you need to make the perfect batch of rich, buttery homemade caramel sauce.
Caramel Sauce
By Sandy Clifton
A rich and buttery tasting Caramel Sauce recipe. This caramel sauce is delicious on ice cream, cheesecake, or for dipping apples in!
Cook: 25 mins
Total: 30 mins
Servings: 9
Equipment
- Saucepan (medium, heavy-bottomed)
- Wood Spoon or Heat-Resistant Spatula
- Candy Thermometer
Ingredients
- ½ cup Water
- 1 ½ cups Granulated Sugar
- ½ teaspoon Kosher Salt (or other coarse salt)
- ½ Vanilla Bean (optional)
- 1 ¼ cups Heavy Cream
- ½ teaspoon Vanilla Extract
Instructions
- Add water, sugar, and salt, and vanilla bean (if using), to a medium saucepan and heat over medium to medium-high heat, stirring well to dissolve the sugar.
- Let the mixture simmer for 10-15 minutes, watching it carefully to make sure it doesn’t boil too hard or burn. You are watching for the mixture to turn golden brown. Darker brown yields a more robust flavor. Be patient, it takes several minutes! Do not stir once boiling.
- As soon as the mixture turns golden brown, immediately remove from heat and carefully stir in the heavy cream and vanilla extract, using a long-handled wood spoon or heat-resistant spatula. Be careful as the mixture will bubble and foam up rapidly. You need to keep stirring until smooth!
- Return to low heat and keep cooking the mixture until the candy thermometer reads 225°F (107°C). This is the right temperature for a pourable sauce consistency.
- To cool the mixture quicker, pour into a bowl and set it in a bigger bowl filled with ice water, stirring to cool. Make sure the water isn’t too deep to avoid getting water in your lovely caramel sauce!
- When cooled to room temperature, pour into a jar and put the lid on it. Serve over your favorite treats!
Notes
Storage Tips
- Store in an airtight glass jar or container for up to 3 weeks in the refrigerator.
- It thickens when cold—totally normal.
To Reheat
- Warm gently in the microwave (15–30 seconds at a time, stirring between) or on the stovetop over low heat.
- Add a splash of cream or milk if it gets too thick.
To Freeze (Yes, you can freeze it!)
- Container: Use a freezer-safe container, leaving a little space for expansion.
- Keeps for 2–3 months.
- To use: Thaw overnight in the fridge, then reheat gently as above.
Serving size is ¼ cup.
Nutrition
Calories: 245kcal
Nutrition information is automatically calculated, so should only be used as an approximation.
Additional Info
Cuisine: American
More Sweet Indulgences
Looking for more delicious dessert ideas? Explore these other delightful recipes:
Mini Cheesecakes Recipe
S’mores Bars Recipe
Instant Pot Dulce de Leche Caramel
Instant Pot Lemon Curd
5 Ingredient Chocolate Peanut Bars