
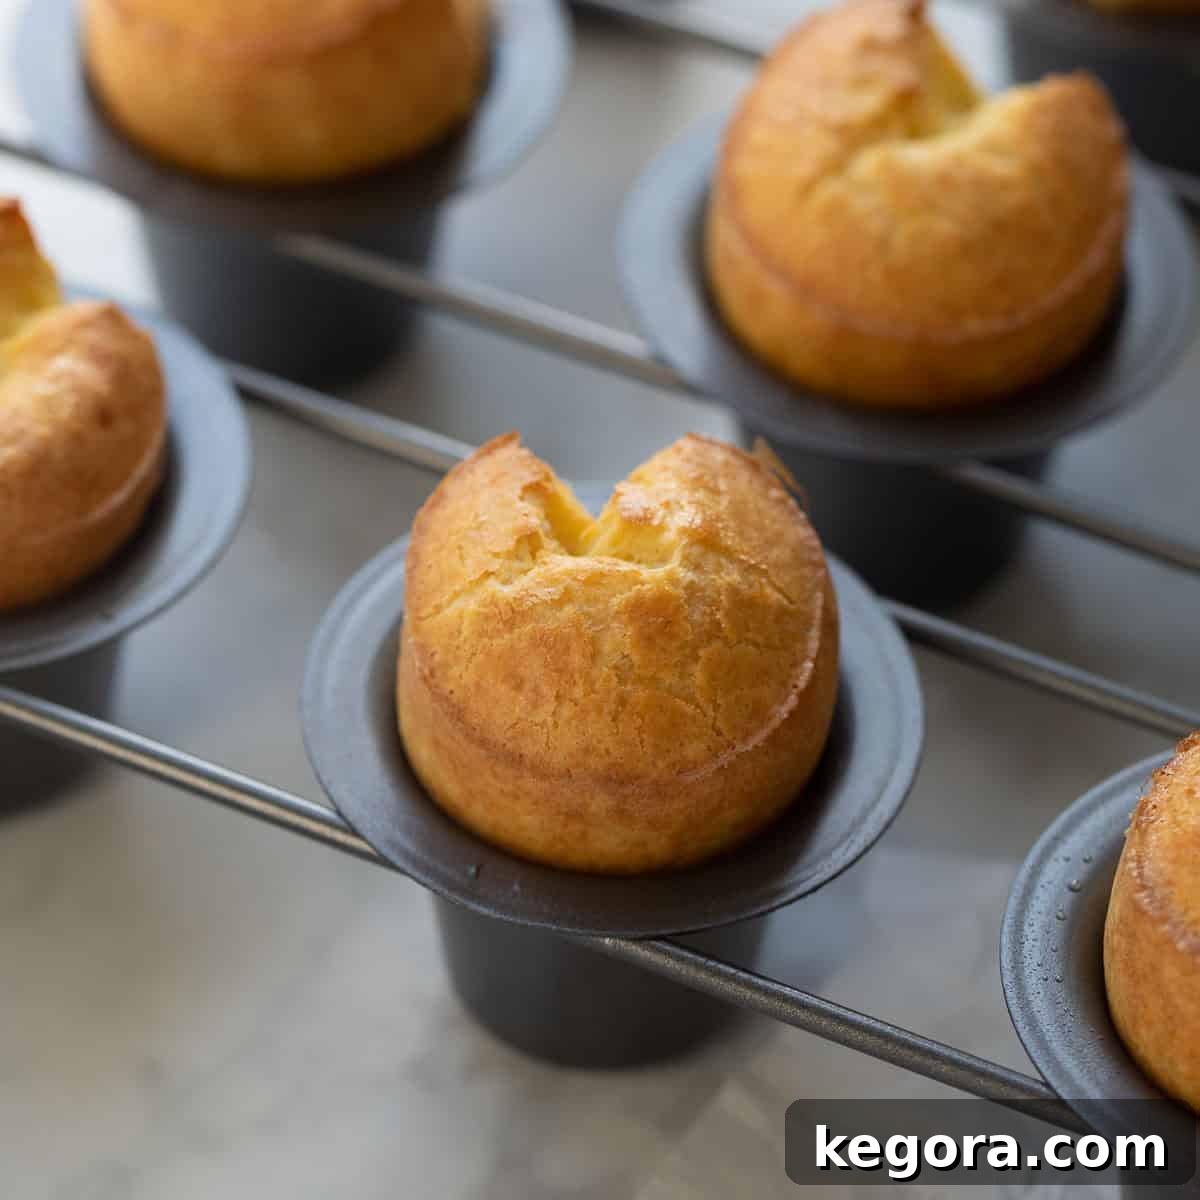
Effortlessly Delicious Gluten-Free Popovers: Your Ultimate Guide
Welcome to Erin’s kitchen, where we transform simple pantry staples into extraordinary treats! Today, we’re diving into the delightful world of Gluten-Free Popovers. These aren’t just any popovers; they’re meticulously crafted to deliver a truly authentic experience without a trace of gluten, promising a light, airy interior and a beautifully crisp exterior.
Texture: Expect a delicate, almost custardy interior that’s incredibly airy, encased in a wonderfully crisp, golden-brown crust. Each bite offers a satisfying contrast that makes these popovers utterly irresistible.
Taste: Prepare for a rich, creamy flavor profile, perfectly balanced with just the right hint of saltiness. They’re savory enough to complement any meal but also versatile for sweet toppings.
Ease: Don’t let their elegant appearance fool you—these popovers are surprisingly easy to make. Utilizing common pantry ingredients, this recipe simplifies the baking process. No specialized popover pan? No problem! A regular muffin pan works perfectly, making them accessible to every home baker.
Top Tips: The secret to popovers that rise dramatically and cook uniformly is a strategic temperature change during baking. Starting your oven at a higher temperature and then reducing it creates the ideal environment for that signature “pop” and ensures they’re cooked through without being doughy.
Recommended GF Flour: For consistently perfect results, I highly recommend King Arthur Flour Gluten-Free Measure-for-Measure Flour. To enhance the texture and moisture, I add a touch of Bob’s Red Mill Gluten-Free Oat Flour. This combination creates an ideal crumb structure that mimics traditional popovers.
Would I make these again? Absolutely, without a doubt! These gluten-free popovers exude a fancy charm while being incredibly straightforward to prepare. They are guaranteed crowd-pleasers, whether served at breakfast, alongside a holiday feast, or as a cozy snack.
xoxo erin
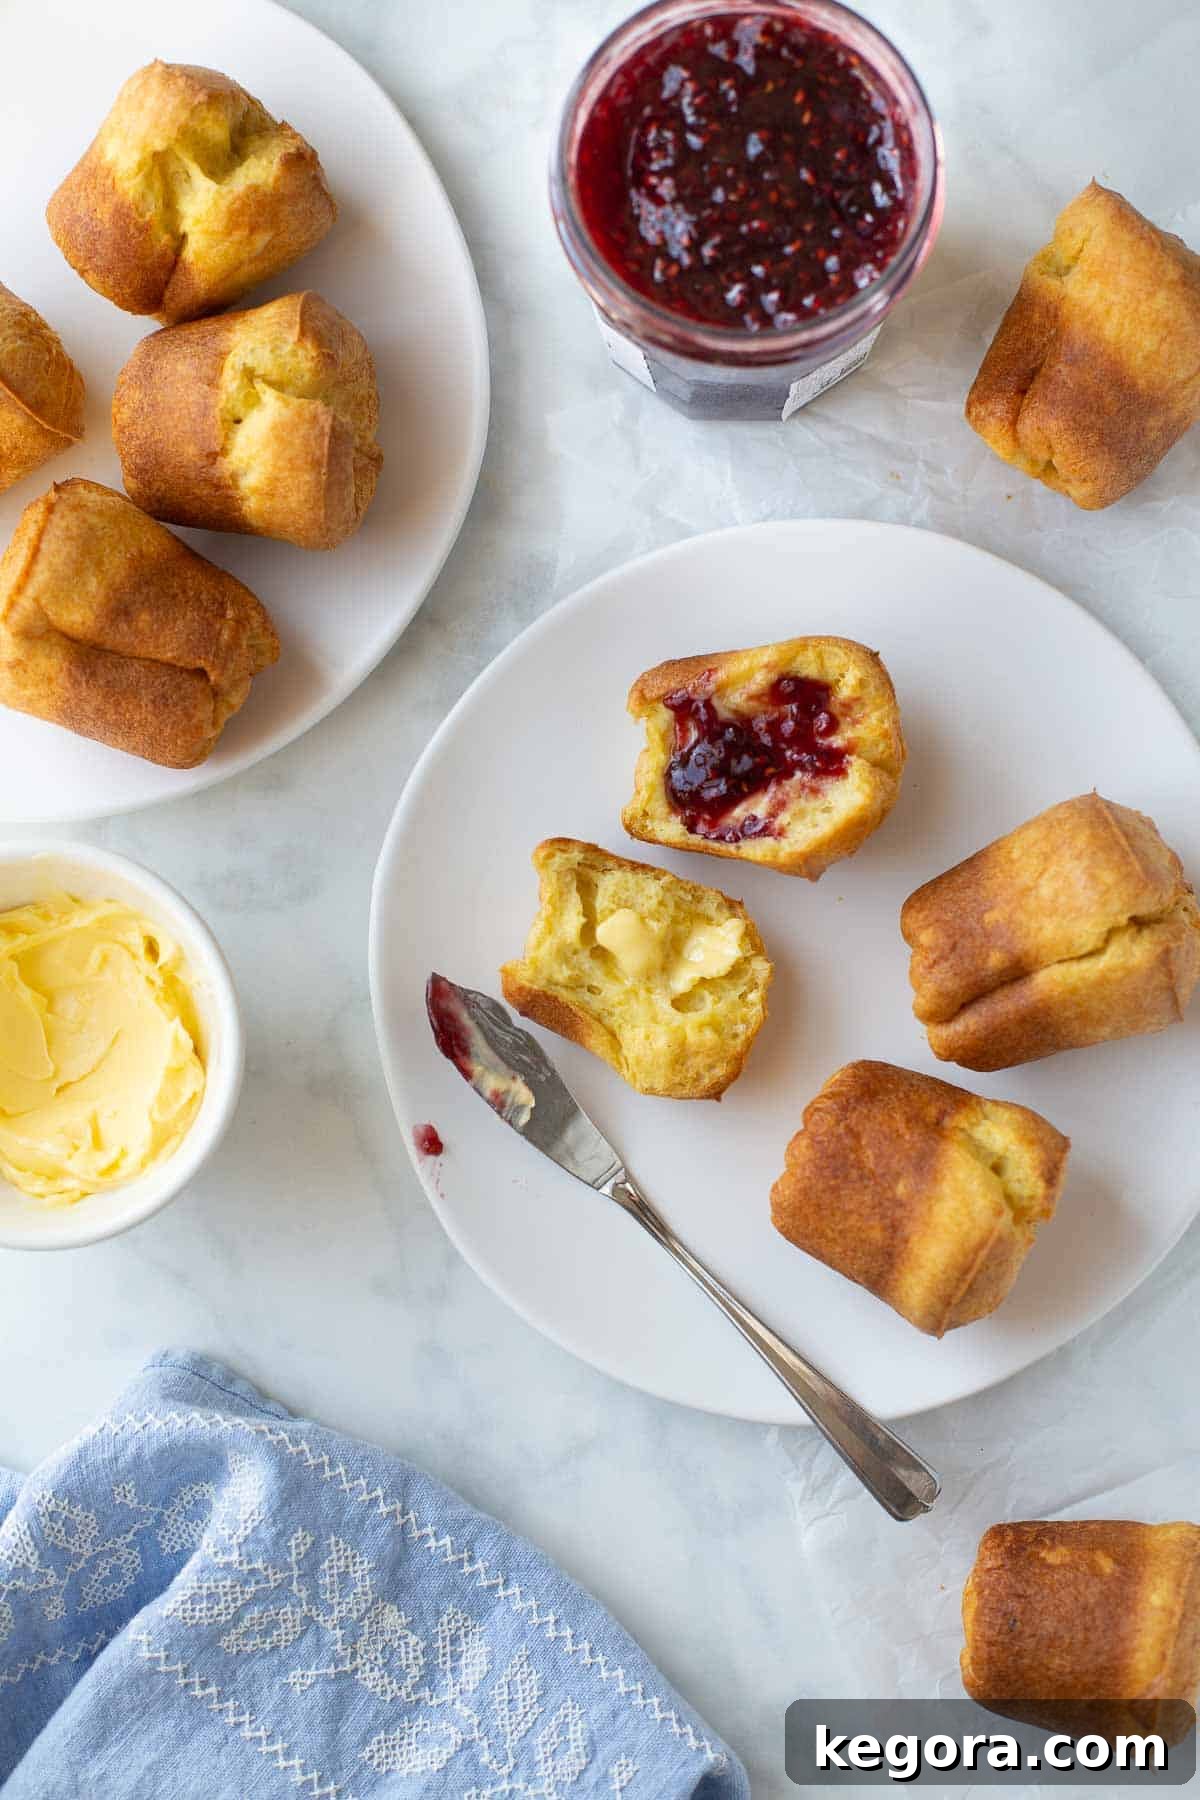
Popovers are a unique culinary delight, often likened to dinner rolls but with an exquisitely lighter, more custardy interior. This gluten-free rendition masterfully captures all the beloved flavors and distinctive textures of classic popovers. In fact, they are so good, no one will ever suspect they are entirely gluten-free!
Their incredible versatility makes them suitable for any occasion. Imagine them warm alongside a cup of coffee for a comforting breakfast, as a sophisticated accompaniment to a hearty lunch or dinner, or simply as a delightful, cozy snack. They add a touch of elegance and warmth to any meal, making them a true culinary chameleon.
Featured Comment
From Gayle: “These are absolutely delicious! Popovers are one of the things I have missed the most since going GF. I think they are just as good as a flour version. Thank you for sharing this awesome GF recipe!”
Read 28 more comments
Table of Contents
- Erin’s Popover Perfection Rundown
- The Magic Behind the Pop: What Makes Popovers So Special?
- Why Go Gluten-Free with Popovers?
- Ingredients Demystified for Gluten-Free Popovers
- How to Make Gluten-Free Popovers: A Detailed Guide
- Make-Ahead, Storage, & Freezing Instructions
- Can these Gluten-Free Popovers be Made Dairy-Free?
- Why Did My Popovers Deflate After Baking?
- What Should I Serve with Gluten-Free Popovers?
- Pro Tips for Perfect Popover Success
- More Gluten-Free Breakfast & Brunch Recipes
- Gluten-Free Popovers Recipe Card
The Magic Behind the Pop: What Makes Popovers So Special?
Popovers are truly captivating, known for their dramatic rise and hollow, airy centers. This unique structure is achieved through a simple, yet fascinating, scientific process. When the thin, egg-rich batter is rapidly heated, the water content quickly turns into steam. This steam then forces the batter upwards, creating those iconic “puffed” domes. As the exterior bakes and sets, it forms a crisp crust, while the interior retains a delicate, almost custardy texture. It’s this beautiful interplay of steam and rapid baking that gives popovers their signature light-as-air quality, making them a delightful and impressive addition to any table.
Why Go Gluten-Free with Popovers?
For those living a gluten-free lifestyle, traditional baked goods can often be off-limits or challenging to replicate. Popovers, with their reliance on gluten for structure, have historically been one of those difficult items. However, this recipe changes everything. By carefully selecting and blending gluten-free flours, we’ve managed to achieve the same incredible rise, the same delicate interior, and the same crispy crust without any gluten. This means everyone can now enjoy the comforting, savory, and undeniably impressive experience of freshly baked popovers. It’s about inclusivity in the kitchen and bringing back a beloved classic to those who thought they might have to miss out forever.
Ingredients Demystified for Gluten-Free Popovers
Crafting these perfect gluten-free popovers requires a few key ingredients, each playing a vital role in achieving that desirable texture and flavor. Here’s a closer look at what you’ll need and why it matters. For precise measurements, be sure to jump to the recipe card below.
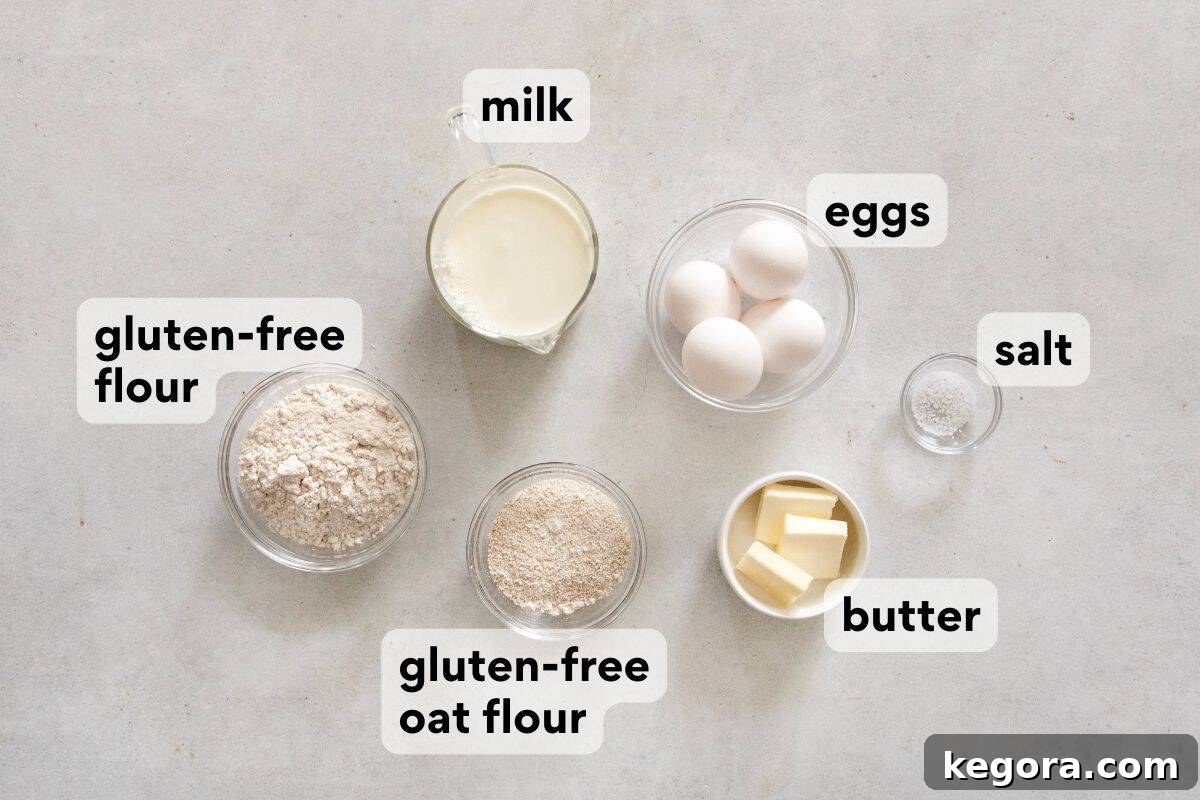
- Gluten-Free Flour Blend: This is the foundation of our gluten-free success. I primarily use King Arthur Flour Gluten-Free Measure-for-Measure Flour, which I consistently find delivers excellent results in a wide array of baked goods. It’s crucial to select a high-quality gluten-free flour blend that already contains xanthan gum. Xanthan gum is an essential binder in gluten-free baking, mimicking the elasticity and structure that gluten provides in traditional flours. Without it, your popovers might not achieve their characteristic tall rise and delicate structure.
- Gluten-Free Oat Flour: While the measure-for-measure blend forms the bulk of the recipe, incorporating a small amount of gluten-free oat flour is a game-changer. Oat flour contributes significant moisture and a subtle richness, helping to balance the texture and prevent the popovers from becoming dry. It works in harmony with the measure-for-measure flour to create a tender, soft crumb that’s truly delightful.
- Milk: For this recipe, 2% milk is my preferred choice. Beyond adding essential moisture, the fat content in the milk is key to ensuring the popovers’ insides remain decadently tender and rich. A critical tip: ensure your milk is at room temperature before you begin mixing it with the butter and eggs. This helps all the ingredients emulsify smoothly, leading to a more consistent batter. If you’re seeking a dairy-free option, simply substitute with your favorite dairy-free milk, such as almond or oat milk.
- Eggs: Eggs are indispensable for the structure and rise of popovers, contributing to their signature airy texture. Much like the milk, it is vital that your eggs are at room temperature. Cold eggs can cause the butter to seize and prevent the batter from coming together smoothly, hindering the popovers’ ability to rise. A quick trick if you forget to take them out ahead of time: place them in a bowl of hot tap water for about 10 minutes to bring them to temperature.
- Butter: Melted butter is added to the batter not only for its rich, savory flavor but also for its role in achieving a perfect texture. It helps keep the interior soft and moist while encouraging the exterior to brown beautifully and become crisp. If you need a dairy-free alternative, vegan butter works wonderfully. While vegan butter might result in slightly less browning, the popovers will still taste absolutely amazing.
- Kosher Salt: A fundamental flavor enhancer, kosher salt highlights the natural richness of the other ingredients, ensuring a well-rounded and savory taste in every bite.
How to Make Gluten-Free Popovers: A Detailed Guide
Creating these light and airy gluten-free popovers is a rewarding experience. While the full, concise instructions are in the recipe card below, here’s a more narrative overview, detailing the ‘why’ behind each step to help you achieve popover perfection.
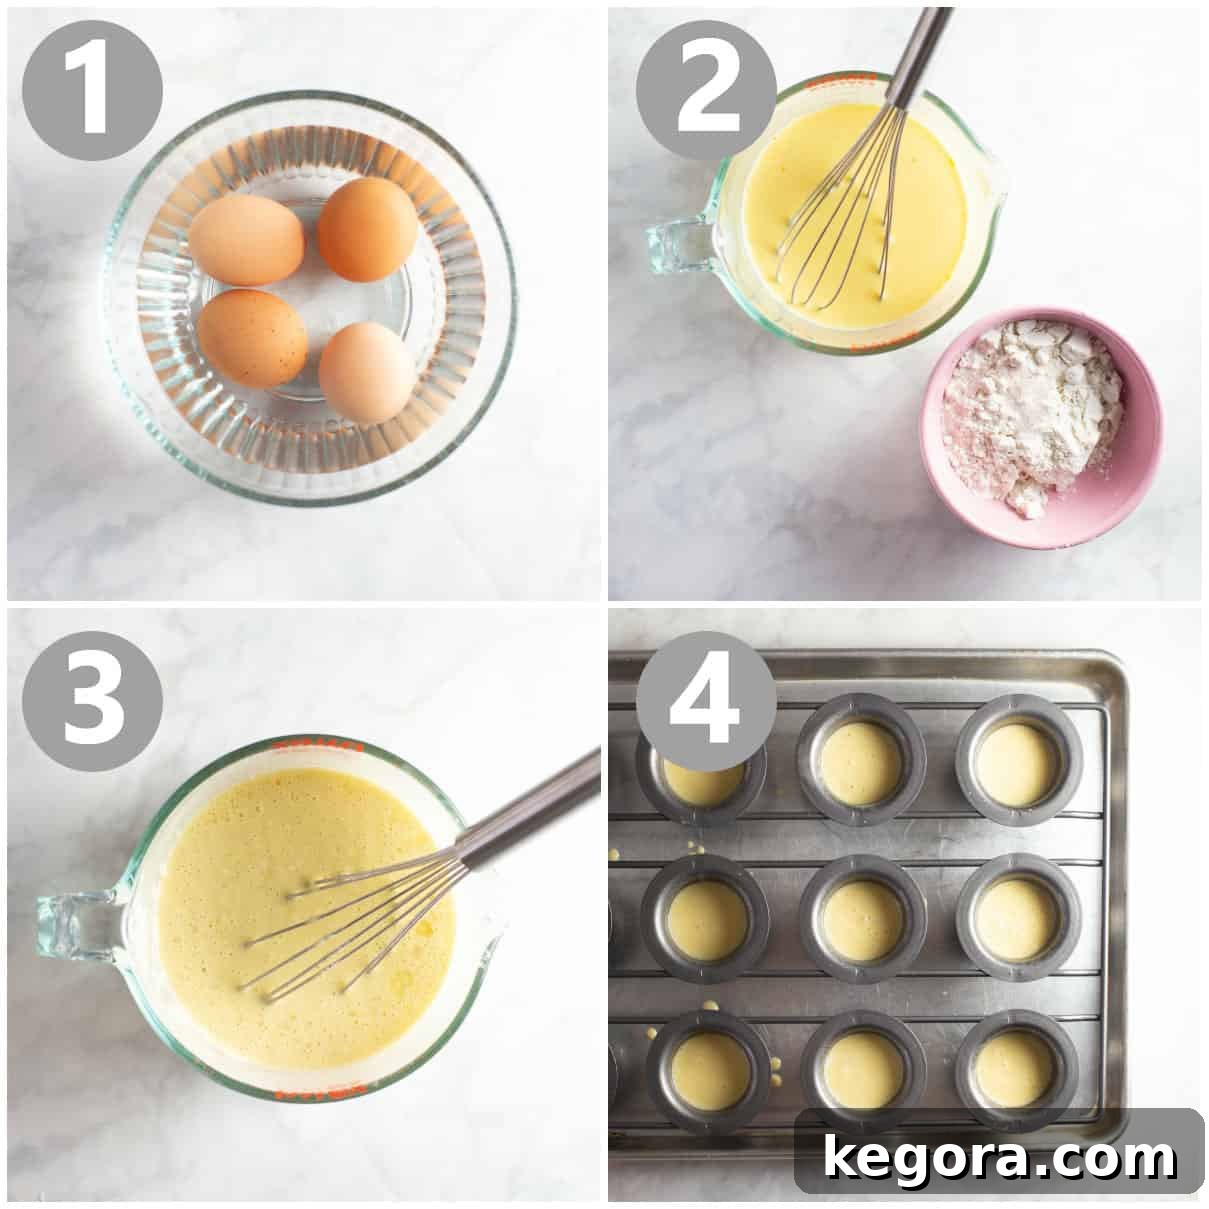
- Prepare for Success: Room Temperature is Key. The first, and arguably most important, step is ensuring your eggs and milk are at room temperature. This isn’t a mere suggestion; it’s critical for achieving a smooth, emulsified batter and optimal rise. Cold ingredients can cause melted butter to solidify, leading to a lumpy batter and inconsistent results. If you, like me, often forget to set eggs out in advance, a quick trick is to place them (still in their shells) in a bowl of hot tap water for about 10 minutes. For the milk, a brief zap in the microwave until it’s warm (but not hot!) will suffice. While the ingredients are warming, preheat your oven to 450°F (232°C) and generously spray your popover pan (or muffin pan) with cooking spray, ensuring every crevice is coated. This helps prevent sticking and aids in the popovers’ dramatic rise.
- Master the Batter: Combine Wet Ingredients Gently. Once your eggs and milk are at room temperature, combine them with the melted butter in a blender jar. Pulse briefly, just a few times, until the mixture is smooth and well combined. The key here is *not to overmix*. Overmixing can develop any inherent gumminess in gluten-free flours and lead to tough popovers. If you don’t have a blender, a measuring cup and a whisk work just as well—just be sure to whisk gently.
- Incorporate Dry Ingredients: The Art of Minimal Mixing. Now, add both your gluten-free measure-for-measure flour and gluten-free oat flour, along with the salt, to the wet ingredients. If using a blender, pulse again very briefly, just until the dry ingredients are barely incorporated. If hand-mixing, lightly fold them in. I cannot stress this enough: do not overmix the batter! A few small lumps are perfectly acceptable and even desirable. Overmixing will lead to dense, chewy popovers rather than the light, airy texture we’re aiming for. The goal is just to hydrate the flours.
- Fill and Bake: The Dramatic Rise. Carefully pour the batter into your prepared pan, filling each cup approximately two-thirds full. Place the pan in the preheated 450°F (232°C) oven. Bake for precisely 15 minutes at this high temperature. This initial blast of heat is what creates the steam necessary for the popovers to inflate rapidly. After 15 minutes, *without opening the oven door*, reduce the oven temperature to 350°F (175°C) and continue baking for another 10-15 minutes, or until the popovers are deep golden brown and firm. It’s incredibly tempting to peek, but resist the urge! Opening the oven door will cause a sudden drop in temperature, which can lead to your popovers deflating prematurely.
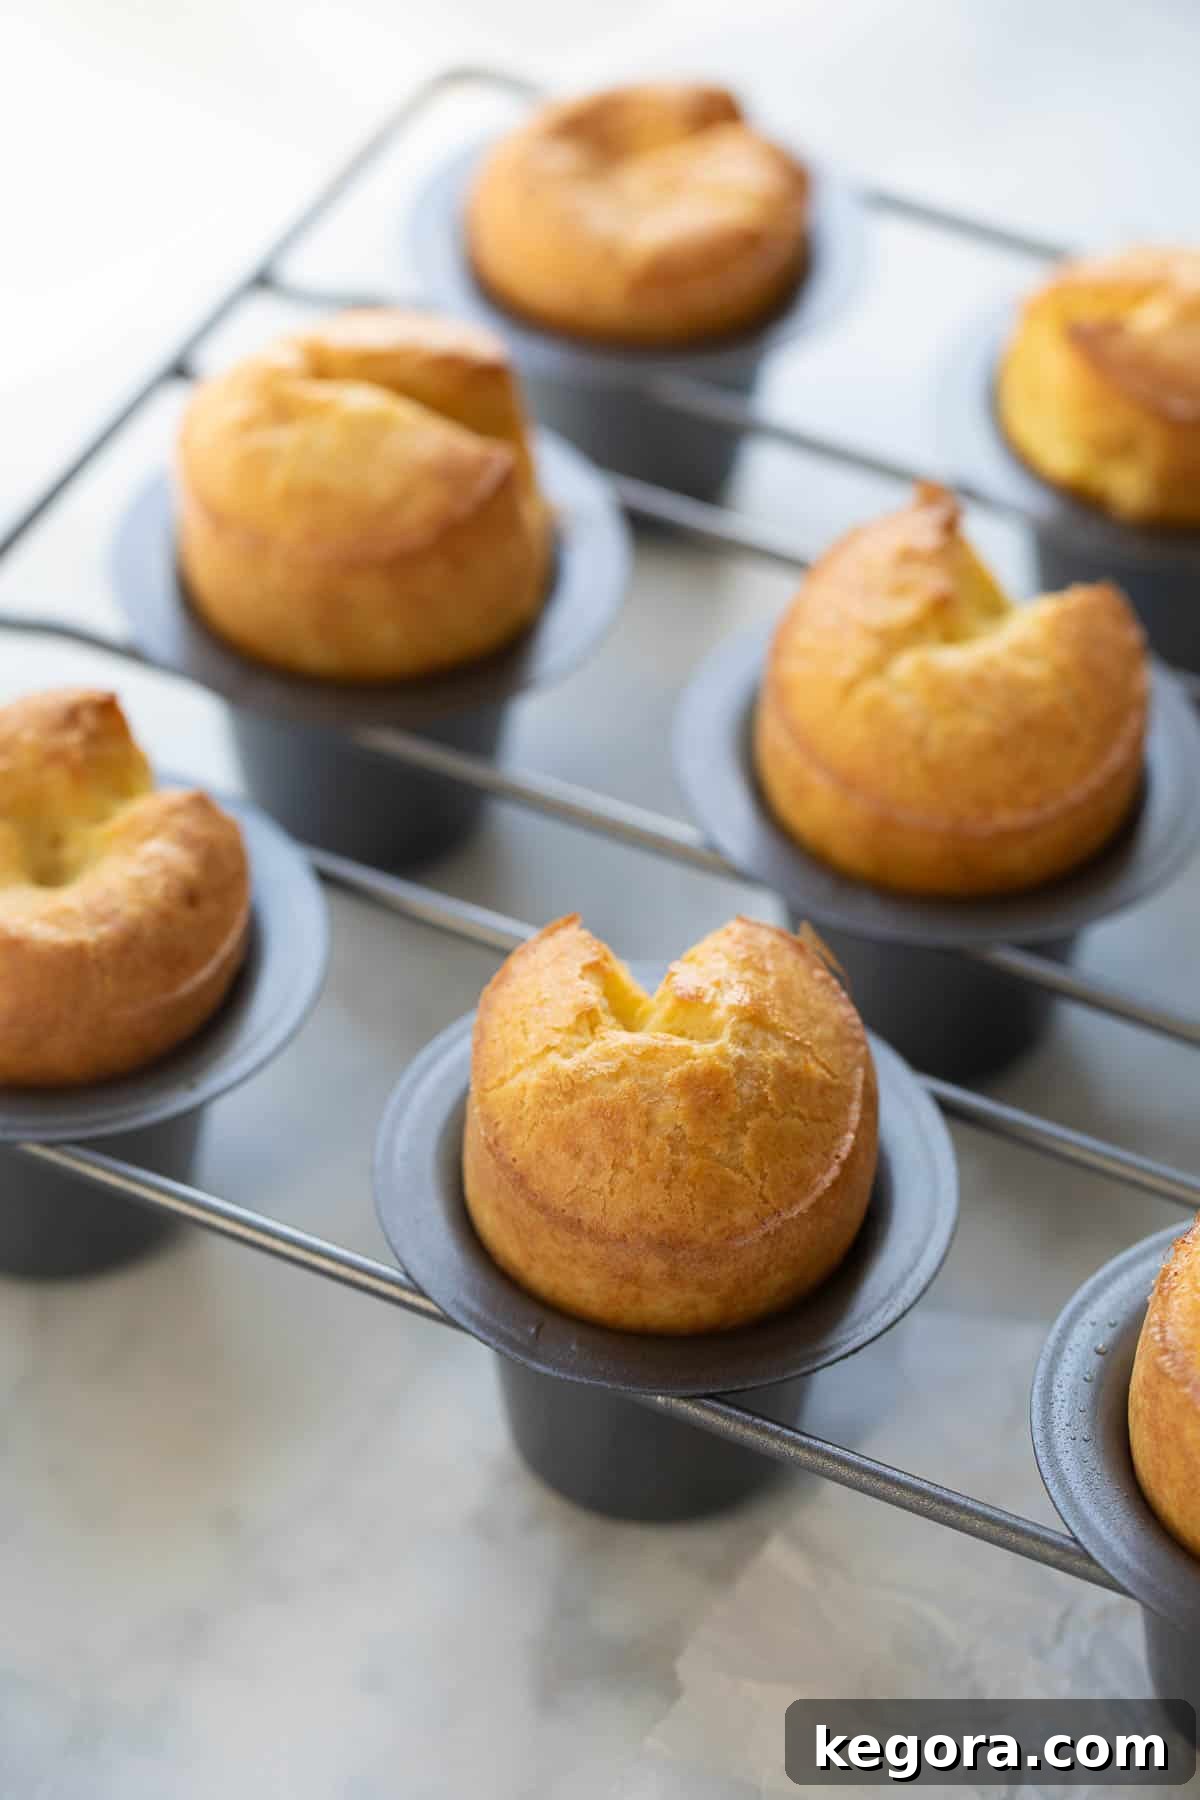
- The Crucial Finish: Steam Release and Immediate Serving. Once your popovers are beautifully browned and have risen to impressive heights, remove them immediately from the oven. To prevent them from collapsing as they cool, swiftly poke a small hole in the side of each popover using a sharp knife. This crucial step allows the trapped steam to escape, preserving their airy structure. Serve these delectable popovers immediately, while they are still piping hot. They are truly at their best straight out of the oven, perhaps with a generous dollop of butter or a smear of your favorite jam.
Make-Ahead, Storage, & Freezing Instructions
Planning ahead or dealing with leftovers? Here’s how to best manage your gluten-free popovers to maintain their quality:
To Make-Ahead: The batter for these popovers can be prepared up to 12 hours in advance. Simply mix the batter as instructed, pour it into your prepared popover or muffin pan, then cover the pan tightly with plastic wrap and refrigerate. When you’re ready to bake, remove the pan from the fridge and let it sit at room temperature for about 15-20 minutes while your oven preheats. Then, bake as usual. This makes them perfect for entertaining or a leisurely weekend breakfast without the morning rush!
To Store Leftovers: Popovers are undeniably best when enjoyed fresh, hot out of the oven. However, if you find yourself with leftovers, proper storage can extend their life. First, allow them to cool completely on a wire rack. This is crucial; placing warm popovers directly into an airtight container will trap steam and make them soggy. Once fully cooled, store them in an airtight container at room temperature. They will retain their quality for up to 2 days, though their crispness may soften slightly.
To Reheat: To revive leftover popovers, a quick reheat in a preheated oven (around 350°F or 175°C) for 5-7 minutes can restore some of their crispness and warmth.
To Freeze: I generally do not recommend baking these popovers ahead and freezing them. The delicate texture of popovers tends to change significantly upon freezing and thawing, often becoming denser and losing their characteristic airy lightness. For the best experience, always aim to bake and serve them fresh.
Can these Gluten-Free Popovers be Made Dairy-Free?
Absolutely! This recipe is wonderfully adaptable for a dairy-free diet. To make these popovers dairy-free, simply swap out the dairy milk for your preferred dairy-free alternative, such as unsweetened almond milk, oat milk, or soy milk. Similarly, replace the regular butter with a high-quality vegan butter. While dairy-free alternatives might result in slightly less intense browning on the popovers’ exterior, rest assured that they will still emerge from the oven incredibly delicious, light, and airy, offering the same satisfying experience.
Why Did My Popovers Deflate After Baking?
Deflated popovers can be a common frustration, but understanding the cause can help you prevent it. The primary reason popovers collapse is trapped steam. When popovers bake, steam builds up inside their hollow centers, creating the pressure that causes them to rise dramatically. If this steam doesn’t have an escape route immediately after baking, as the popovers cool, the steam condenses, and the vacuum created can cause the delicate structure to cave in.
Therefore, the most crucial step to prevent deflation is to immediately poke a small hole in the side of each popover with a sharp knife as soon as they come out of the oven. This allows the hot steam to escape, stabilizing the popover’s structure and helping it retain its impressive height. Other factors that can contribute to deflation include opening the oven door too early during baking, which causes a sudden temperature drop, or underbaking, where the structure isn’t fully set.
What Should I Serve with Gluten-Free Popovers?
The versatility of these gluten-free popovers is truly one of their best qualities. They are equally delightful served with sweet or savory accompaniments, making them a perfect fit for any meal of the day. Here are some serving suggestions:
- Simply Plain or with Butter: For a classic, comforting experience, enjoy them warm and unadorned, allowing their rich, creamy flavor to shine. A generous slathering of softened butter (dairy or vegan) is also a simple, heavenly pairing.
- Sweet Toppings: Elevate them into a breakfast or dessert item with:
- Your favorite fruit jams or preserves (strawberry, raspberry, apricot).
- Maple syrup or honey for a touch of sweetness.
- A dusting of powdered sugar.
- Fresh berries and a dollop of whipped cream (dairy or coconut cream).
- Savory Pairings: Popovers make an excellent side dish for a variety of savory meals:
- Alongside classic breakfast items like scrambled eggs, bacon, or sausage.
- With hearty lunch and dinner entrees such as roast chicken, beef stew, or grilled fish.
- As a comforting accompaniment to soups and salads, perfect for dipping.
- With a spread of savory herb butter or a sprinkle of grated cheese (like Parmesan) for added zest.
- A side to a delicious pot roast or any meal that needs a light, bready component.
Their neutral, rich flavor profile makes them an incredibly adaptable component, ready to enhance any dish you choose to serve them with.
Pro Tips for Perfect Popover Success
Achieving those impressively tall, airy, and golden-brown gluten-free popovers is easier than you think, especially with these insider tips:
- Embrace Gentle Mixing – Do Not Overmix! This is perhaps the most critical rule for popovers, especially gluten-free ones. Unlike traditional wheat flour batters where some gluten development can be desirable, gluten-free batters benefit from minimal handling. You want to incorporate the milk, butter, and eggs until just smooth, and then lightly mix in the flours and salt until barely combined. A few small lumps are perfectly fine. Overmixing can lead to dense, tough popovers because it over-activates the starches and binders in the gluten-free flour, resulting in a less airy texture.
- Maintain Oven Door Discipline. The dramatic “pop” of a popover relies heavily on consistent, high heat and the steam created within the batter. It’s incredibly tempting to peek at your beautiful creations as they rise, but resist the urge at all costs! Leave the oven door firmly shut throughout the entire baking process, especially during the initial high-temperature phase. Opening the door causes a sudden drop in temperature, which can prematurely collapse the delicate structure of the rising popovers, preventing them from reaching their full, fluffy potential. If you absolutely must check, use the oven light to peer through the glass.
- Serve the Popovers Right Away. For the ultimate popover experience, timing is everything. These culinary marvels are best enjoyed piping hot, straight out of the oven. Their crisp exterior and tender, airy interior are at their peak just moments after baking. As they cool, the delicate crust can soften, and the interior might become a little denser. So, have your butter, jam, or savory accompaniments ready and serve them immediately for maximum enjoyment.
- Room Temperature Ingredients are Non-Negotiable. As discussed in the ingredients section, ensuring your eggs and milk are at room temperature is fundamental. Cold ingredients can stiffen the melted butter, creating a lumpy batter that won’t rise evenly or achieve the desired smooth texture. Room temperature ingredients blend more seamlessly, resulting in a uniform batter that is essential for a consistent “pop” and a tender crumb.
- Grease Your Pan Generously. Don’t be shy with the cooking spray or butter when preparing your popover or muffin pan. A well-greased pan is vital not only to prevent sticking but also to help the popovers climb and achieve their impressive height. The slick surface allows the batter to glide upwards easily as it expands, contributing to that iconic tall rise.
More Gluten-Free Breakfast & Brunch Recipes
If you’re a fan of delightful gluten-free mornings, be sure to explore these other fantastic breakfast and brunch recipes that are sure to become family favorites:
- Fluffy Gluten-Free Pancakes
- Crispy Classic Gluten-Free Waffles
- Delicate Gluten-Free Crepes
- Tender Gluten-Free Scones
- Versatile Gluten-Free Muffins (with Endless Mix-ins!)
- Irresistible Gluten-Free French Breakfast Puffs
Gluten-Free Popovers Recipe Card
Erin Collins
15 mins
30 mins
5 mins
50 mins
12 petite popovers
Golden-brown, light, and airy gluten-free popovers — with just a few pantry staples, you won’t believe how easy they are to make!
These popovers are delicious smothered with butter right out of the oven!
Comments
Print Recipe
Ingredients
- 4 large eggs at room temperature
- 1 1/4 cups (300ml) 2% milk at room temperature
- 3 tablespoons butter melted
- 2/3 cup (100g) gluten-free measure-for-measure flour
- 1/4 cup (30g) gluten-free oat flour
- 3/4 teaspoon kosher salt
Instructions
- Before you begin: Ensure your eggs and milk are at room temperature. A quick way to warm eggs is to place them (uncracked!) in a medium bowl and cover with hot tap water for 10 minutes. You can also microwave the milk until it’s warm, but not hot.
- Preheat the oven to 450°F (232°C). Generously spray a 12-count petite popover pan (or a standard 12-count muffin pan if a popover pan isn’t available) with cooking spray. Note: This recipe yields 12 petite popovers or 6 grand popovers. Petite popovers often turn out best.
- In a blender jar, add the room temperature eggs, milk, and melted butter. Pulse briefly a few times until the mixture is smooth and well combined. Be careful not to overmix! Then, add both the gluten-free measure-for-measure flour, gluten-free oat flour, and salt. Pulse very briefly again, just until the dry ingredients are combined with the wet. Remember, do not overmix the batter!
- Carefully pour the prepared batter into each cup of the greased pan, filling each about 2/3 full.
- Bake in the preheated oven at 450°F (232°C) for 15 minutes. After 15 minutes, reduce the oven temperature to 350°F (175°C) and continue baking for an additional 10-15 minutes, or until the popovers have risen dramatically and are deep golden brown. Do not open the oven door during baking.
- Immediately remove the popovers from the oven. Using a sharp knife, swiftly poke a small hole in the side of each popover. This crucial step allows steam to escape and prevents the popovers from deflating. Serve immediately for the best results!
Notes
Don’t overmix! Ensure milk, butter, and eggs are incorporated without overworking. Lightly mix in flour and salt.
Leave the oven shut: This helps them bake up nice and fluffy. If you want to peek, use the oven light with the door closed.
Serve immediately: These are best piping hot, straight out of the oven. Delicious smothered with butter!
No popover pan? No problem! A regular 12-count muffin pan works great.
Dairy-free option: Use almond milk and vegan butter. They might not brown as much, but will still be delicious.
To Make-Ahead: Prep batter up to 12 hours before baking. Pour into the prepared pan, cover with plastic wrap, and refrigerate. Bake when ready to serve.
To Store: Best fresh. For leftovers, cool completely on a wire rack, then store in an airtight container for up to 2 days at room temperature.
To Freeze: Freezing can alter their delicate texture, so baking ahead and freezing is not recommended.
Nutrition
Carbohydrates: 8g
Protein: 4g
Fat: 5g
Saturated Fat: 3g
Polyunsaturated Fat: 1g
Monounsaturated Fat: 2g
Trans Fat: 0.1g
Cholesterol: 64mg
Sodium: 201mg
Potassium: 65mg
Fiber: 1g
Sugar: 2g
Vitamin A: 192IU
Vitamin C: 0.05mg
Calcium: 44mg
Iron: 1mg