
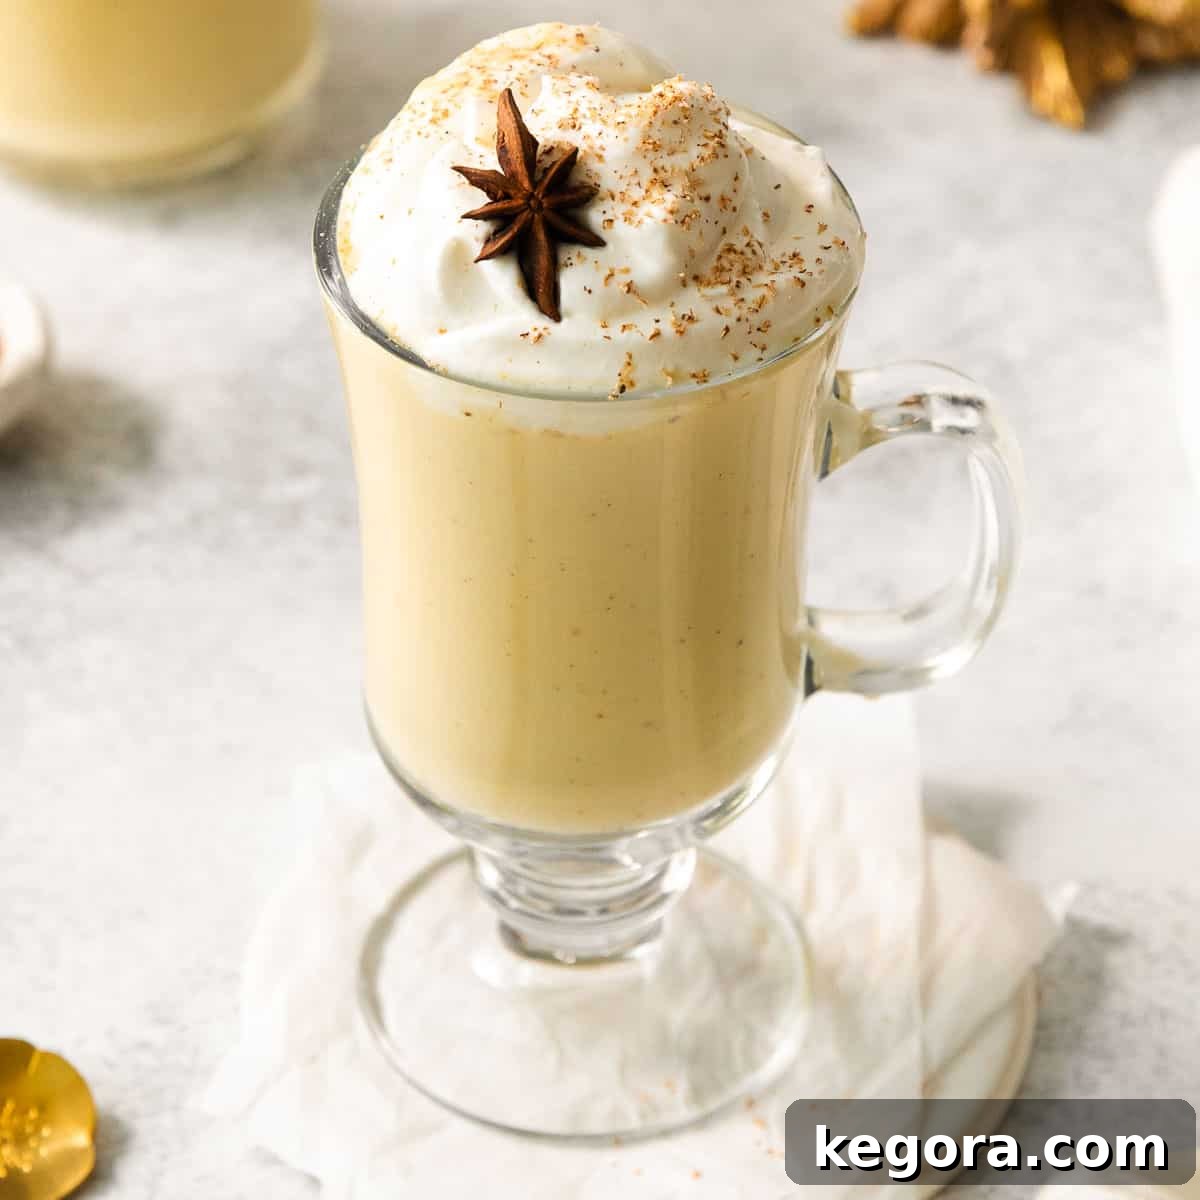
Creamy Dairy-Free Eggnog: Your Essential Holiday Recipe Guide
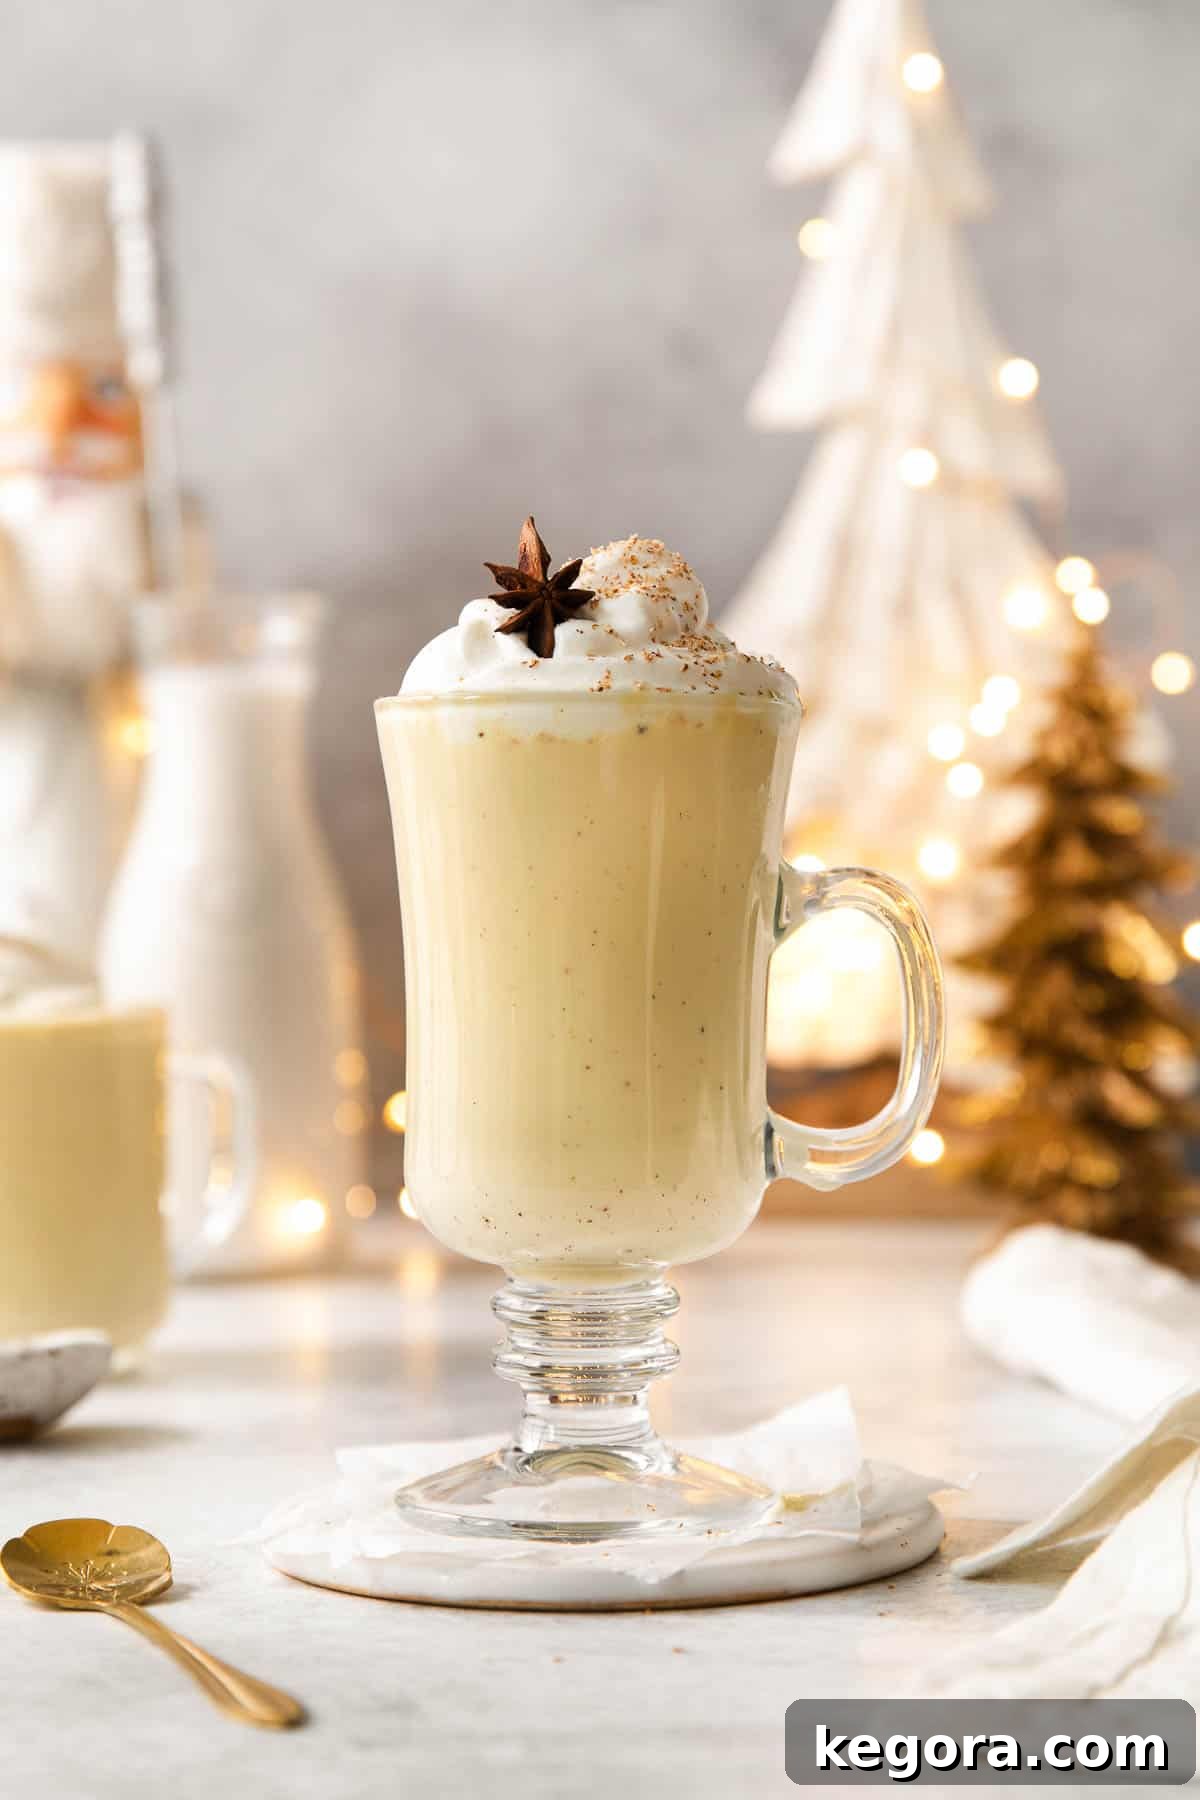
The holiday season undeniably holds a special kind of magic, often characterized by twinkling lights, cozy evenings, and, of course, delightful festive treats. For many, a glass of rich, velvety eggnog is an indispensable part of these cherished traditions, evoking warmth and nostalgia. However, traditional eggnog, with its reliance on dairy products, has long been a challenge for those with lactose intolerance, dairy allergies, or simply a preference for plant-based options. This is where our meticulously crafted dairy-free eggnog recipe comes to the rescue! We’ve managed to capture all the decadent creaminess, luscious texture, and signature warming spices of the classic holiday beverage, ensuring that absolutely everyone can partake in this beloved ritual. Prepare to be genuinely surprised – this homemade version is not just a worthy alternative; it’s truly just as good, if not superior, to the traditional dairy-laden kind.
Why This Dairy-Free Eggnog Will Become Your Holiday Staple
- Authentic Richness and Creaminess: Forget watery or thin dairy-free substitutes. Our recipe expertly combines specific dairy-free milks with real egg yolks to create an incredibly smooth, thick, and luxurious mouthfeel that perfectly mirrors traditional eggnog. The robust, spiced flavor profile remains gloriously intact, delivering that comforting holiday taste you’ve always loved.
- Crafted with Simple, Accessible Ingredients: You won’t need specialty store trips for obscure ingredients. This delightful eggnog is made with readily available unsweetened dairy-free milks and common pantry staples, making holiday indulgence effortless and enjoyable.
- Ideal for Make-Ahead Preparations: Ease your holiday stress with a recipe designed for convenience. This dairy-free eggnog can be prepared a day or even several days in advance, allowing the complex flavors to fully meld and deepen while it chills to its perfect, thick consistency in the refrigerator.
- Versatile for Any Festive Occasion: Whether you’re hosting an elaborate Christmas dinner, settling in for a quiet Christmas Eve with your nearest and dearest, or throwing a lively holiday party with friends, this dairy-free eggnog is a guaranteed showstopper and crowd-pleaser for all ages (and can easily be made adult-friendly!).
- Safe & Delicious with Real Eggs: For those who love the richness eggs bring but worry about raw consumption, rest assured! Our detailed tempering method ensures that the egg yolks are thoroughly cooked through by gently raising their temperature with the hot dairy-free milk. This process not only guarantees safety but also imparts that signature, authentic richness without any compromise.
Explore More Delightful Dairy-Free Recipes from Erin
If you’re embracing a dairy-free lifestyle or simply looking for more delectable plant-based treats that don’t compromise on flavor, you’re in the right place! Continue your culinary journey with these other fantastic recipes crafted by Erin:
- Indulgent Dairy-Free Crème Brûlée
- Tropical Dairy-Free Coconut Cream Pie
- Rich Dairy-Free Chocolate Fondue
- Classic Dairy-Free Banana Cream Pie
- Easy & Versatile Dairy-Free Caramel Sauce
- Comforting Dairy-Free Rice Pudding
- Simple & Sweet Dairy-Free Fudge
Warmly, Erin
Featured Testimonial
From Anna: “This is the best non-dairy eggnog I’ve ever had! Absolutely delicious and so creamy! Thank you for the recipe, Erin!”
View 17 more comments
Key Ingredients for the Perfect Dairy-Free Eggnog Experience
Crafting truly exceptional homemade dairy-free eggnog begins with a careful selection of ingredients. Each component in this recipe plays a crucial role in achieving that signature rich flavor, creamy texture, and overall delightful holiday experience. Below, you’ll find detailed notes on the key ingredients, explaining their importance and offering helpful tips for optimal results. For precise measurements, please refer to the full recipe card located further down this page.
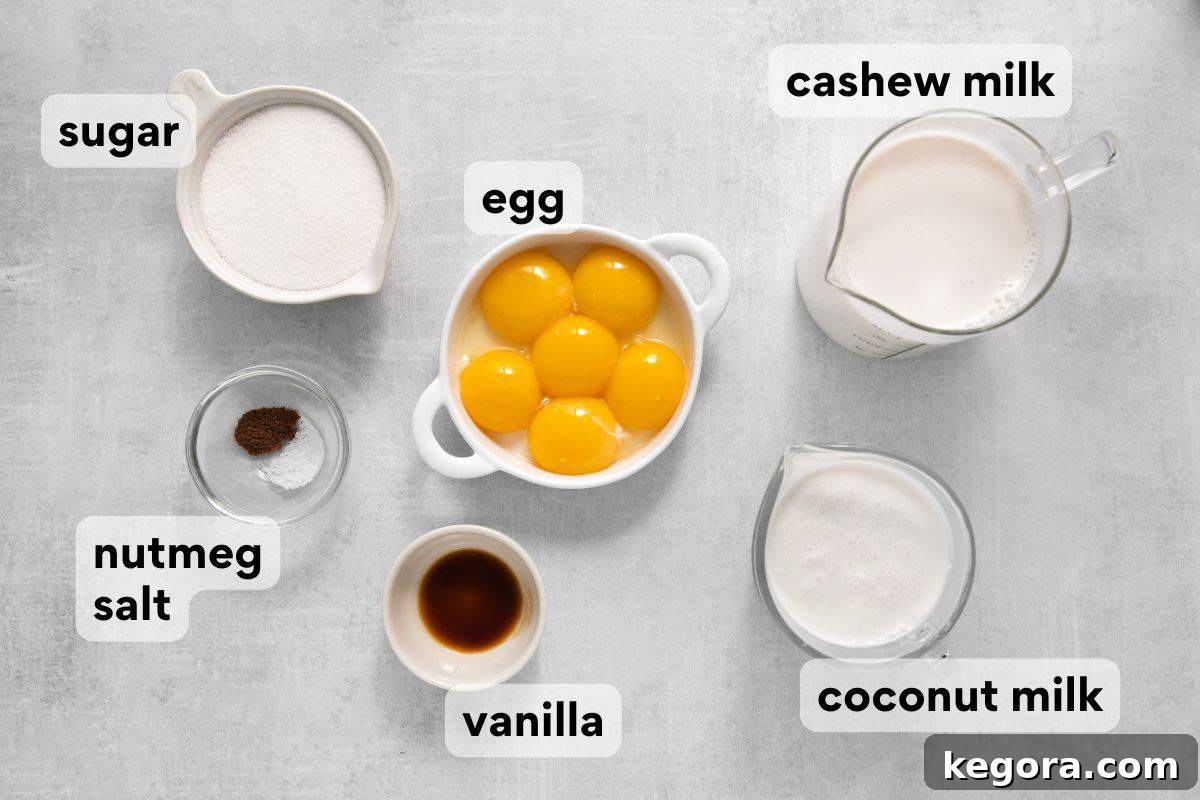
- Unsweetened Cashew Milk: This is our top recommendation for dairy-free milk due to its naturally creamy consistency and remarkably neutral flavor. Unlike some other plant-based milks, cashew milk won’t impart a distinct taste that might compete with the delicate spices of the eggnog. While unsweetened almond milk or oat milk can serve as alternatives, we highly advise against sweetened or flavored varieties, as we’ll be adding sugar and spices ourselves to achieve a perfectly balanced profile. For the freshest taste, you can even prepare your own cashew milk by soaking raw cashews and blending them with water.
- Full-Fat Canned Coconut Milk: This ingredient is absolutely non-negotiable for achieving the rich, thick body and luxurious mouthfeel characteristic of traditional eggnog. The high fat content in full-fat coconut milk contributes significantly to the luscious creaminess. While light canned coconut milk can be used, expect a slightly thinner result. It’s important to avoid coconut cream, which is too dense, and the refrigerated carton-style coconut milk, as these have different compositions that won’t yield the desired texture.
- Large Egg Yolks: The inclusion of real egg yolks is what truly elevates this recipe, providing incredible richness, natural emulsification, and the beautiful pale yellow hue that makes eggnog so appealing. Using egg yolks sets this recipe apart from many purely “vegan” eggnogs, delivering a more authentic and traditional flavor profile. For the smoothest incorporation, ensure your egg yolks are at room temperature before you begin cooking. Don’t let those unused egg whites go to waste! They can be stored and used in other fantastic recipes, such as fluffy omelets or a delicate gluten-free angel food cake.
- Granulated Sugar: Essential for balancing the richness of the milks and eggs, providing the perfect level of sweet indulgence. Adjust to your personal preference for sweetness.
- Kosher Salt: A small but mighty ingredient, a pinch of kosher salt works wonders by enhancing and bringing out the depth of all the other flavors, making the eggnog taste more complex and well-rounded.
- Vanilla Extract: A crucial flavoring agent, vanilla extract contributes warm, aromatic notes that beautifully complement the nutmeg and other spices, adding to the overall comforting taste.
- Ground Nutmeg: This is the quintessential spice that defines eggnog. For the most intense, fragrant, and authentic flavor, we highly recommend using freshly grated nutmeg. The difference in aroma and taste compared to pre-ground nutmeg is truly remarkable and will elevate your homemade eggnog to gourmet status.
Delve into More Dairy-Free Comfort Food Delights
If you savor the idea of enjoying your beloved comfort foods without dairy, you’ve found your culinary home! We believe that dietary preferences shouldn’t limit deliciousness. Explore these other heartwarming and satisfying dairy-free recipes that promise to deliver all the flavor and comfort you crave:
- Hearty & Creamy Dairy-Free Potato Soup
- Classic & Flavorful Dairy-Free Lasagna
- Perfectly Fluffy Dairy-Free Mashed Potatoes
- Clean Eating Dairy-Free Spinach Artichoke Dip
Step-by-Step Guide: How to Craft Your Own Irresistible Dairy-Free Eggnog
Creating your own rich, creamy, and perfectly spiced dairy-free eggnog at home is a wonderfully rewarding experience, and it’s simpler than you might imagine. Follow these detailed steps carefully to ensure a luscious, smooth, and utterly delicious holiday beverage that will impress everyone. For precise instructions and exact ingredient quantities, remember to jump directly to the full recipe card below.
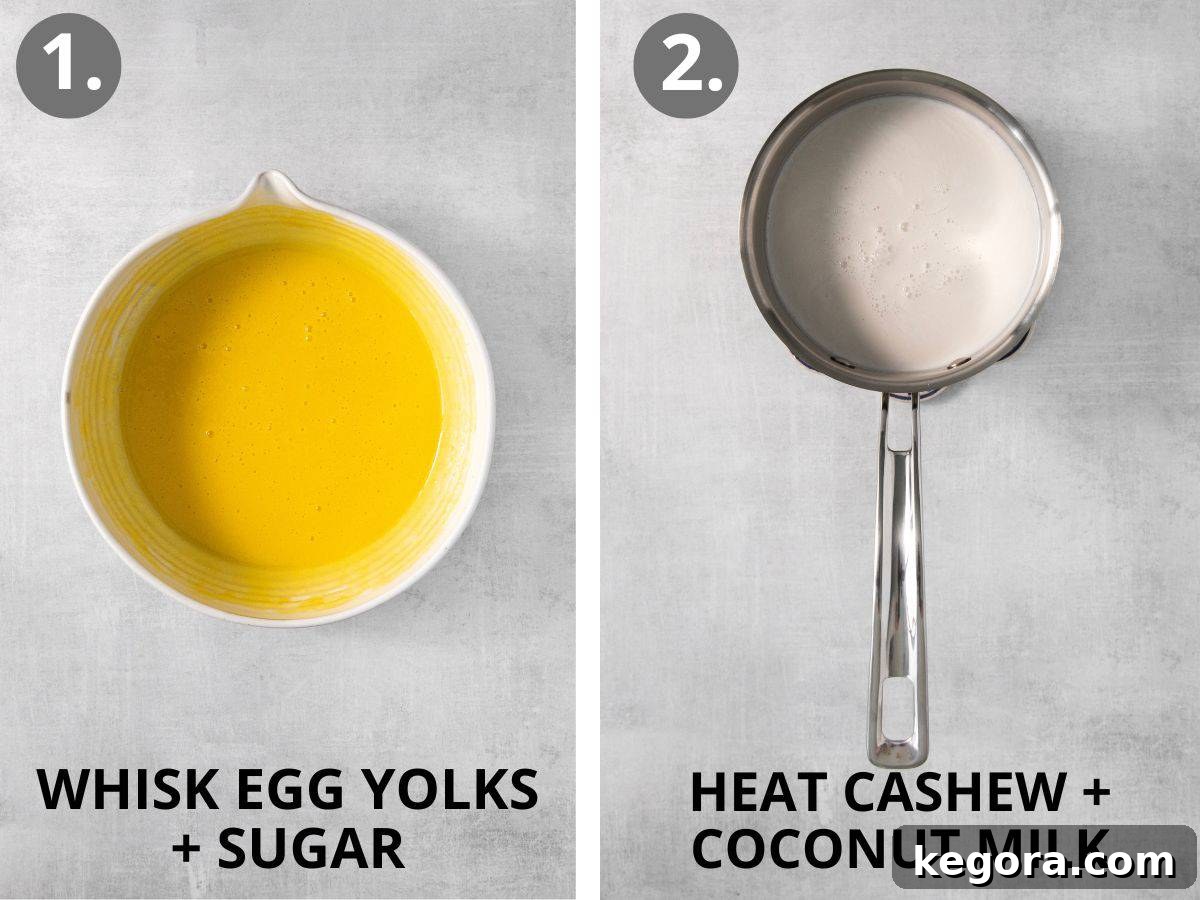
1. Create the Egg & Sugar Base
In a medium-sized heatproof bowl, combine your large, room-temperature egg yolks with the granulated sugar. Using a whisk, beat these ingredients together vigorously. Continue whisking for several minutes until the mixture transforms into a pale yellow, light, and wonderfully creamy consistency. This aeration process is key; it incorporates air, resulting in a lighter final texture and ensures the sugar fully dissolves.
2. Gently Heat the Dairy-Free Milks
In a sturdy saucepan, pour in the full-fat canned coconut milk, unsweetened cashew milk, and a pinch of kosher salt. Place the saucepan over medium-high heat. Stir the mixture frequently and consistently to prevent any sticking or scorching, which can be particularly common with coconut milk. Heat the mixture until you see small bubbles forming gently around the edges, indicating it has just begun to simmer. It should be hot, but not at a rolling boil, as this temperature is perfect for tempering the eggs effectively.
3. Temper the Eggs – A Crucial Step for Smoothness!
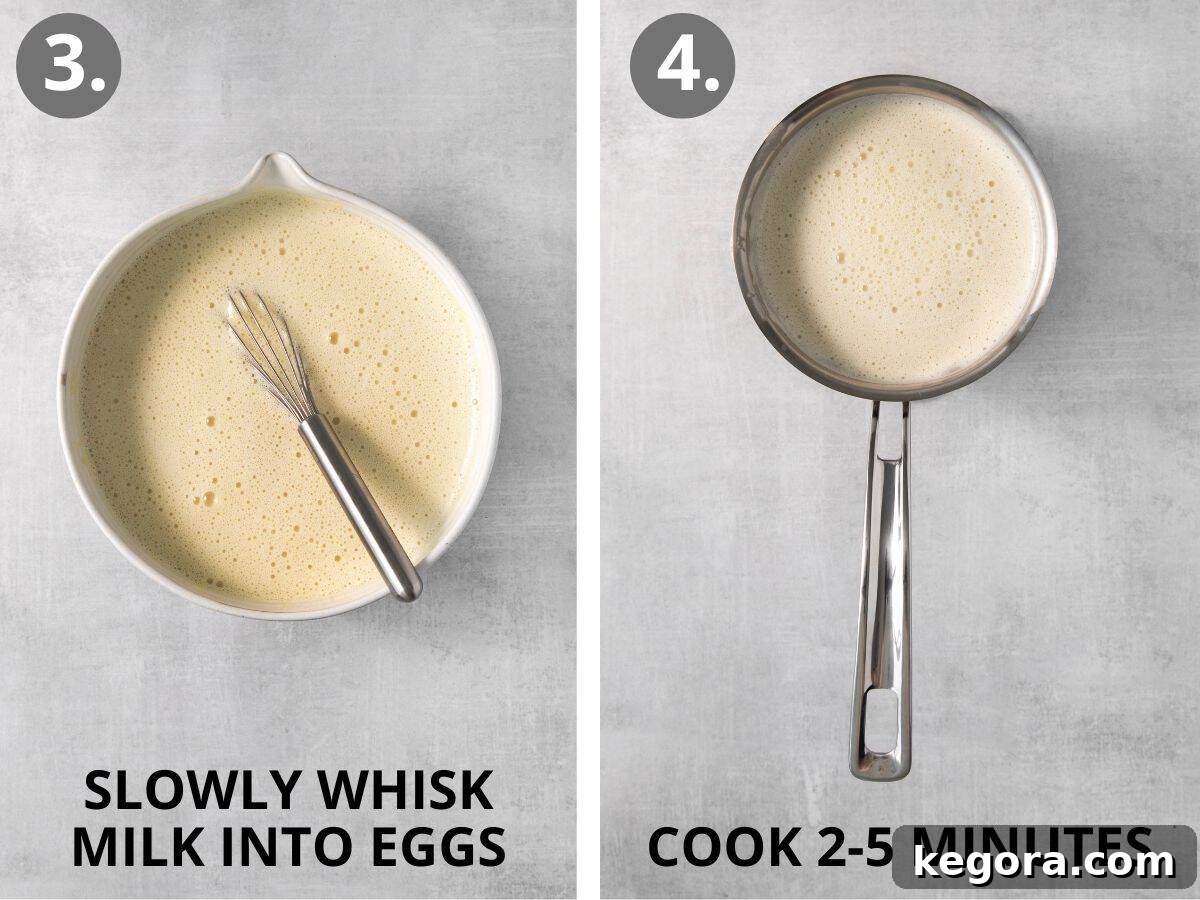
This is arguably the most vital step to achieve a smooth, lump-free eggnog and prevent the eggs from scrambling. While continuously and vigorously whisking the egg and sugar mixture in the bowl, slowly drizzle in a small amount (about 2-3 tablespoons) of the hot dairy-free milk from the saucepan. Whisk energetically to fully incorporate the hot liquid. Repeat this delicate process, adding the hot milk spoonful by spoonful, until approximately half to two-thirds of the hot milk has been thoroughly mixed into the egg mixture. This gradual addition slowly and safely raises the temperature of the eggs, allowing them to gently warm and cook without coagulating rapidly.
4. Cook the Eggnog to Perfection
Once the eggs are properly tempered, carefully pour the entire warmed egg-and-milk mixture from the bowl back into the saucepan, combining it with the remaining hot milk. Return the saucepan to the stovetop and set the heat to medium-low. Now, cook the eggnog, whisking constantly and diligently, for approximately 2 to 5 minutes. Your goal is to reach a temperature between 160°F and 165°F (71°C to 74°C). If you don’t have a thermometer, look for the mixture to thicken slightly, just enough to coat the back of a spoon. It’s important not to let it boil at this stage. Remember, the eggnog will continue to thicken significantly as it cools, so don’t be tempted to overcook it.
5. Strain and Infuse with Flavor
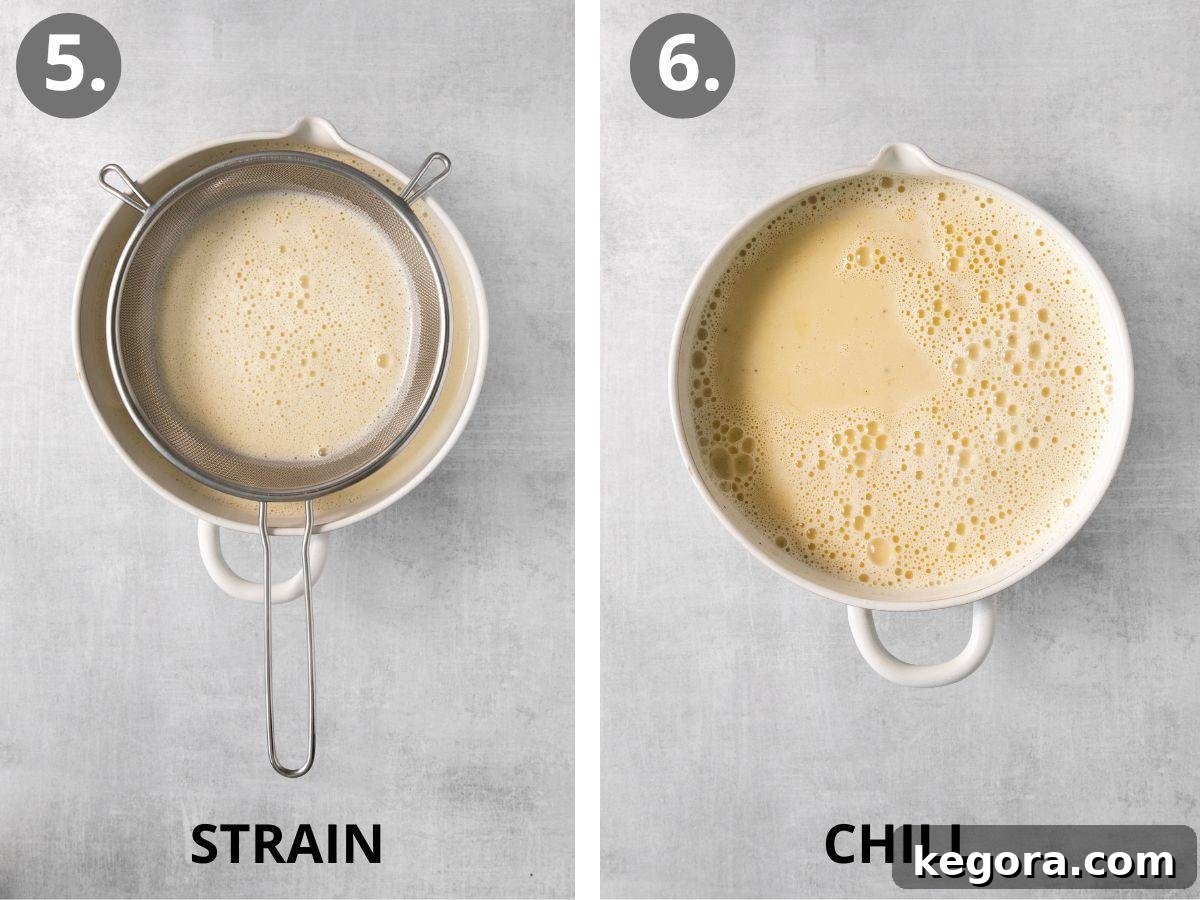
As soon as the eggnog reaches the ideal temperature and exhibits a slight thickening, immediately remove it from the heat. Carefully pour the hot custard through a fine-mesh strainer into a clean, large bowl. This critical straining step ensures that any tiny bits of cooked egg or spice residue are removed, guaranteeing an incredibly smooth, silky, and refined texture for your finished eggnog. Now, stir in the vanilla extract and the ground nutmeg. If you’re adding an alcoholic component, such as brandy, bourbon, rum, or whisky, this is the perfect moment to incorporate it. Start with ¼ cup and adjust the amount to suit your personal taste preferences.
6. Chill for Optimal Thickness and Flavor Development
Once flavored, cover the bowl of warm eggnog tightly with plastic wrap. Ensure the plastic wrap makes direct contact with the surface of the eggnog to prevent an undesirable skin from forming as it cools. Transfer the bowl to the refrigerator and allow it to chill thoroughly for a minimum of 3 hours, though ideally, overnight. This chilling period is absolutely essential—not only does it cool the eggnog down, but it also allows the mixture to thicken to its proper rich, creamy consistency, and provides ample time for all the delightful holiday flavors to fully meld and deepen. If, after chilling, you find the consistency thicker than you prefer, simply pour the eggnog into a blender with a tablespoon or two of extra unsweetened cashew milk and blend until it reaches your desired smoothness.
7. Garnish and Serve Your Festive Creation
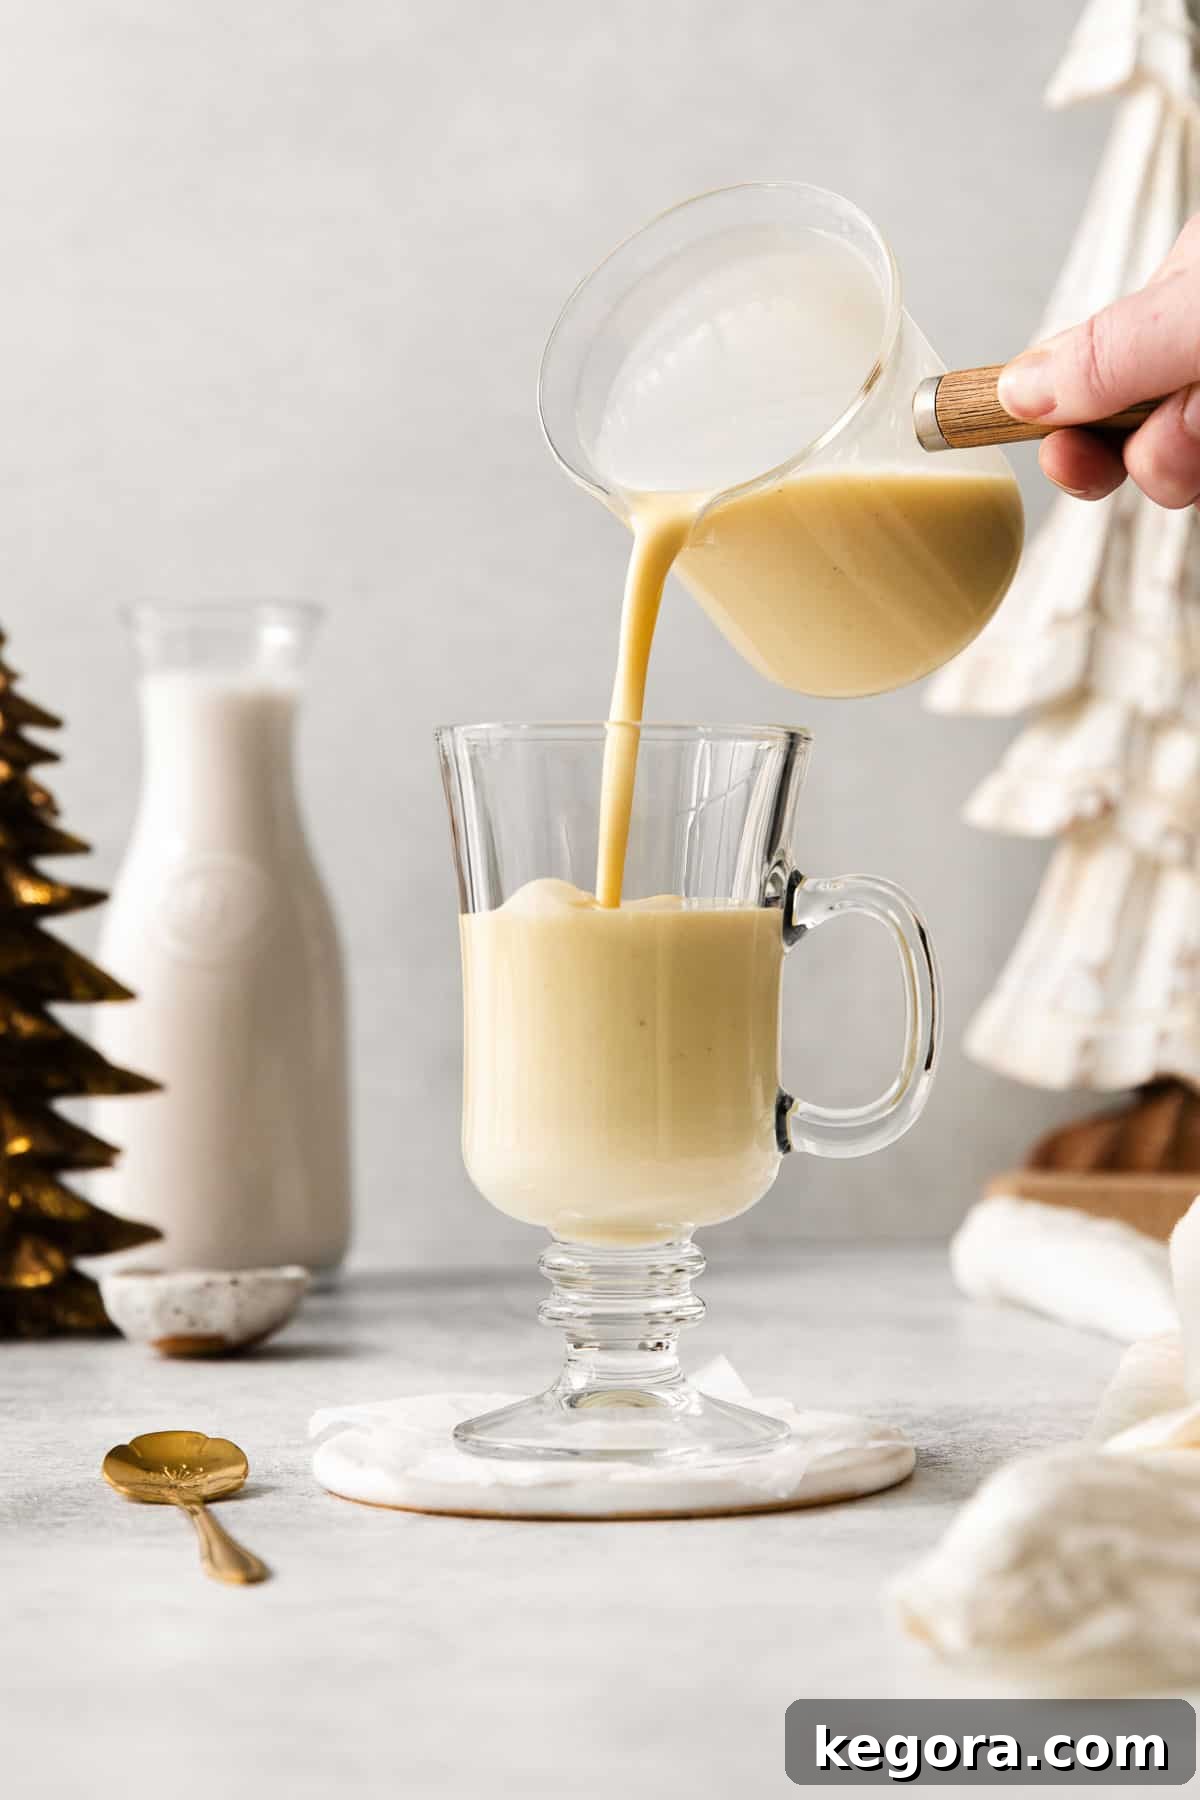
Once your dairy-free eggnog is perfectly chilled and has achieved its luxurious thickness, give it a final stir or gentle shake, then pour it into elegant individual glasses or a festive holiday pitcher. Now comes the fun part: garnishing! Get creative and make it look as inviting as it tastes. Popular garnishes include a generous dollop of dairy-free whipped cream, a delicate dusting of cinnamon or freshly grated nutmeg, a sprinkle of finely grated dark chocolate, or a charming cinnamon stick for a rustic touch. These small but impactful additions make your homemade dairy-free eggnog truly special and ready to be enjoyed by all your guests.
Enhance Your Holiday Beverage Spread with Dairy-Free Hot Chocolate!
For another comforting and equally delicious holiday beverage option, consider pairing your dairy-free eggnog with this delightful easy dairy-free hot chocolate. It’s the perfect way to offer variety and cater to all tastes during your festive celebrations!
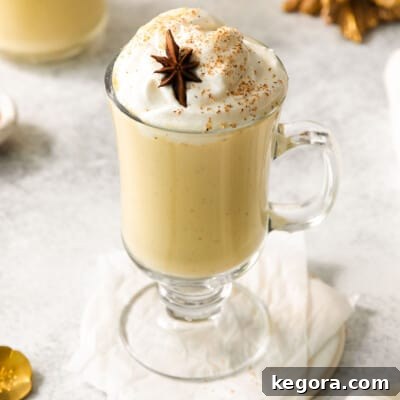
Dairy-Free Eggnog (with Real Eggs!)
Erin Collins
10 mins
5 mins
3 hrs
3 hrs 15 mins
8 servings
Experience the magic of the holidays with this rich, creamy, and undeniably delicious dairy-free eggnog! This recipe uses real egg yolks combined with carefully selected dairy-free milks to create a luxurious texture and authentic flavor that rivals any traditional eggnog. Perfect for family gatherings, festive parties, or a cozy evening by the fire, this homemade dairy-free eggnog is sure to become a beloved part of your holiday traditions.
Comments
Ingredients
- 6 large egg yolks
- ½ cup (100g) granulated sugar
- 1 13.5 oz can (400ml) full-fat coconut milk
- 2 cups (480ml) unsweetened cashew milk or unsweetened dairy-free milk of choice
- ¼ teaspoon kosher salt
- 1 teaspoon vanilla extract
- ½ teaspoon ground nutmeg preferably freshly grated
- Optional: Alcohol (e.g., brandy, bourbon, rum, or whisky – see notes for amounts)
Instructions
-
In a medium bowl, combine the 6 large egg yolks and ½ cup granulated sugar. Whisk them vigorously for 2-3 minutes until the mixture turns light in color and achieves a creamy, airy texture. This step ensures proper emulsification and a smooth result.
-
In a medium saucepan, combine the 1 13.5 oz can full-fat coconut milk, 2 cups unsweetened cashew milk (or other chosen dairy-free milk), and ¼ teaspoon kosher salt. Place the saucepan over medium-high heat. Stir the mixture frequently to ensure even heating and to prevent any scorching on the bottom, continuing until it just begins to simmer gently around the edges. Do not bring it to a rolling boil.
-
To temper the eggs, slowly and carefully add a large spoonful (approximately 2-3 tablespoons) of the hot milk mixture to the whisked egg yolks and sugar. Whisk vigorously and continuously as you add the hot liquid. Repeat this process, adding one spoonful at a time, until at least half of the hot milk has been thoroughly incorporated into the egg mixture. This gradual tempering prevents the eggs from scrambling.
-
Once the eggs are tempered, pour the entire egg-and-milk mixture back into the saucepan containing the remaining hot milk. Return the saucepan to medium-low heat.
-
Cook the mixture, whisking constantly and without interruption, for 2 to 5 minutes, or until it reaches a temperature between 160°F and 165°F (71°C to 74°C). The eggnog should noticeably thicken and lightly coat the back of a spoon. Avoid allowing the mixture to boil, as this can cause curdling. Keep in mind that it will thicken considerably more as it cools.
-
Immediately remove the saucepan from the heat. Pour the cooked eggnog custard through a fine-mesh strainer into a clean large bowl to ensure a perfectly smooth and lump-free consistency. Stir in 1 teaspoon of vanilla extract and ½ teaspoon of ground nutmeg (preferably freshly grated). If adding alcohol (such as brandy, bourbon, rum, or whisky), incorporate ¼ cup now, or add it after the eggnog has cooled completely, adjusting the amount to your taste preferences.
-
Cover the bowl with plastic wrap, ensuring the wrap directly touches the surface of the eggnog to prevent a skin from forming. Refrigerate for at least 3 hours, or ideally overnight, until it is thoroughly chilled and has reached its optimal thick, creamy texture. This chilling period is crucial for both flavor development and proper thickening.
-
The dairy-free eggnog will naturally thicken significantly as it chills. If you find it too thick for your preference, or desire a smoother texture, you can pour the mixture into a blender with 2-3 tablespoons of additional unsweetened cashew milk (or your chosen dairy-free milk) and blend until it reaches your desired consistency.
-
Serve your delicious homemade dairy-free eggnog cold. Garnish generously with dairy-free whipped cream, a sprinkle of extra cinnamon or freshly grated nutmeg, or a festive cinnamon stick. Enjoy this indulgent and satisfying holiday treat!
Notes & Tips for Success
Naturally Gluten-Free: This dairy-free eggnog recipe is inherently gluten-free, making it a wonderful and safe option for those with gluten sensitivities or celiac disease. All the primary ingredients – egg yolks, cashew milk, coconut milk, sugar, vanilla, and spices – are naturally free of gluten, so you can enjoy this festive drink without concern.
Ensuring Dairy-Free Status: To guarantee your eggnog is truly dairy-free, always be diligent about ingredient selection. Use unsweetened cashew milk (or another unsweetened dairy-free milk alternative like almond or oat milk). For the rich body and authentic texture, full-fat canned coconut milk is paramount; while light canned coconut milk can be used, the final consistency may be slightly thinner. Always double-check all ingredient labels to confirm they are certified dairy-free.
Adding Alcohol for a Festive Twist: For an adult-friendly version of this holiday classic, alcohol can be a fantastic addition. Traditional and popular choices include brandy, bourbon, dark rum, or whisky. We recommend starting with ¼ cup of your chosen spirit and adding it at the same time as the vanilla and nutmeg, or stirring it in after the eggnog has cooled completely. You can always add more to taste, ensuring a personalized level of holiday cheer and flavor intensity.
Make-Ahead Convenience: This dairy-free eggnog is an excellent candidate for make-ahead preparations, which is perfect for busy holiday schedules. You can easily prepare it up to 1 week in advance. Store the finished eggnog in an airtight container or a sealed pitcher in the refrigerator. Making it ahead allows the flavors to truly meld and deepen over time, resulting in an even more delicious and harmonious beverage.
Optimal Storage Practices: To maintain its freshness and quality, store your homemade dairy-free eggnog in an airtight container, such as a glass jar with a tight-fitting lid or a sealed pitcher, in the refrigerator for up to 1 week. It is completely normal for some slight separation to occur during storage due to the natural composition of the ingredients. Before serving, simply give the container a good shake or stir the eggnog thoroughly to revive its creamy, uniform consistency.
Freezing for Longer Preservation (with caveats): While freezing eggnog is possible, it’s generally not the ideal method for long-term preservation as it can sometimes alter the delicate texture and subtle flavors upon thawing. If you do choose to freeze it, pour the eggnog into an airtight, freezer-safe container, leaving approximately an inch of headspace at the top to allow for expansion. Freeze for up to 2 months. To thaw, transfer the container to the refrigerator overnight. After thawing, we highly recommend blending it briefly to re-emulsify any separated components and restore its smooth, creamy texture.
Serving Warm: Although traditionally served chilled, some individuals prefer the comforting warmth of hot eggnog. To serve warm, gently reheat the eggnog over very low heat on the stovetop, stirring frequently and patiently. It is crucial to heat it slowly and avoid bringing the mixture to a boil, as high heat can cause the egg proteins to curdle or the mixture to separate. Keep the heat gentle to maintain its smooth, inviting texture.
Nutrition Information (per serving)
Frequently Asked Questions about Dairy-Free Eggnog
Q: Can I use other dairy-free milks besides cashew milk?
A: Yes, unsweetened almond milk, oat milk, or soy milk can be used as suitable alternatives to cashew milk in this recipe. However, cashew milk is particularly recommended for its naturally creamy consistency and relatively neutral flavor, which beautifully mimics the base of traditional eggnog without introducing competing tastes. Always ensure your chosen milk is unsweetened to maintain control over the overall sweetness level of your finished eggnog.
Q: Is this recipe truly dairy-free if it contains eggs?
A: Absolutely. It’s a common misconception, but eggs are not considered dairy products. Dairy refers specifically to milk and products derived from milk (like cheese, butter, and yogurt) from mammals. This recipe is genuinely dairy-free because it completely avoids animal milk and cream, opting instead for plant-based alternatives like cashew and coconut milk. However, it is important to note that this recipe is not vegan, as it does incorporate real egg yolks for that classic richness and texture.
Q: How can I ensure the eggs don’t curdle when cooking the eggnog?
A: The secret to preventing curdled eggs and achieving a silky smooth eggnog lies in two crucial techniques: proper tempering and constant whisking. First, you must gradually temper the egg mixture by slowly adding small amounts of hot dairy-free milk to it, whisking continuously. This step slowly raises the temperature of the eggs. Once combined, continue cooking the mixture over medium-low heat while whisking diligently until it reaches the target temperature of 160-165°F (71-74°C). The key is to avoid high heat and never allow the mixture to come to a rolling boil, which would rapidly cook and curdle the eggs.
Q: Can I make this dairy-free eggnog ahead of time for entertaining?
A: Yes, absolutely! This dairy-free eggnog recipe is an excellent candidate for making ahead, which is a huge convenience during the busy holiday season. In fact, preparing it a day or even two in advance allows the spices to fully infuse and the flavors to deepen and meld beautifully. The chilling process also contributes to its desired thick and creamy consistency. Store it securely in an airtight container in the refrigerator for up to a week.
Q: What are the best ways to serve and garnish homemade dairy-free eggnog?
A: Dairy-free eggnog is traditionally served chilled, and a cold temperature truly enhances its refreshing and rich qualities. For a beautiful and festive presentation, pour it into elegant glasses and garnish generously. Popular choices include a dollop of dairy-free whipped cream, a sprinkle of freshly grated nutmeg or cinnamon (freshly grated is always best!), or a festive cinnamon stick for an aromatic touch. For an adult-only indulgence, a splash of your favorite brandy, bourbon, or rum is a classic and highly recommended addition.
This post was originally published in December 2022 and has been comprehensively updated with enhanced instructions, additional tips, and new content in November 2025 to ensure the best possible experience for our readers.