
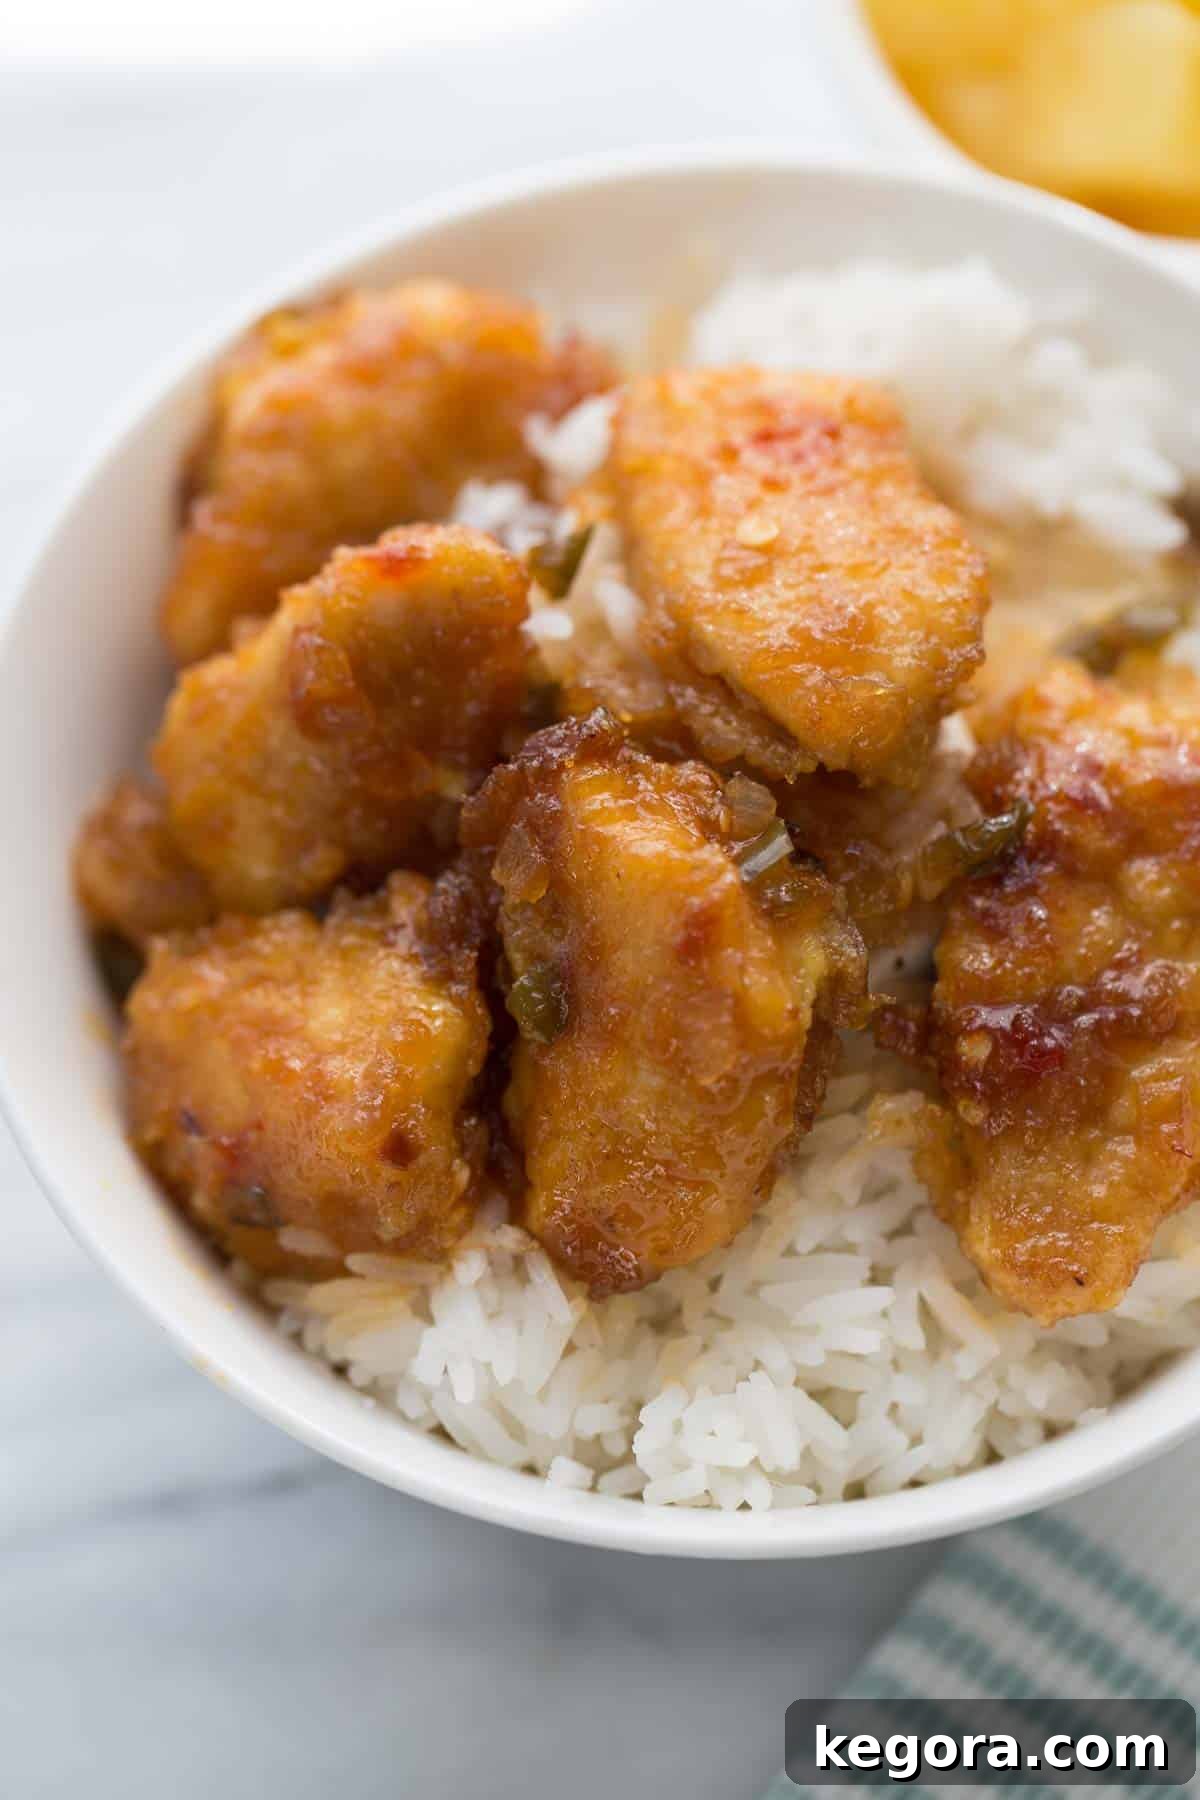
This sensational baked Sticky Chicken recipe is poised to become an instant favorite in your household! Imagine tender, succulent chunks of chicken, perfectly coated and baked to perfection in an irresistible sweet and tangy pineapple glaze. It’s a true crowd-pleaser and a kid-friendly delight, making it the ideal dish for any day of the week or special gatherings. This recipe brings together ease of preparation with an explosion of flavors that will have everyone asking for seconds.
This comprehensive article is packed with expert tips and detailed insights to help you master this cherished family recipe. For a complete visual guide, be sure to watch the accompanying video!
If you’re eager to explore more tried-and-true dinner recipes that are big on flavor and simple to prepare, consider trying our delectable glazed pineapple salmon, which offers a similar tropical tang, or our savory beef stir-fry for another quick and satisfying meal option!
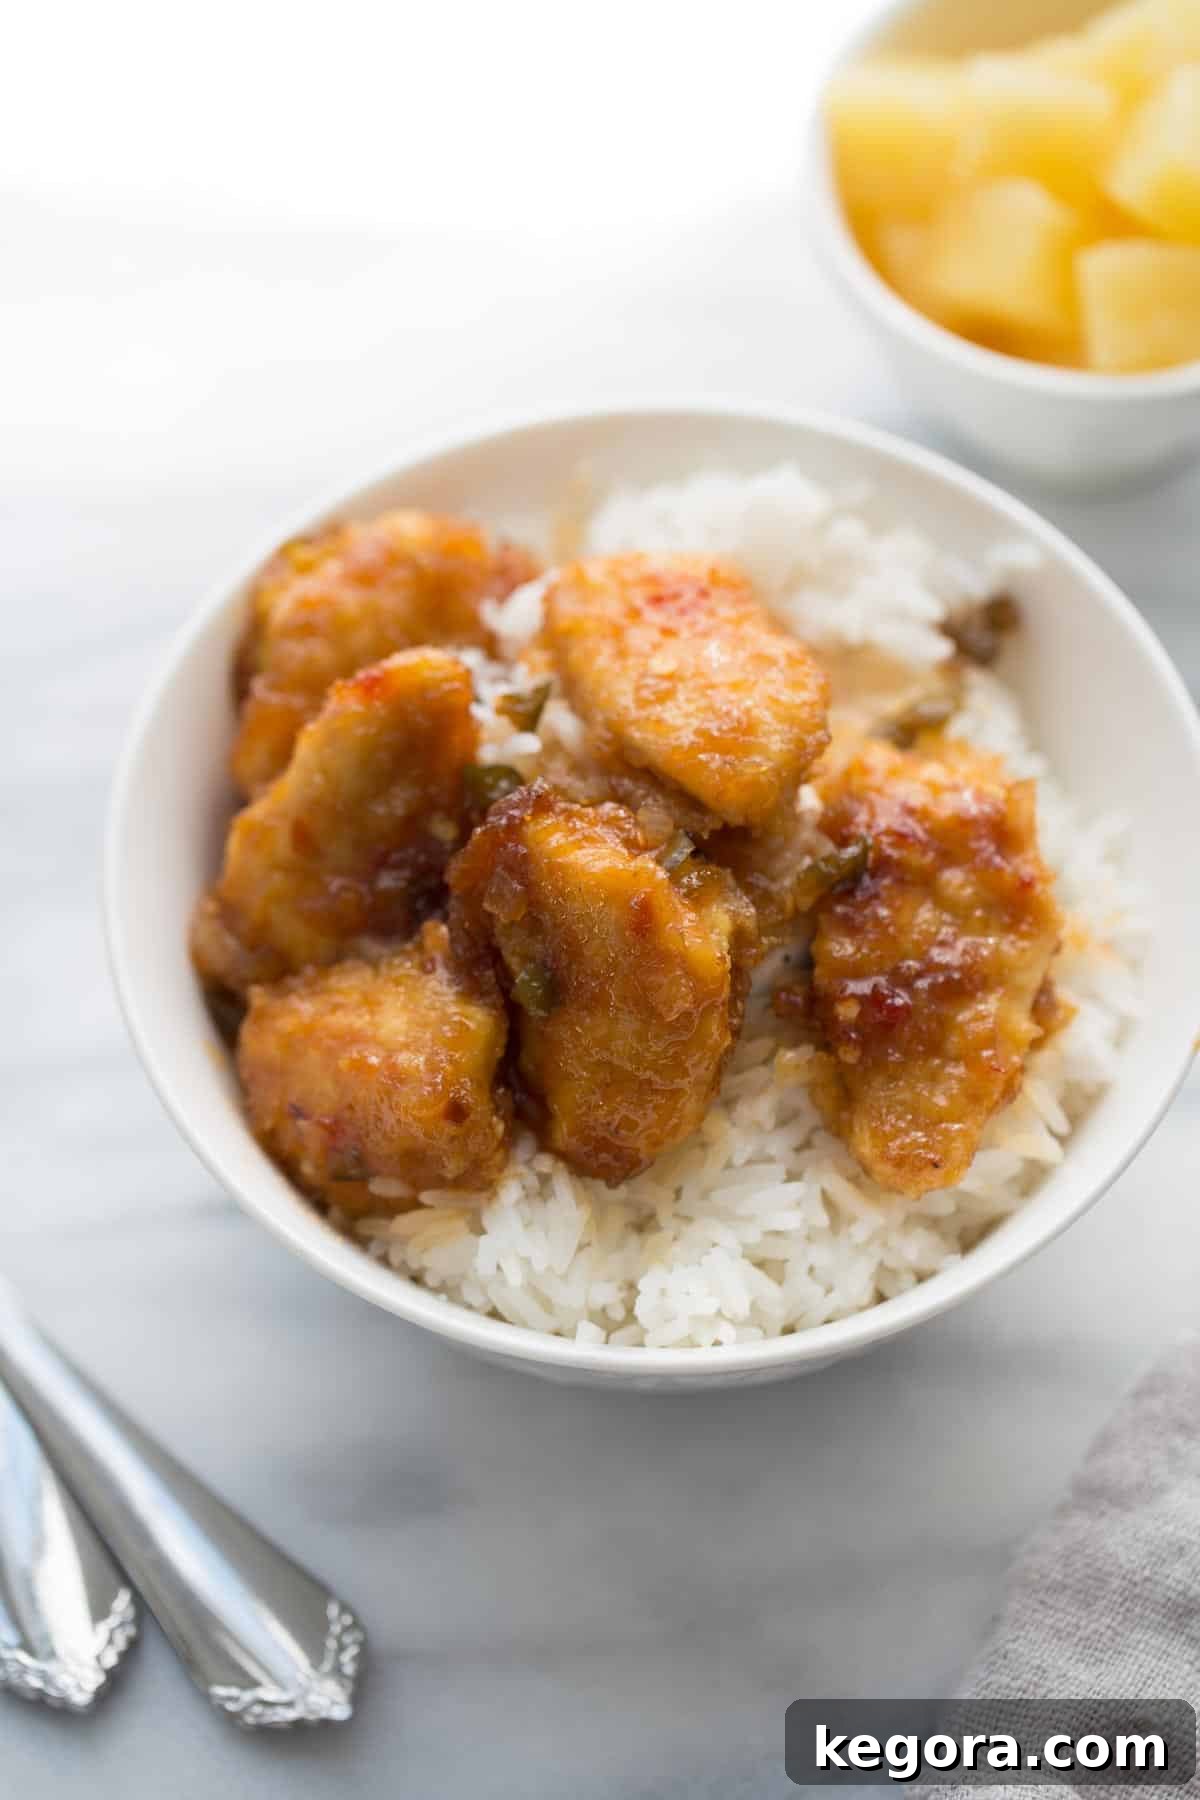
Discover the Magic of Sticky Chicken: An Award-Winning Family Favorite!
What exactly is sticky chicken? It’s a culinary marvel that combines tender, bite-sized pieces of chicken with a luscious, glossy glaze that clings beautifully to every morsel. This particular recipe stands out not only as a long-time family favorite but also as an award-winning dish. It proudly earned the title of “best recipe” in a local newspaper competition nearly two decades ago, a testament to its enduring appeal and incredible flavor. Whenever this dish is on the dinner menu, my children’s faces light up with excitement, proving its universal charm across generations.
The secret lies in the harmonious balance of sweet and tangy notes in the pineapple-based sauce, creating a taste profile that is both comforting and exhilarating. Its simple preparation method makes it accessible for home cooks of all skill levels, ensuring a delicious outcome every time. Whether you’re planning a weeknight meal or hosting a casual get-together, this sticky chicken recipe promises to be a memorable addition to your culinary repertoire.
For those exploring similar flavor profiles, you might also enjoy our homemade gluten-free teriyaki sauce, perfect for marinades and stir-fries, or our delightful honey sesame chicken skewers, another fantastic option for a flavorful chicken dish.
Essential Ingredients for Irresistible Baked Sticky Chicken
The heart and soul of this recipe undeniably lies in its extraordinary sauce. This flavorful glaze is crafted from easily accessible pantry staples, proving that incredible taste doesn’t require exotic ingredients. Each component plays a crucial role in creating the signature sweet and tangy profile that makes this sticky chicken so addictive.
For the Sweet and Tangy Glaze:
- **Pineapple Juice:** The cornerstone of our glaze, providing natural sweetness and a vibrant tropical tang. It balances the savory elements and gives the sauce its signature fruity base.
- **Granulated Sugar:** Enhances the sweetness and contributes to the glaze’s desirable sticky texture as it caramelizes during baking.
- **Ketchup:** Adds a rich, savory depth and a hint of tomato sweetness, along with a touch of acidity that beautifully complements the other flavors.
- **Soy Sauce (or Tamari):** A fundamental ingredient for umami and a savory backbone. For those following a gluten-free diet, using tamari is an excellent substitution that maintains all the delicious flavor without the gluten.
- **Vinegar (Red Wine or Apple Cider):** Introduces a crucial sharp tang, cutting through the sweetness and brightening the entire flavor profile of the sauce.
- **Fresh Ginger (Grated):** Provides a warm, aromatic, and slightly spicy note that elevates the sauce from simple to sophisticated. Fresh ginger is key for that authentic, vibrant flavor.
- **Garlic Powder:** Offers a pungent, savory depth that is indispensable in many Asian-inspired dishes, adding complexity without being overwhelming.
- **Red Pepper Flakes:** A touch of heat that awakens the palate. Adjust the amount to your preference for a mild warmth or a more pronounced spice.
- **Salt:** Essential for seasoning and bringing all the flavors into harmony.
Have you ever wondered how restaurants achieve that distinct, appetizing coating on their chicken dishes? It’s surprisingly simple to replicate at home! You’ll need a few more common pantry items to prepare the chicken before it gets smothered in our incredible glaze.
For Coating and Preparing the Chicken:
- **Boneless, Skinless Chicken Breasts or Thighs:** We recommend chicken breasts for their lean texture, cut into uniform chunks for even cooking. Thighs can also be used for a richer flavor and more tender result.
- **Egg:** Acts as a binder, helping the cornstarch adhere to the chicken pieces, creating a protective and flavorful coating.
- **Cornstarch:** This is the magic ingredient for that light, restaurant-style coating. It crisps up nicely during initial cooking and helps the sauce thicken and cling.
- **Salt & Black Pepper:** Crucial for seasoning the chicken itself, ensuring every bite is flavorful, not just the glaze.
- **Onion & Green Bell Pepper (Diced):** These vegetables add texture, aromatic depth, and a subtle sweetness that complements the chicken and sauce beautifully. They soften during cooking and integrate wonderfully into the dish.
- **Cooking Oil (Coconut, Avocado, or Grapeseed):** For pan-frying the chicken to develop a golden crust before baking. Choose an oil with a high smoke point.
Effortless Preparation: Step-by-Step Guide to Baked Sticky Chicken
Creating this delicious sticky chicken is a straightforward process, broken down into simple, manageable steps. Follow these instructions to ensure a perfectly cooked, flavorful dish every time. Remember, careful preparation at each stage contributes to the overall success of the recipe.
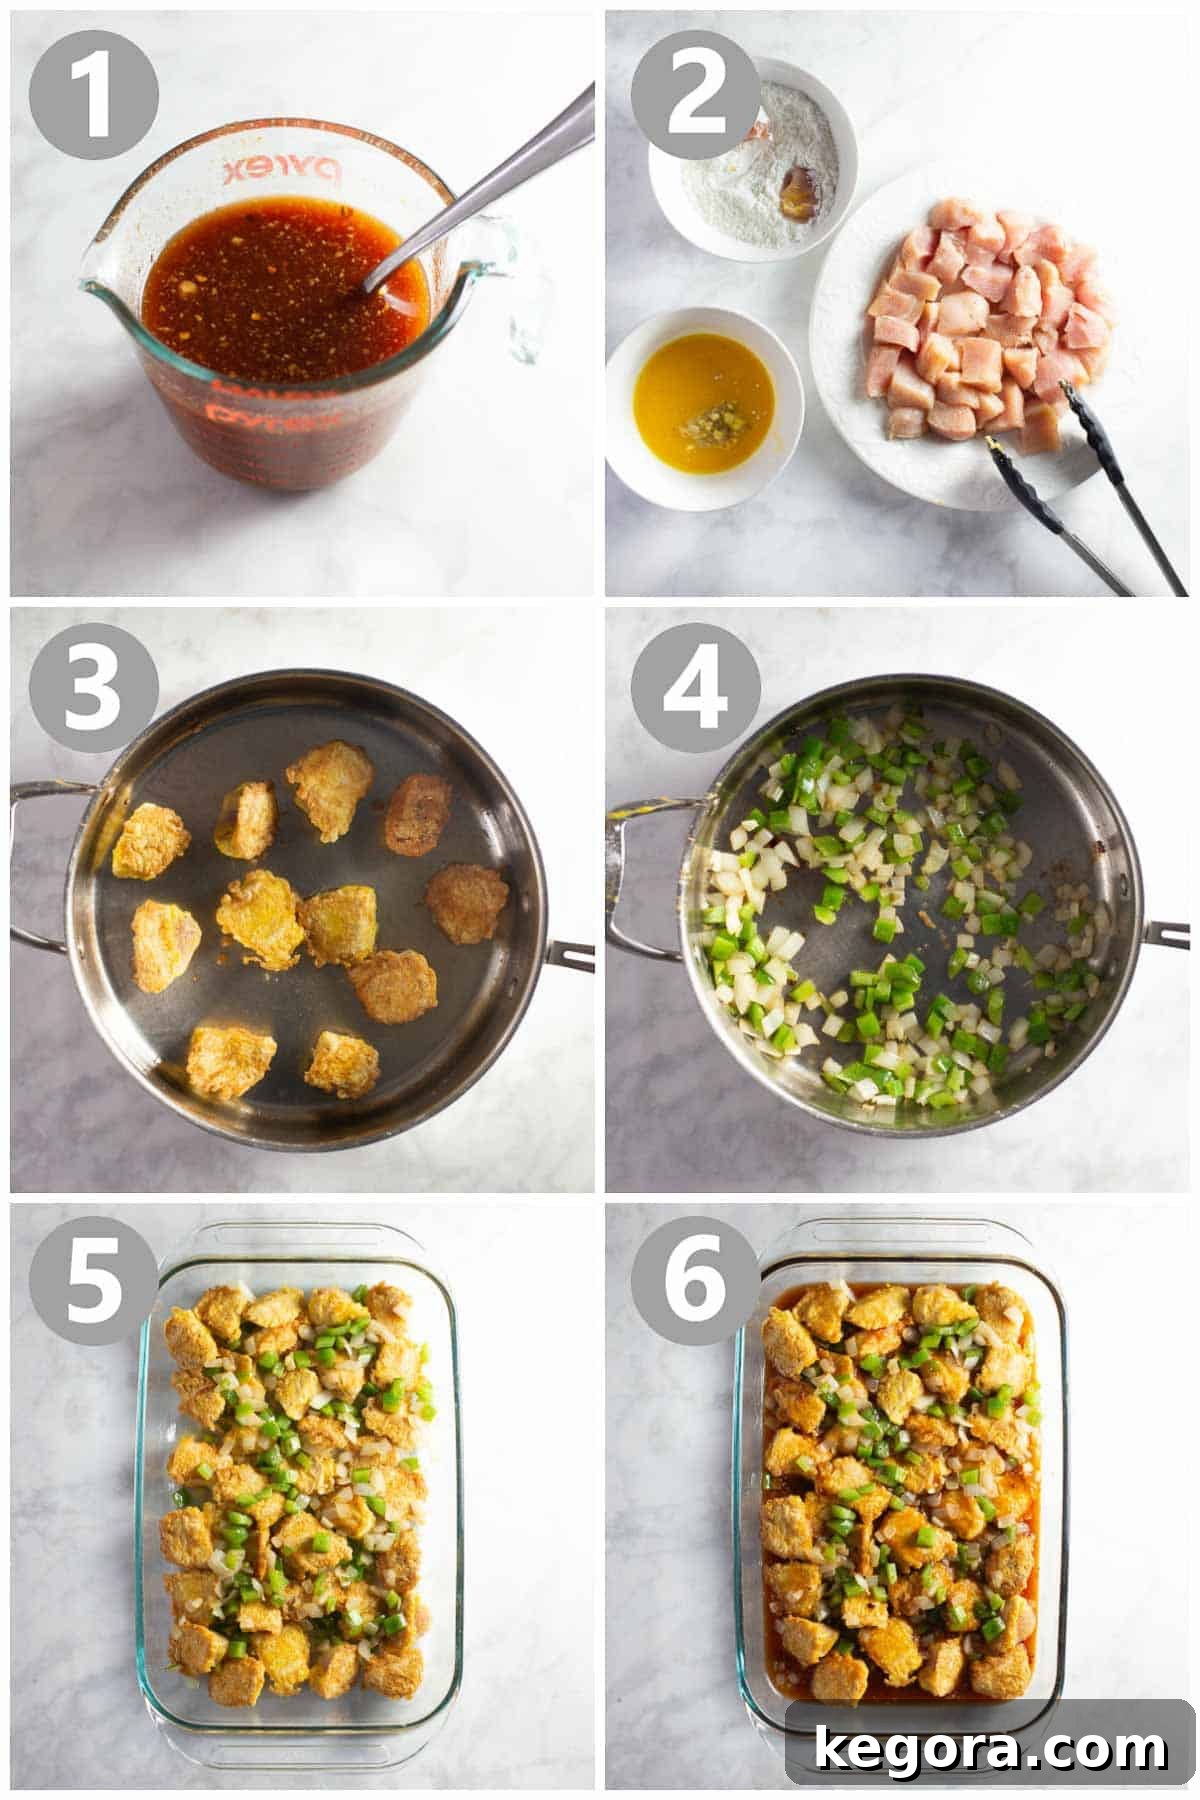
- Prepare the Flavorful Sauce: Begin by combining all the sauce ingredients – pineapple juice, sugar, ketchup, soy sauce (or tamari), vinegar, grated fresh ginger, garlic powder, red pepper flakes, and salt – in a glass measuring cup or a small bowl. Whisk them together until thoroughly combined and set aside. Preparing the sauce first ensures it’s ready to go when your chicken is.
- Set Up Your Dredging Station: Achieving that delectable restaurant-quality coating is simpler than you think! Start by cutting your chicken breasts or thighs into uniform, bite-sized cubes. This promotes even cooking. Generously season the chicken pieces with salt and freshly ground black pepper. This crucial step infuses flavor directly into the chicken, not just the coating. Next, prepare two separate bowls: one with cornstarch and another with beaten eggs. Dip each chicken piece first into the cornstarch, ensuring a light, even coating, then into the beaten egg.
- Sear the Chicken to Golden Perfection: Heat about 3 tablespoons of your preferred cooking oil (like coconut, avocado, or grapeseed oil) in a large skillet over medium-high heat until it shimmers. Carefully place the dredged chicken pieces into the hot oil, making sure not to overcrowd the pan. You’ll likely need to cook the chicken in two batches to ensure proper browning and to prevent the temperature of the oil from dropping too much. Cook each side for 1-2 minutes until beautifully golden brown. The goal here is to create a crust, not to cook the chicken through completely.
- Sauté the Aromatics: Once all the chicken is seared and transferred to your baking dish, add the diced onion and green pepper to the now-empty skillet (add a little more oil if needed). Sauté these vegetables over medium heat for 3-5 minutes, or until they have softened and become fragrant. This step extracts their sweetness and aroma, which will further enhance the final dish.
- Assemble in the Baking Dish: Evenly spread the seared chicken pieces across a 9×13 inch baking pan. Distribute the sautéed onions and green peppers over the chicken.
- Glaze and Bake: Pour the prepared sweet and tangy pineapple sauce generously over the chicken and vegetables in the baking dish, ensuring every piece is coated. Bake in a preheated oven at 350°F (175°C) for 30-35 minutes, or until the chicken is cooked through (internal temperature of 165°F / 74°C) and the sauce is bubbly and thickened.
For more delicious meal ideas, consider this vibrant sweet and sour chicken stir fry recipe or these incredibly tender oven-baked chicken thighs.
Pro Tips for Perfect Sticky Chicken
To ensure your baked sticky chicken turns out absolutely perfect every time, keep these important tips and considerations in mind:
- Uniform Chicken Cuts are Key: When cubing your chicken, strive for pieces that are roughly the same size. This seemingly small detail ensures that all the chicken cooks evenly throughout the baking process, preventing some pieces from being undercooked or overcooked.
- Shake Off Excess Cornstarch: After dipping the chicken in cornstarch, give each piece a gentle shake to remove any excess. You’re aiming for a light, thin coating, not a thick layer. Too much cornstarch can result in a gummy texture once combined with the sauce.
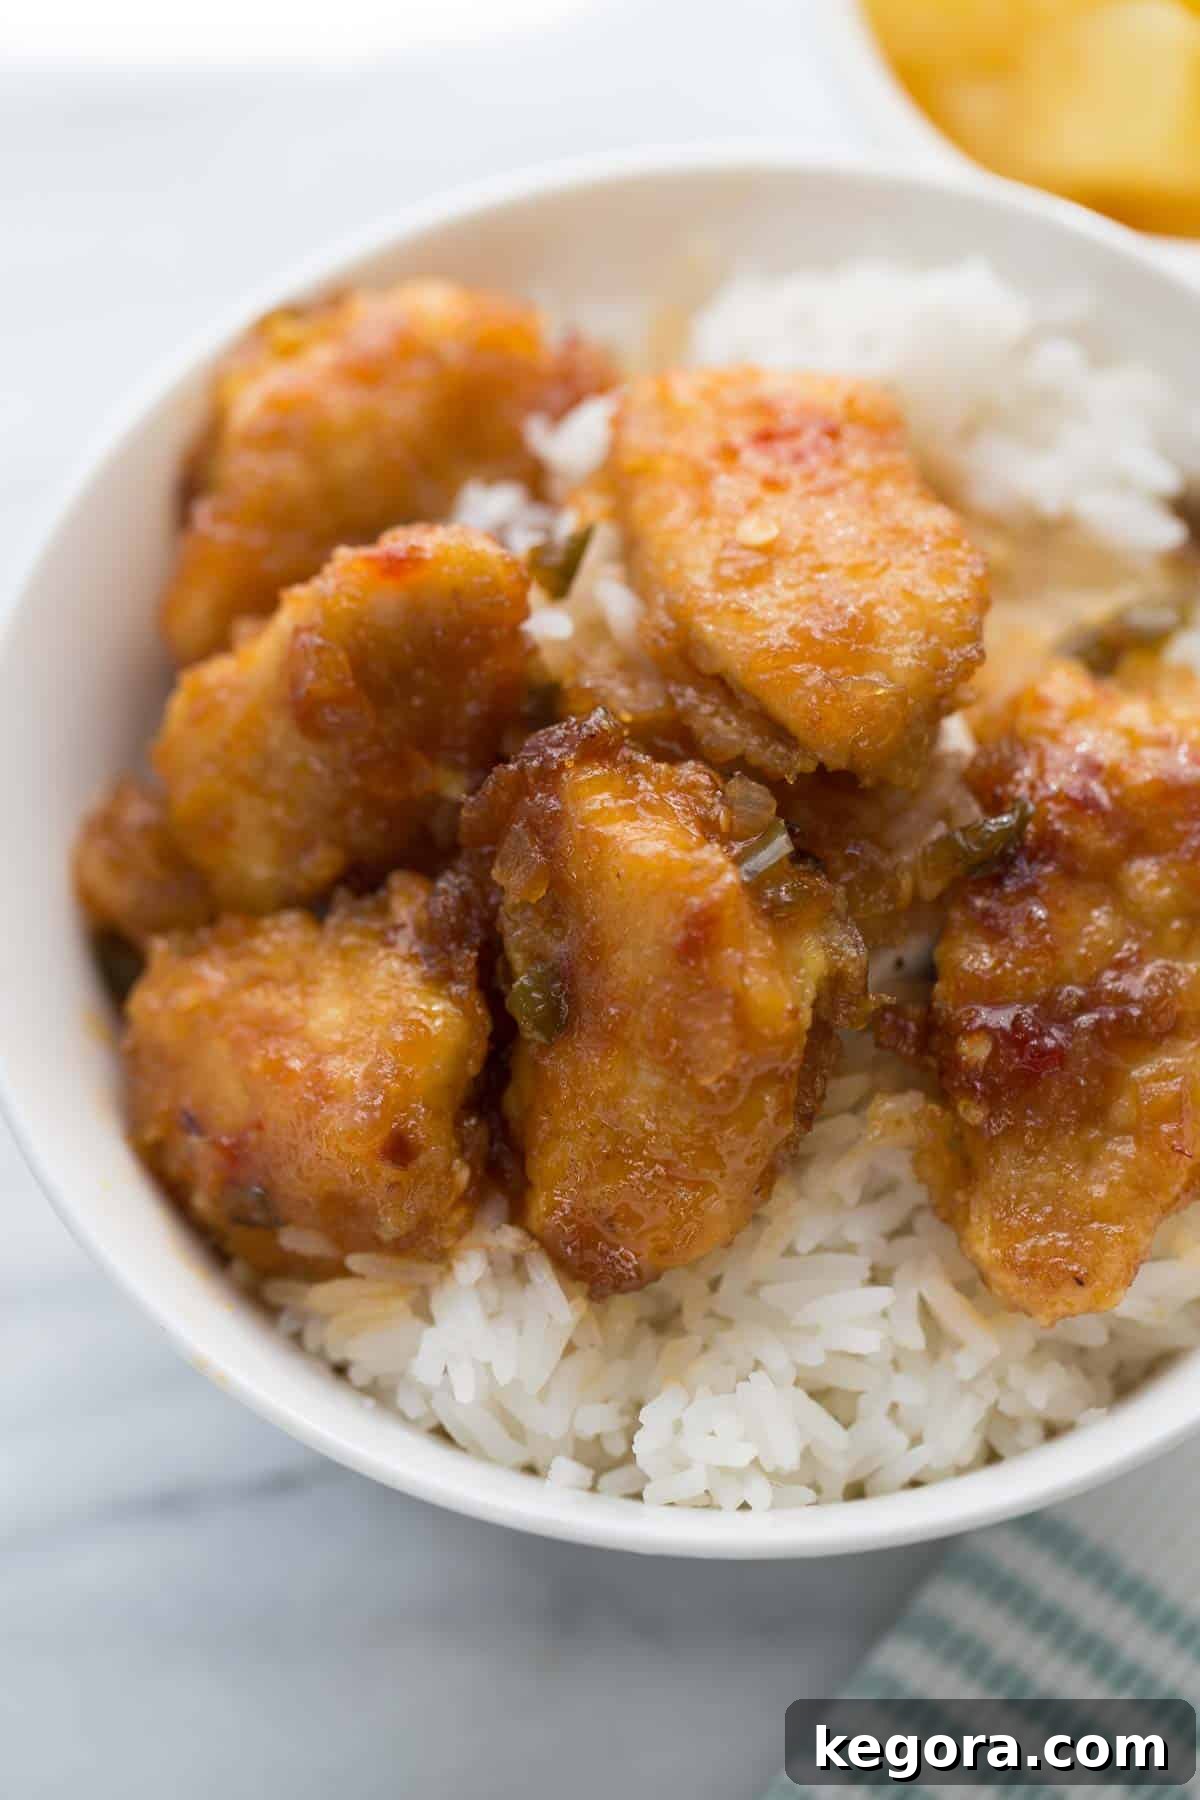
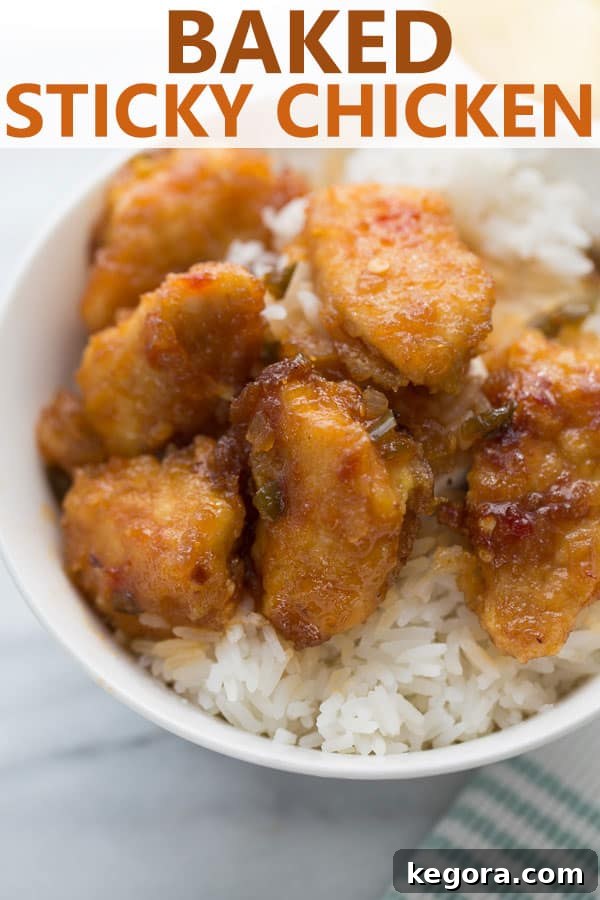
- Embrace the Stickiness, Not the Crispiness: It’s important to understand the intended texture of this dish. This baked sticky chicken is designed to be wonderfully sticky and tender, with the sauce beautifully clinging to the chicken. It is not meant to be crispy like deep-fried chicken. So, don’t be alarmed when the coating softens and becomes sticky after it bakes in the sauce—that’s exactly how it should be!
- Season the Chicken First: Always season the chicken generously with salt and pepper *before* dredging it in the egg and cornstarch. This ensures that the flavor penetrates the meat itself, providing a well-seasoned taste in every bite, rather than just relying on the sauce for flavor.
- Perfect Pairing: Jasmine Rice: This dish is truly elevated when served over a bed of fluffy jasmine rice. Its fragrant aroma and delicate texture are the perfect complement to the rich, sticky chicken. For consistently perfect rice, I highly recommend using an Instant Pot. My go-to method is to rinse 2 cups of jasmine rice, add it to the Instant Pot with 2 cups of water and a pinch of salt. Cook on high pressure for 3 minutes, then allow a natural release for 10 minutes. This yields impeccably fluffy, separate grains of rice every single time.
Serving Suggestions and Creative Variations
While sticky chicken is a star on its own, pairing it with the right side dishes can elevate your meal to a truly memorable experience. Beyond jasmine rice, consider these options to round out your dinner, and explore some creative ways to customize the recipe.
Perfect Pairings:
- Steamed or Roasted Vegetables: Complement the rich sauce with light, fresh vegetables. Broccoli florets, snap peas, green beans, or asparagus make excellent choices. A simple side salad with a light vinaigrette also works wonders.
- Noodles: For an alternative to rice, serve your sticky chicken over thin egg noodles or lo mein noodles. The sauce clings beautifully to them, creating a satisfying and comforting dish.
- Garnish for Freshness: A sprinkle of toasted sesame seeds adds a lovely nutty crunch, while thinly sliced green onions or chopped fresh cilantro introduce a burst of freshness and color.
Making It Your Own:
- Kick Up the Heat: If you love a spicier dish, increase the red pepper flakes in the sauce. A dash of sriracha or a pinch of cayenne pepper can also be added for an extra fiery kick.
- Add More Vegetables: Feel free to incorporate other quick-cooking vegetables into the pan alongside the onion and green pepper. Sliced carrots, bell peppers of different colors, or even mushrooms can add more nutrients and textural variety.
- Protein Alternatives: While chicken is traditional, this versatile glaze works beautifully with other proteins. Try it with cubed firm tofu for a vegetarian option, or with pork tenderloin pieces for a different twist. Shrimp could also be a delicious, quicker-cooking alternative, added towards the end of baking.
- Gluten-Free Excellence: As mentioned, ensuring this dish is gluten-free is as simple as using tamari in place of conventional soy sauce. All other ingredients are naturally gluten-free, making it an excellent option for those with dietary restrictions.
Meal Prep and Storage Tips for Sticky Chicken
This sticky chicken recipe is not only delicious freshly made but also fantastic for meal prepping and enjoying later. Here’s how to make the most of your leftovers and prepare ahead:
- Storing Leftovers: Any leftover sticky chicken should be stored in an airtight container in the refrigerator. It will stay fresh and delicious for 3-4 days. The flavors often meld and deepen overnight, making it even more enjoyable the next day.
- Reheating: For best results, reheat sticky chicken gently. You can warm individual portions in the microwave until heated through. For larger quantities, place the chicken and sauce back into an oven-safe dish, cover with foil to prevent drying, and reheat in a preheated oven at 300°F (150°C) for about 15-20 minutes, or until warm. If the sauce has thickened too much, you can add a tablespoon or two of water or pineapple juice before reheating.
- Freezing Instructions: Sticky chicken freezes surprisingly well! Once cooled completely, transfer the chicken and sauce into a freezer-safe airtight container or heavy-duty freezer bags. It can be frozen for up to 2-3 months. Thaw overnight in the refrigerator before reheating as directed above. Note that the chicken’s coating might be slightly less distinct after freezing and thawing, but the flavor will remain excellent.
- Make-Ahead Sauce: The pineapple glaze can be prepared up to 2-3 days in advance and stored in an airtight container in the refrigerator. This saves valuable time on busy weeknights, allowing you to quickly cook the chicken and combine it with the pre-made sauce.
By keeping these tips in mind, you can enjoy this award-winning sticky chicken whenever the craving strikes, making meal times both convenient and incredibly satisfying!
We are confident that once you add this baked sticky chicken recipe to your dinner rotation, it will quickly become a cherished favorite! If you try this incredible recipe, please be sure to leave a comment and rating below. Your feedback means the world to us, and we’d absolutely love to hear from you!
Explore More Delicious Chicken Recipes:
Easy Chicken Fajitas: A guaranteed hit, featuring a marinade that is exceptionally flavorful and truly stands out.
Gluten-Free Chicken with Broccoli and Cheddar Rice: A comforting and wholesome skillet recipe that consistently makes its way into our regular meal plans.
Instant Pot Cheesy Chicken and Rice: The ultimate easy comfort food, prepared quickly and effortlessly in your Instant Pot.
Baked Sticky Chicken
Comments
Video
Ingredients
For the sauce:
- Juice of 1 8oz can Pineapple Chunks (about 1/2 cup)
- 1/2 cup cane sugar
- 2 tablespoons soy sauce (use tamari for gluten-free)
- 3 tablespoon organic ketchup
- 1 tablespoon red wine vinegar
- 1/2 tablespoon fresh ginger grated
- 1/2 teaspoon garlic powder
- 1/4 teaspoon red pepper flakes
- 1/4 teaspoon salt
For the chicken:
- coconut oil for cooking (or oil of choice)
- 1 1/2 pounds chicken breasts cut into chunks
- salt & pepper
- 2 eggs beaten
- 1 cup cornstarch
- 1/2 cup onion diced
- 1/2 of a green pepper diced
Instructions
-
Preheat the oven to 350F (175°C). In a glass measuring cup, mix together the ingredients for the sauce: pineapple juice, sugar, soy sauce, ketchup, red wine vinegar, grated fresh ginger, garlic powder, red pepper flakes, and salt. Whisk until well combined.
-
Season the chicken chunks generously with salt and pepper. In a large skillet, heat 3 tablespoons of coconut oil (or your oil of choice) over medium-high heat until hot and shimmering. Prepare a dredging station with a bowl of cornstarch and a bowl of beaten eggs. Dip each piece of chicken first into the cornstarch, shaking off any excess, then into the beaten egg.
-
Place the coated chicken pieces into the hot oil in batches to avoid overcrowding the pan. Cook for about 1-2 minutes per side, until golden brown and a crust has formed. Transfer the cooked chicken to a 9×13 inch baking dish. Repeat with all remaining chicken, adding more oil to the skillet if needed and adjusting heat to prevent burning.
-
Add the diced onion and green pepper to the now-empty skillet (with a little more oil if necessary). Cook until softened, approximately 3-5 minutes. Sprinkle the softened vegetables over the seared chicken in the baking dish.
-
Pour the previously mixed sauce evenly over the chicken and vegetables. Ensure all chicken pieces are well coated. Bake for 30-35 minutes, or until the chicken is cooked through (internal temperature reaches 165°F / 74°C) and the sauce is bubbly and slightly thickened. Serve immediately over steamed jasmine rice. Enjoy your flavorful homemade sticky chicken!
Notes
- Season the chicken with salt and pepper BEFORE dredging it in the egg/cornstarch so each piece is flavorful.
- Cut the chicken evenly. Try to cut the chicken into the same size pieces as much as you can so it bakes evenly.
- Shake off the excess cornstarch after dredging. A light coating of cornstarch is what you’re going for!
- This chicken is supposed to be sticky, not necessarily crispy. Don’t be alarmed when the chicken coating is sticky after it’s baked in the sauce. The chicken isn’t deep-fried like you would for crispy chicken – so it’s supposed to be this way.
- Serve this over jasmine rice. I like to make rice in my instant pot! I usually rinse 2 cups of rice, then add it to the instant pot with 2 cups of water and a pinch of salt. Cook on high pressure for 3 minutes, then natural release for 10 minutes, and you’ll have perfect fluffy rice.