
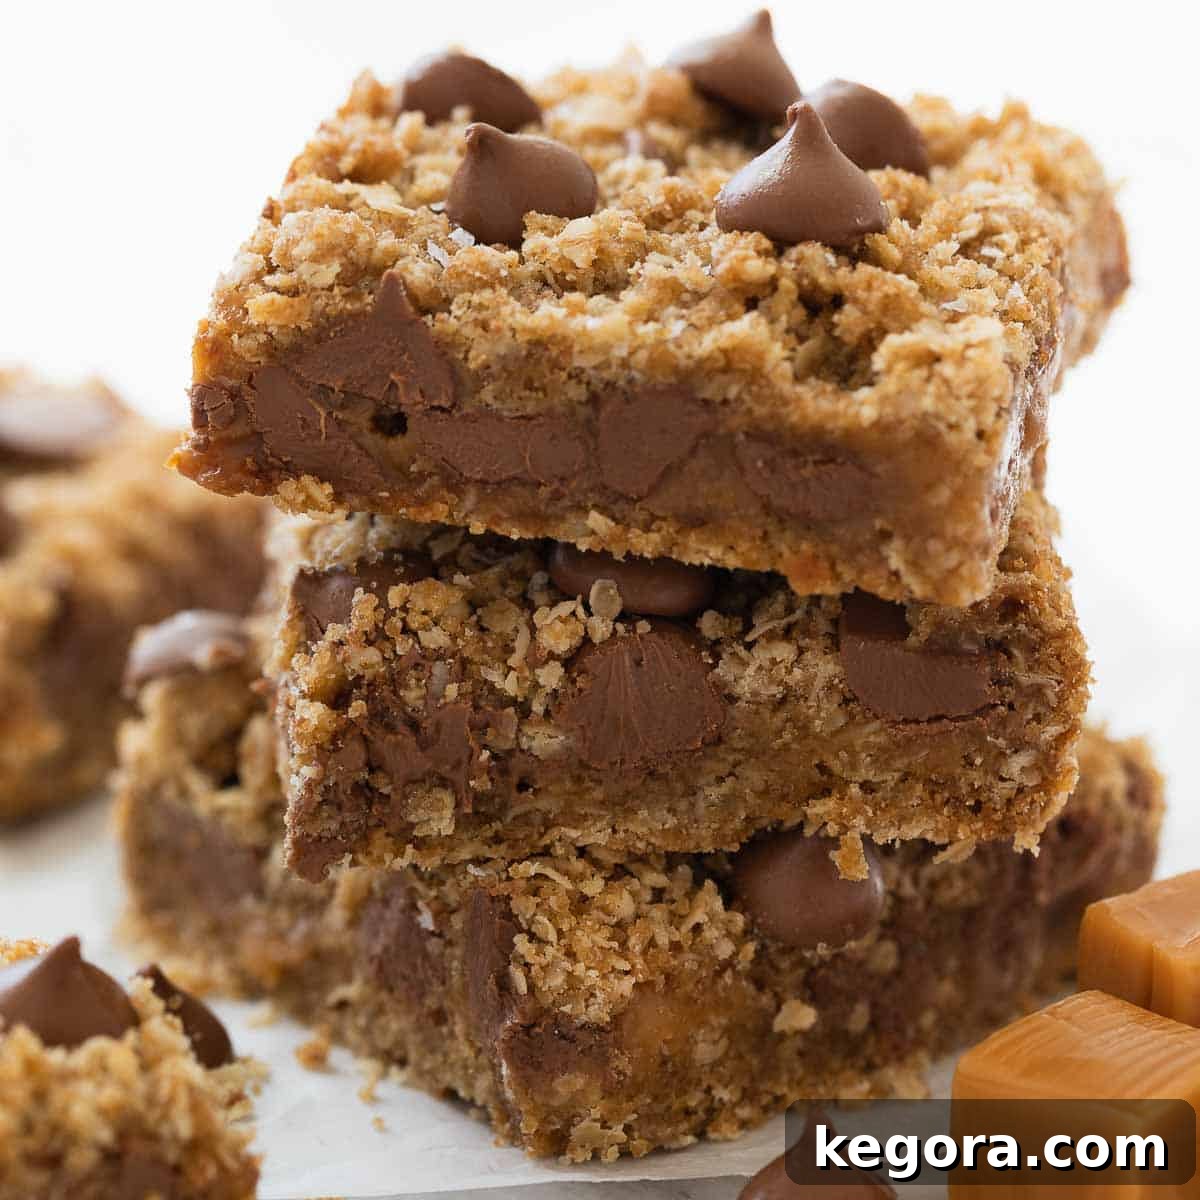
Welcome to a world of irresistible indulgence, where gluten-free goodness meets the classic pairing of chocolate and caramel. These decadent Gluten-Free Chocolate Caramel Oatmeal Bars, often affectionately known as “Caramelitas,” are more than just a dessert; they are a delightful experience designed to bring joy to any gathering. With a chewy, crumbly oat base, a luscious layer of melted caramel, and rich chocolate, these bars are poised to become your new go-to recipe for potlucks, parties, or simply a comforting treat at home.
If you’re a fan of the timeless combination found in gluten-free oatmeal chocolate chip cookies and crave the buttery sweetness of caramel, then this easy-to-follow, gluten-free dessert recipe is tailor-made for you. What makes these bars even more versatile is the option to easily adapt them to be dairy-free, ensuring everyone can enjoy a bite of this heavenly creation. Prepare yourself for a baking adventure that promises rich flavors and satisfying textures in every bite.
A Timeless Treat: The Story Behind These Caramel Oatmeal Bars
Growing up, the holiday season always held a special place in my heart, largely due to the tradition my Mom upheld. Every year, she would lovingly prepare an assortment of our favorite homemade holiday treats, meticulously arranging them on beautiful plates to share with our neighbors. Among the many festive delights, the Chocolate Caramel Oatmeal Bars—our very own “Caramelitas”—were always the first to disappear. The anticipation of their arrival was almost as sweet as the bars themselves, a memory cherished to this day.
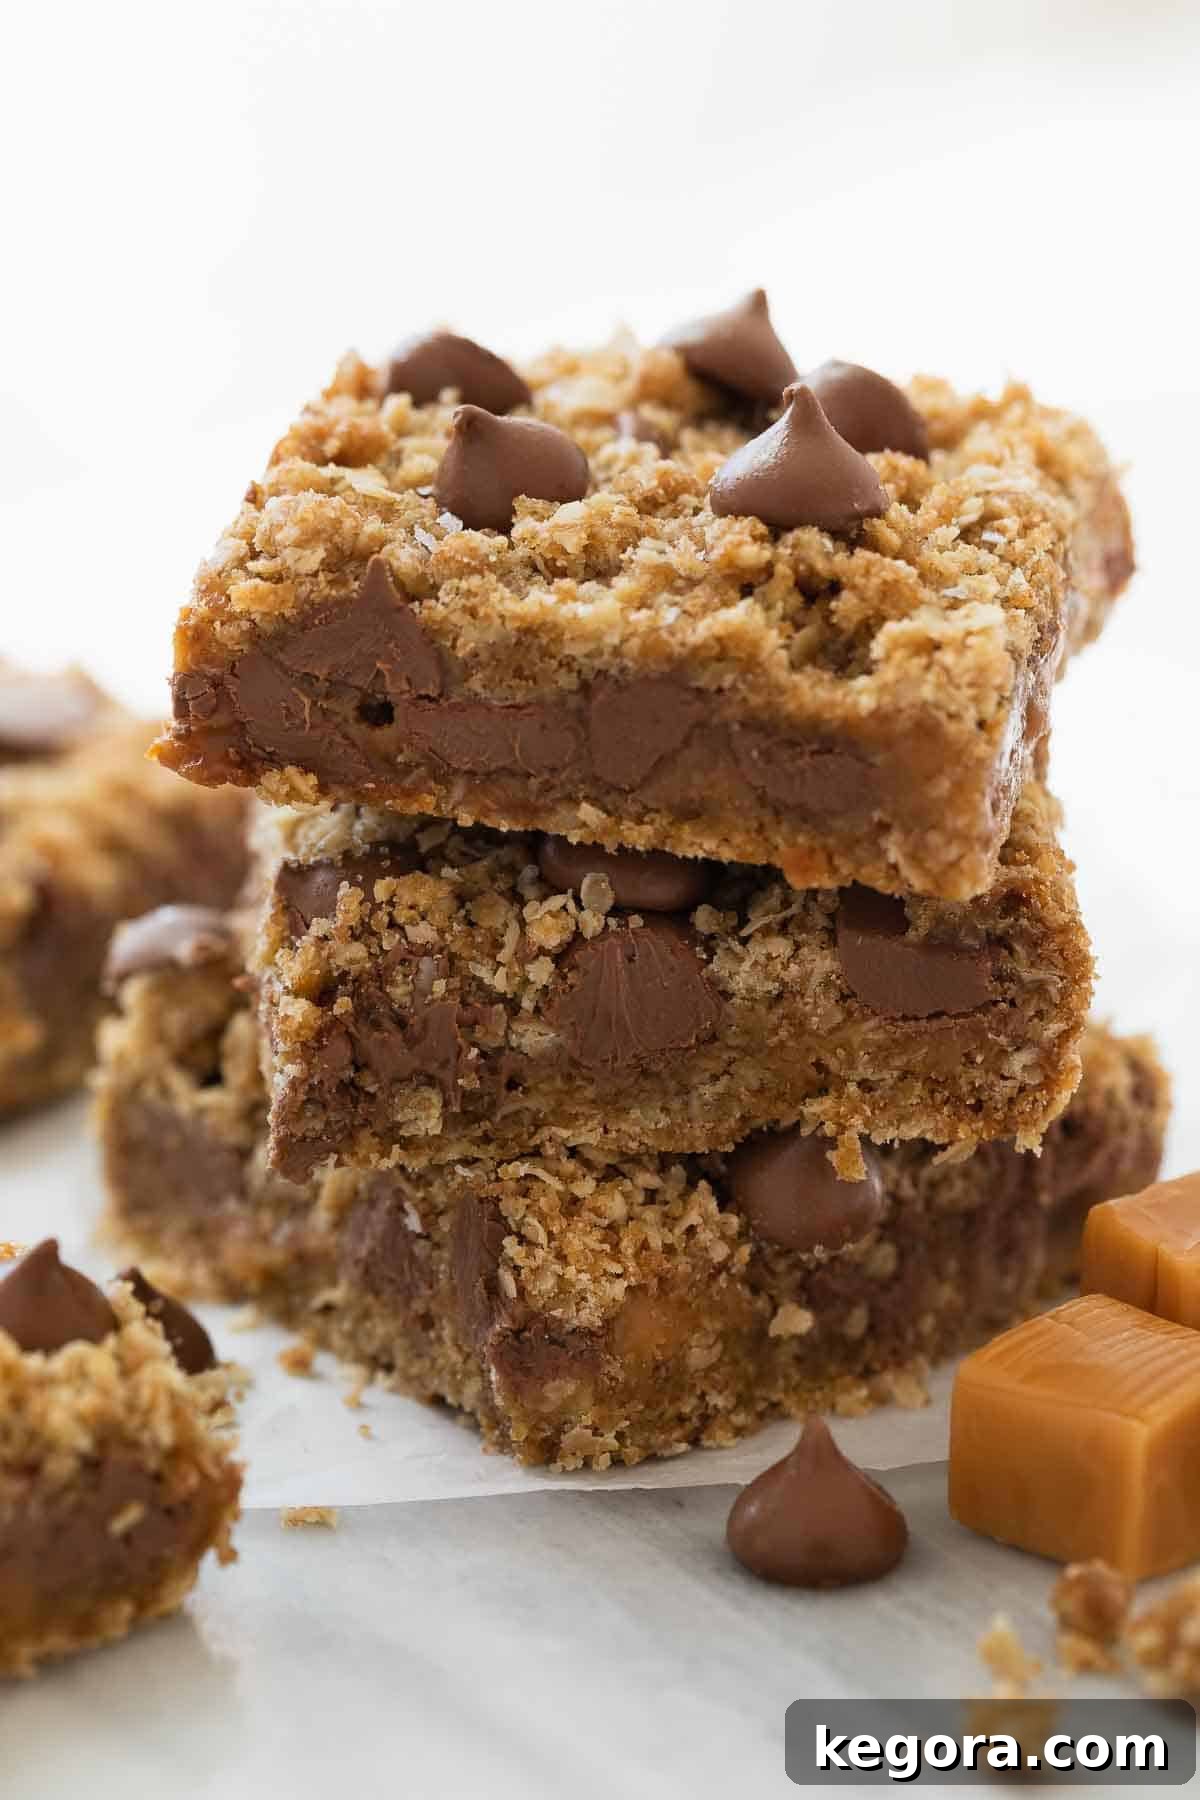
There’s something truly magical about the interplay of textures and flavors in these oatmeal bars. The hearty chewiness of the oats, the melt-in-your-mouth richness of chocolate, the warm, nutty notes of pecans (if you choose to include them), all bound together by a gooey, golden layer of caramel. This symphony of ingredients creates a truly decadent experience that tastes like pure comfort and joy.
Each bar is a masterpiece of layering. You start with a tender, crumbly crust made from the wholesome oat mixture, providing a delightful foundation. This is then generously topped with a glorious, soft, melted caramel and chocolate layer that oozes with flavor. Finally, another sprinkle of the oat mixture forms a crisp, golden-brown top. The optional chopped pecans add an extra dimension of delicious crunch, elevating these bars from merely good to absolutely unforgettable. Truly, what more could one desire from a perfect cookie bar?
Beyond their incredible taste, these gluten-free oatmeal bars offer a fantastic solution for those with dietary restrictions without compromising on flavor or texture. They are incredibly satisfying and ensure that everyone at your table can indulge in a classic treat.
Exploring More Gluten-Free Dessert Creations
If you’re looking to expand your repertoire of delicious gluten-free desserts, be sure to explore some of our other cherished recipes. You might love these light and airy gluten-free rice krispies treats, the buttery perfection of gluten-free shortbread cookies, or the delightful crunch of gluten-free chocolate chip biscotti.
For more layered bar experiences, these gluten-free 7 layer bars offer a medley of flavors, while our healthy peanut butter bars provide a no-bake alternative. And for fruit lovers, these vibrant gluten-free raspberry crumb bars are a must-try. Each recipe is crafted to deliver maximum flavor and enjoyment, ensuring your gluten-free baking is always a success.
How to Master Gluten-Free Chocolate Caramel Oatmeal Bars
Crafting these irresistible gluten-free oatmeal bars is a straightforward and rewarding process. The beauty of this recipe lies in its simplicity and the ability to achieve professional-tasting results with minimal effort. Let’s walk through the steps to create these delightful “Caramelitas.”
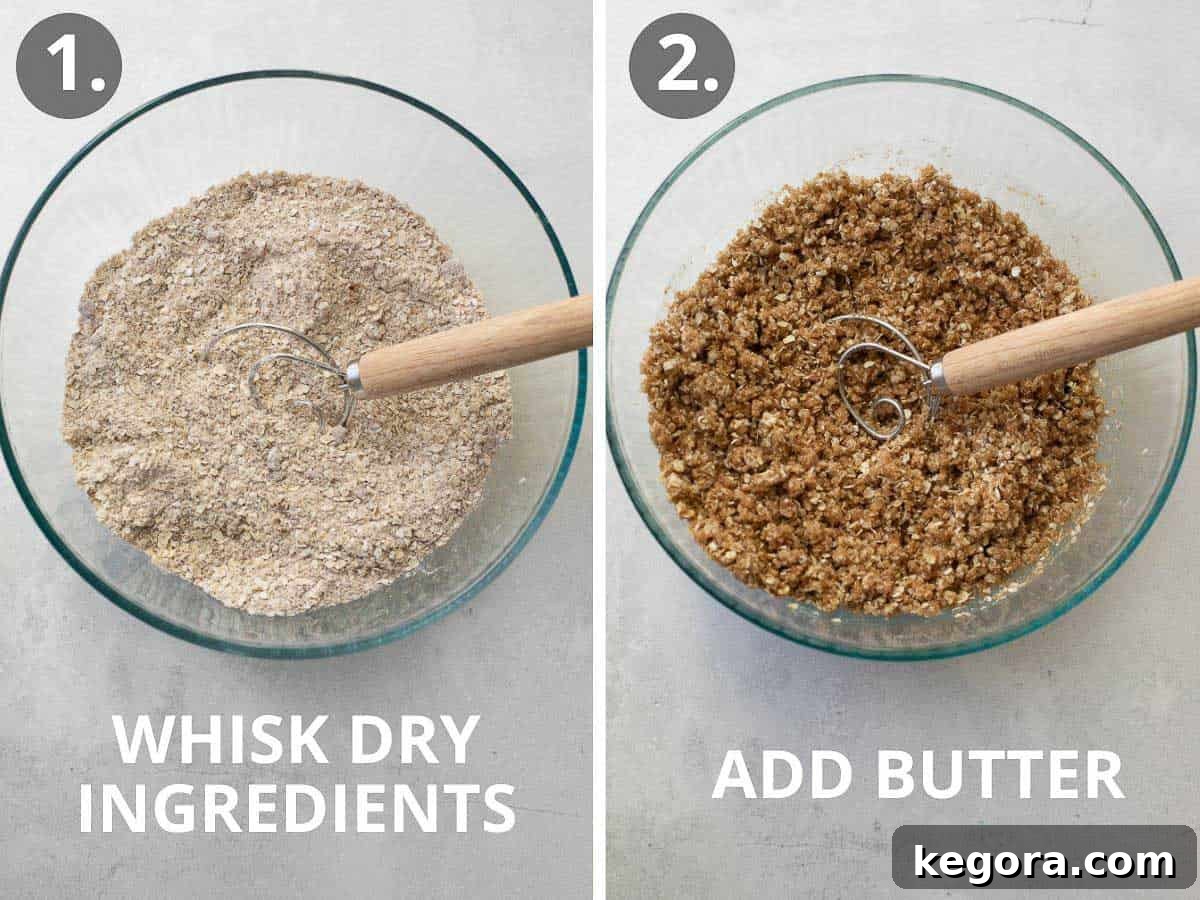
The first step involves preparing the oat mixture, which forms both the base and the crumbly topping. In a spacious mixing bowl, combine the gluten-free quick oats, your preferred 1:1 gluten-free baking flour blend, light brown sugar, baking soda, and a pinch of salt. Whisk these dry ingredients thoroughly to ensure they are well combined and evenly distributed. This step is crucial for achieving consistent flavor and texture throughout your bars. Once the dry ingredients are harmonized, introduce the melted butter. Stir the mixture until it comes together in a deliciously crumbly texture, reminiscent of a perfect cookie dough.
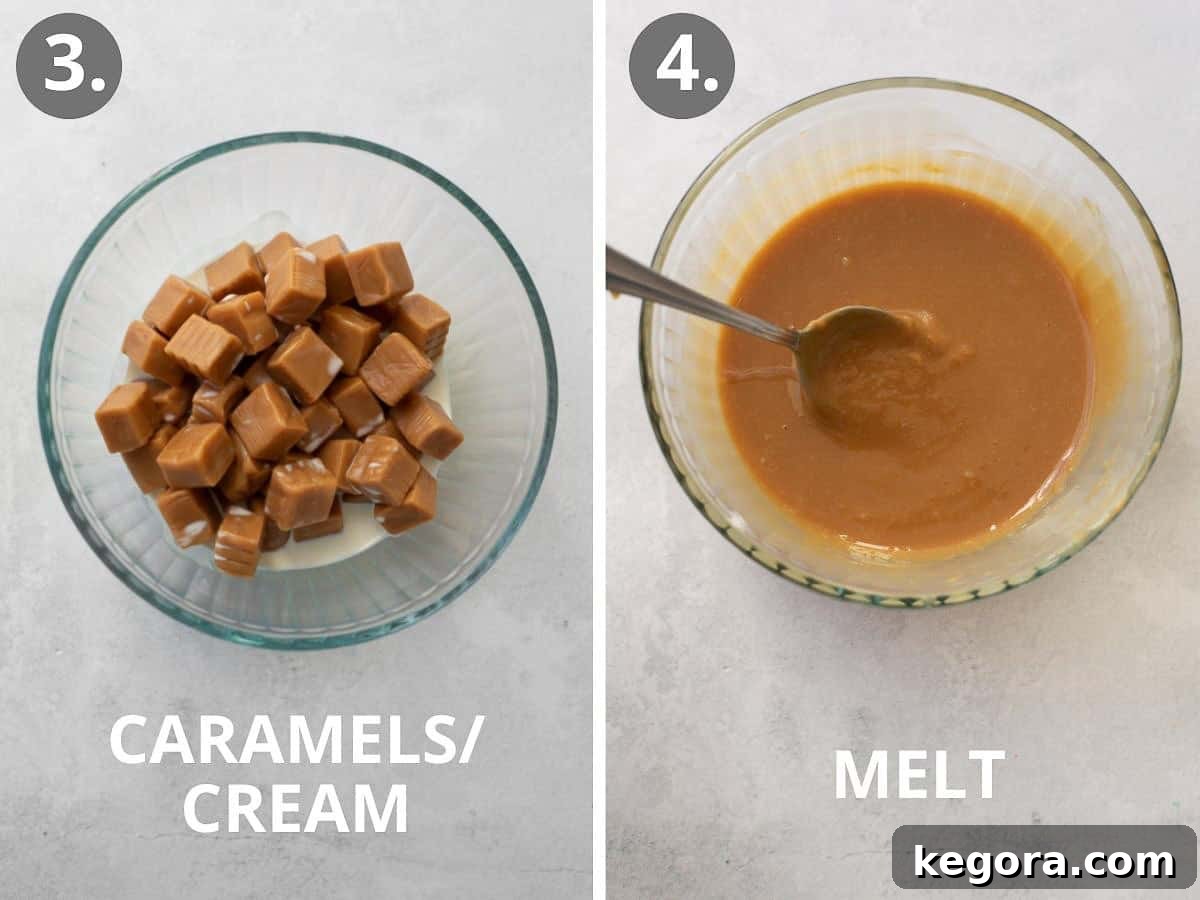
Next, it’s time to create that irresistible gooey caramel layer. In a separate, microwave-safe bowl, combine the soft caramel candies (ensure they are unwrapped!) and heavy cream. For a convenient alternative, you could also use a high-quality caramel syrup, though traditional candies yield a richer, chewier texture. Microwave the mixture on 50% power for about 3-4 minutes, stirring diligently every minute. This gentle heating method ensures the caramel melts smoothly without scorching, resulting in a perfectly pourable, luscious consistency.
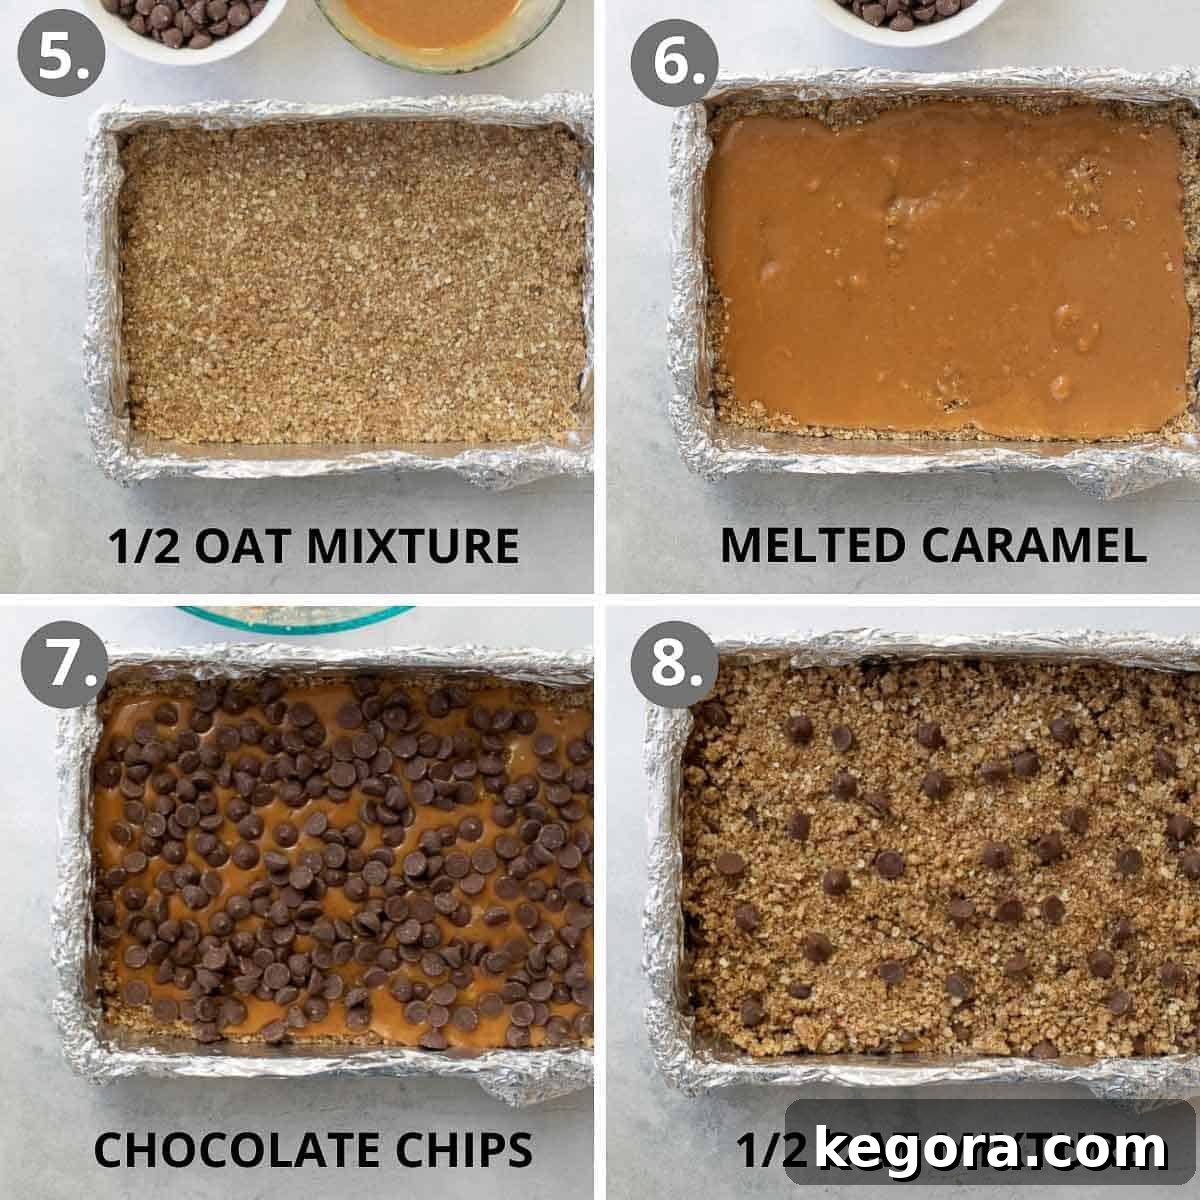
Assembly is where the magic truly happens! Begin by pressing half of your prepared oat mixture firmly into the bottom of your greased 9×13 inch baking pan. This forms the foundational crust of your bars. Once you have an even layer, carefully pour the warm, smooth caramel mixture over the crust, spreading it gently to cover completely. Then, generously sprinkle chocolate chips over the caramel. If you’re using them, now is also the time to add your chopped pecans for an extra layer of flavor and crunch. Finally, crumble the remaining half of the oat mixture evenly over the chocolate and caramel, creating the top crust. A few extra chocolate chips on top before baking will make them even more appealing.
Bake these beauties until the top is golden brown and the caramel peeks through with a delightful bubbly shimmer. The aroma filling your kitchen will be absolutely heavenly! The key to perfectly neat slices and a well-set caramel is patience. It’s crucial to allow the gluten-free oatmeal bars to cool completely before attempting to slice them. For quicker setting, you can place the pan in the refrigerator for about an hour. This will firm up the caramel and chocolate, ensuring clean, picture-perfect cuts every time. Enjoy your homemade gluten-free chocolate caramel oatmeal bars!
Make Them Dairy-Free: Delicious Alternatives
Adapting these indulgent gluten-free oatmeal bars to be dairy-free is simpler than you might think, allowing even more people to savor this delightful treat. The main components to consider for substitution are the butter, chocolate chips, and caramel.
For the butter, a high-quality vegan butter substitute, such as Earth Balance buttery sticks, works exceptionally well. These vegan butters mimic the texture and flavor of traditional butter, ensuring your oat crust remains rich and tender. When it comes to chocolate, choose dairy-free chocolate chips, which are widely available in most grocery stores and specialty shops. Finally, for the caramel layer, you have a few excellent options. You can use a store-bought dairy-free caramel sauce or, for an even better homemade touch, whip up your own easy dairy-free caramel sauce using coconut cream or another plant-based milk. These simple swaps ensure your gluten-free oatmeal bars are just as luscious and satisfying without any dairy.
Gluten-Free Oatmeal Bar Storage and Freezing Tips
Ensuring your delicious gluten-free chocolate caramel oatmeal bars stay fresh and flavorful is key to enjoying them for days or even weeks. Proper storage also helps maintain their delightful texture.
To Store
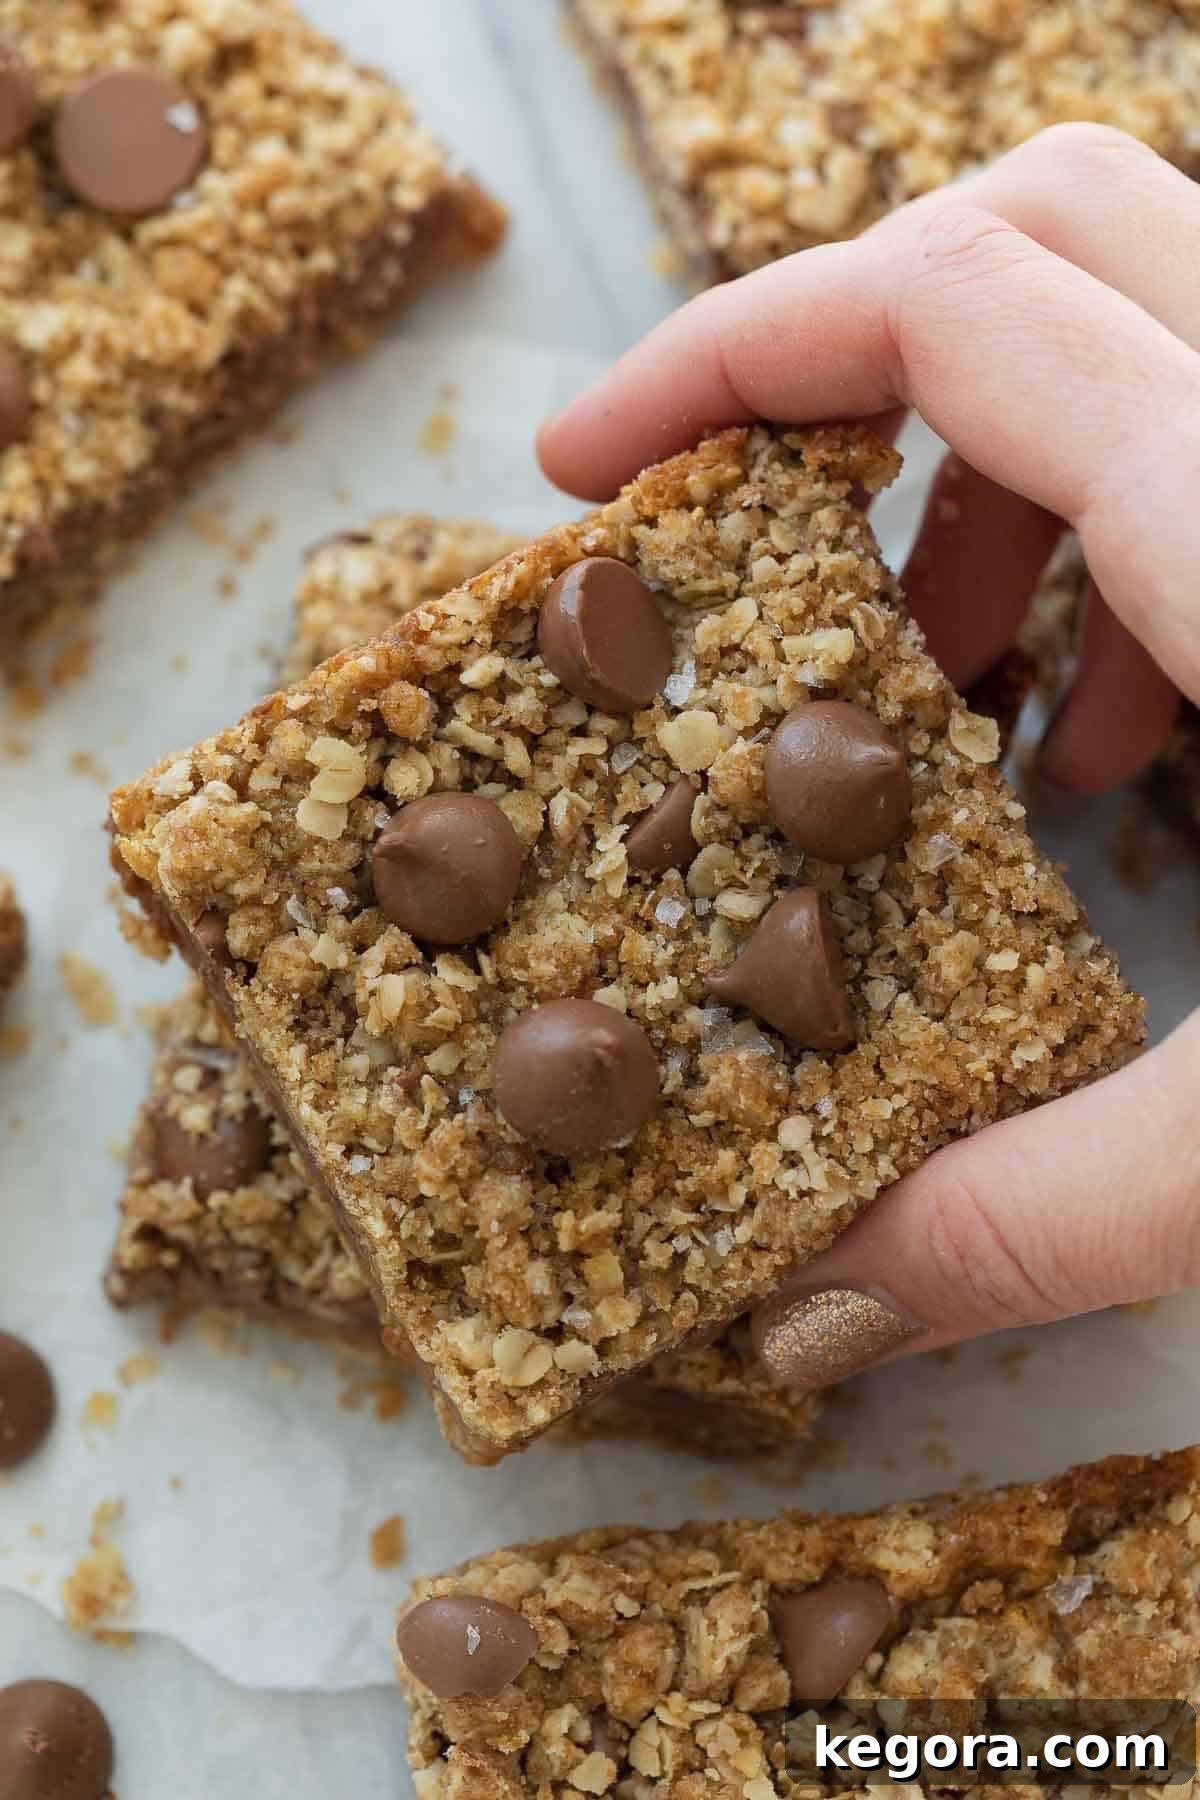
Once fully cooled, these bars will maintain their best quality when stored in an airtight container or tightly covered at room temperature. They will remain wonderfully fresh and delicious for up to 3 days. For extended freshness, especially in warmer climates, you might consider refrigerating them, which can also help the caramel stay firmer. Just bring them back to room temperature for a few minutes before serving to soften the caramel slightly.
To Freeze
These gluten-free oatmeal bars freeze beautifully, making them an excellent make-ahead dessert or a convenient treat for unexpected guests.
- You have the option to freeze the entire slab of bars. Simply ensure it’s completely cooled, then wrap it securely in multiple layers of plastic wrap followed by aluminum foil. This double layer protects against freezer burn.
- Alternatively, for easier portion control, cut the bars into individual slices (approximately 24). Wrap each slice individually in parchment paper, then place them in a large ziploc freezer bag. This prevents them from sticking together and makes it simple to grab just one or two when a craving strikes.
- For ultimate convenience, consider baking the bars directly in a disposable foil pan. Once cooled, you can simply cover the entire pan with foil and freeze.
Properly frozen, these gluten-free chocolate caramel oatmeal bars will keep well for 2-3 months. To enjoy, simply thaw them at room temperature or gently warm them in the microwave for a few seconds for that freshly baked feel.
More Delicious Gluten-Free Cookie Recipes to Explore
Discover More Gluten-Free Cookie Delights
Gluten-Free Peppermint Meltaways
Bake These 16 Gluten-Free Christmas Cookies Before the Holidays Hit Full Speed
Gluten-Free Chocolate Turtle Cookies
Gluten-Free Cadbury Snowball Cookies
Gluten-Free Shortbread
Gluten-Free Linzer Cookies
Gluten-Free White Chocolate Peppermint Pretzel Cookies
Gluten-Free Slice and Bake Cookies
We truly hope you adore this Gluten-Free Chocolate Caramel Oatmeal Bar recipe as much as our family does! If you try it, please consider leaving a comment and rating below. Your feedback means the world to us, and we’d love to hear about your baking success!
Gluten-Free Chocolate Caramel Oatmeal Bars
Erin Collins
20
25
45
24 bars
Gluten-free oatmeal cookie bars with a layer of melted caramel and rich chocolate. These decadent bars will become your new favorite thing to bake!
Comments
Ingredients
- 2 cups gluten-free quick oats
- 1 1/4 cups gluten-free 1:1 baking flour
- 1 1/2 cups light brown sugar
- 1 teaspoon baking soda
- 1/4 teaspoon salt
- 1 cup butter melted
- 2 1/2 cups chocolate chips
- 50 soft caramel candies unwrapped
- 1/2 cup heavy whipping cream
- 3/4 cup chopped pecans optional
Instructions
-
Preheat the oven to 350°F (175°C). Spray a 9×13 inch baking pan with cooking spray. For easier clean-up and removal, you can also line the pan with aluminum foil and then spray it with cooking spray.
-
In a large bowl, combine the gluten-free quick oats, gluten-free 1:1 baking flour, light brown sugar, baking soda, and salt. Whisk these dry ingredients together thoroughly. Add the melted butter and stir until the mixture becomes crumbly.
-
In a small, microwave-safe bowl, combine the unwrapped soft caramel candies and heavy cream. Microwave on 50% power for 3-4 minutes, stirring every minute or so, until the caramel is completely melted and smooth. Alternatively, you can melt the caramels and cream in a small saucepan over low heat, stirring constantly until smooth.
-
Take half of the oat mixture and press it firmly into the bottom of your prepared baking pan, creating an even layer for the base. Carefully pour the melted caramel mixture over this oat layer and gently smooth it out. Next, sprinkle 2 cups of the chocolate chips (reserving a few for the top if you like) and the chopped pecans (if using) evenly over the caramel. Finally, sprinkle the remaining oat mixture over the chocolate and caramel layer, then add any reserved chocolate chips to the top.
-
Bake for 20-25 minutes, or until the top crust is golden brown and the caramel mixture is bubbly around the edges. Once baked, remove the pan from the oven and allow the bars to cool completely before slicing. For perfectly clean slices and a well-set caramel, placing them in the refrigerator for 1-2 hours will speed up the setting process.
-
Once fully cooled and set, cut the large rectangle into individual bars using a sharp knife. Serve and enjoy these irresistible gluten-free treats!
Notes
Tip for Perfect Slices: For the cleanest, most attractive bars, it’s essential to wait until the gluten-free oatmeal bars are completely cool before attempting to slice them. This allows the caramel and chocolate layers to fully set, preventing sticky edges and ensuring neat cuts. If you’re short on time, placing the bars in the refrigerator for about an hour can significantly speed up the cooling and setting process.
Dairy-Free Adaptation: To make these gluten-free oatmeal bars suitable for a dairy-free diet, simply swap a few key ingredients. Use dairy-free chocolate chips, and choose a reliable dairy-free caramel sauce, such as our easy dairy-free caramel sauce. Additionally, substitute regular butter with a high-quality vegan butter alternative like Earth Balance buttery sticks. These simple changes ensure a delicious, dairy-free treat.
Storage Recommendations: Keep any leftover bars fresh by storing them in an airtight container or tightly wrapped at room temperature for up to 3 days. This method helps maintain their moistness and prevents them from drying out.
Freezing for Later Enjoyment: These bars are excellent for freezing. You can freeze the entire baked and cooled slab by wrapping it tightly in plastic wrap and then aluminum foil. Alternatively, cut the bars into individual portions (approx. 24 slices), wrap each slice in parchment paper to prevent sticking, and then store them in a large freezer-safe ziploc bag. For extra convenience, consider baking in a disposable foil pan, then simply cover the pan with foil for freezing. Frozen bars will remain fresh for 2-3 months. Thaw at room temperature or gently warm before serving.
Nutrition
Calories: 384kcal | Carbohydrates: 52g | Protein: 4g | Fat: 19g | Saturated Fat: 10g | Polyunsaturated Fat: 2g | Monounsaturated Fat: 5g | Trans Fat: 1g | Cholesterol: 31mg | Sodium: 208mg | Potassium: 130mg | Fiber: 2g | Sugar: 39g | Vitamin A: 362IU | Vitamin C: 1mg | Calcium: 76mg | Iron: 1mg