
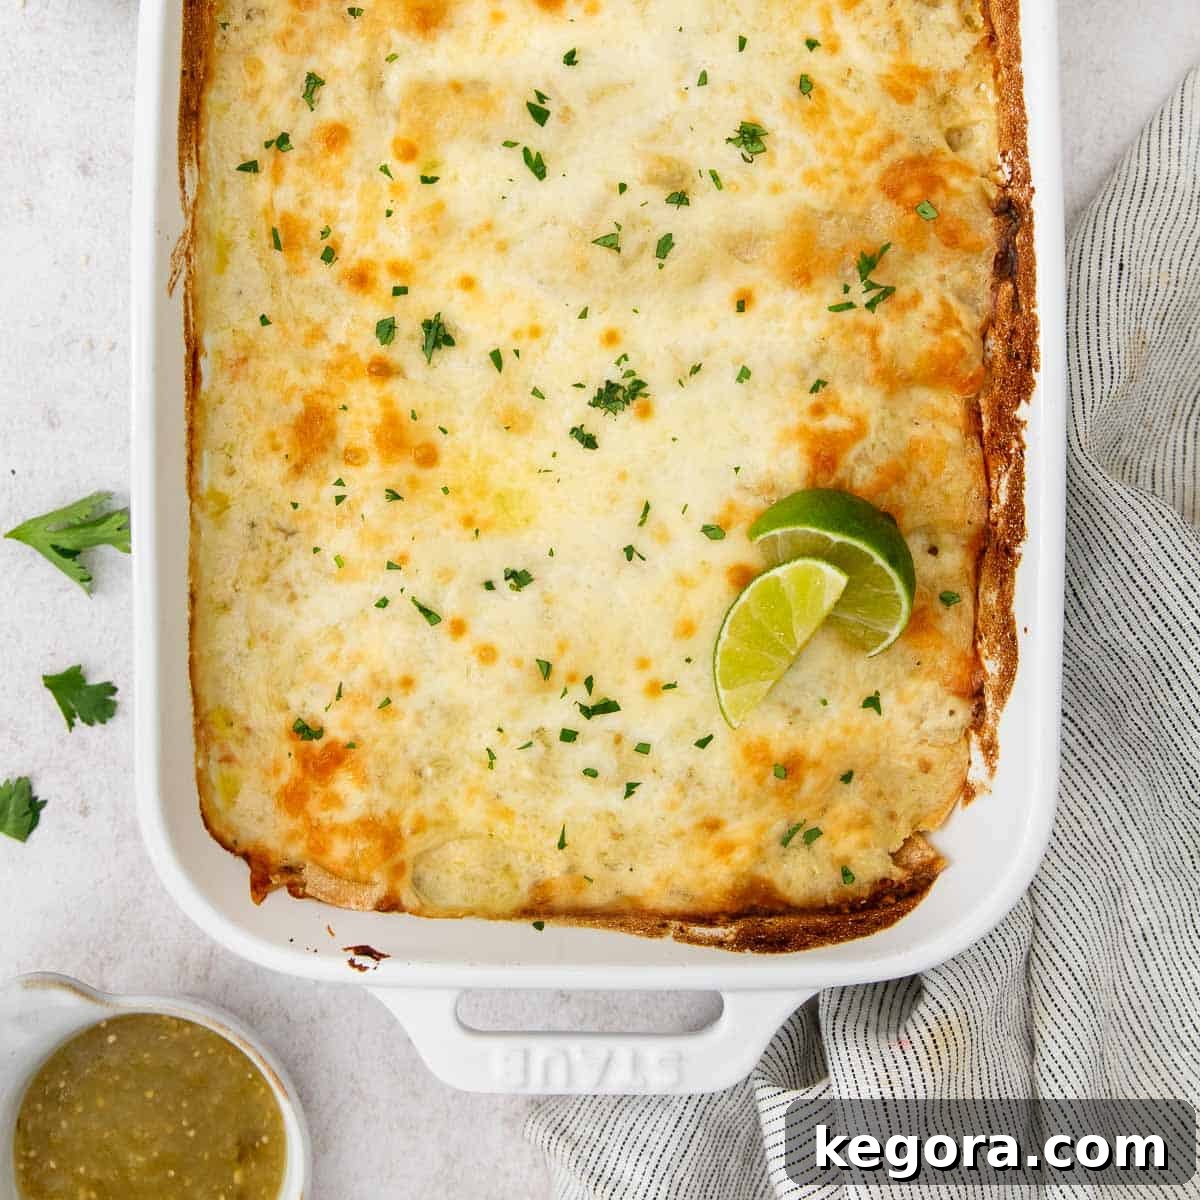
Irresistible Gluten-Free Green Chile Chicken Enchiladas: Your Ultimate Family Favorite!
Welcome to a culinary journey that promises to transform your weeknight dinners! These gluten-free green chile chicken enchiladas are a testament to how comforting and profoundly satisfying a meal can be, even with dietary considerations. Crafted with a rich, creamy sauce, tender shredded chicken, and a gentle kick from vibrant green chiles, this dish is a symphony of flavors that will delight every palate. Most importantly, it’s not just a recipe; it’s a beloved family tradition that always brings smiles to the table. Prepare to make this cheesy, easy, and incredibly flavorful enchilada casserole your new go-to!
Why You’ll Fall in Love with This Gluten-Free Enchilada Recipe
This recipe for classic green chile chicken enchiladas is truly a marvel. It offers all the traditional comfort and rich flavors you’d expect from a homemade Mexican-inspired dish, but with the added benefit of being entirely gluten-free. Here’s why it’s destined to become a staple in your kitchen:
- Effortlessly Delicious: Despite its impressive taste, this recipe is surprisingly straightforward. It delivers that homemade flavor as if you’ve been slaving away in the kitchen for hours, but in reality, it comes together with remarkable ease. It’s perfect for both seasoned cooks and those new to enchilada making.
- Ultimate Comfort Food: There’s nothing quite like a warm, cheesy casserole to soothe the soul. These enchiladas are the epitome of comfort food, with their creamy texture, savory chicken, and satisfying blend of spices. Each bite is a warm hug.
- Perfect for Meal Prep: One of the best features of this recipe is its make-ahead potential. You can assemble the entire dish in advance, cover it, and simply pop it into the oven when you’re ready to bake. This makes it an ideal choice for busy weekdays, entertaining guests, or even bringing to a potluck.
- Naturally Gluten-Free & Flavorful: We’ve specifically designed this recipe to be deliciously gluten-free without compromising on flavor or texture. Using corn tortillas and a gluten-free flour blend for the sauce ensures everyone can enjoy this fantastic meal.
- Versatile & Customizable: While the recipe is perfect as is, it also allows for easy customization. Adjust the spice level, swap cheeses, or add extra vegetables to make it truly your own.
Top Tips for Perfect Gluten-Free Green Chile Chicken Enchiladas
Achieving restaurant-quality enchiladas at home is easier than you think, especially with a few insider tips:
- Softening Corn Tortillas: Corn tortillas are notoriously prone to breaking when cold. To prevent this, always warm them thoroughly before filling and rolling. A simple trick is to stack them on a plate, cover them with a damp paper towel, and microwave for 15-30 seconds until they are pliable and soft. Alternatively, you can quickly dip each tortilla in warm oil or chicken broth for a few seconds before filling.
- Room Temperature Cream Cheese: For a truly creamy and lump-free filling, ensure your cream cheese is at room temperature. This allows it to blend seamlessly with the shredded chicken and other ingredients, creating a smooth and cohesive mixture that spreads easily.
- The Secret to a Silky Sauce: When making the green chile sauce, whisk continuously, especially when adding the flour and liquids. This prevents lumps and ensures a smooth, velvety consistency. Removing the sauce from the heat before stirring in the salsa verde and sour cream helps prevent curdling and preserves their fresh flavors.
- Shredded Chicken Shortcuts: Save time by using a pre-cooked rotisserie chicken. It’s perfectly seasoned and shreds easily, making meal prep a breeze. You can also boil and shred your own chicken breasts or thighs if preferred.
- Don’t Skimp on the Cheese: A generous amount of Monterey Jack cheese both in the filling and sprinkled on top is key to that irresistible cheesy goodness. For extra flavor, consider a blend of Monterey Jack and a sharp cheddar or pepper jack.
For more delicious Mexican-style dishes that are also gluten-free, you might also enjoy these classic gluten-free enchiladas, easy gluten-free tacos, skillet chicken with Mexican green rice, or try this incredible chicken fajita marinade for your next Tex-Mex feast!
xoxo erin
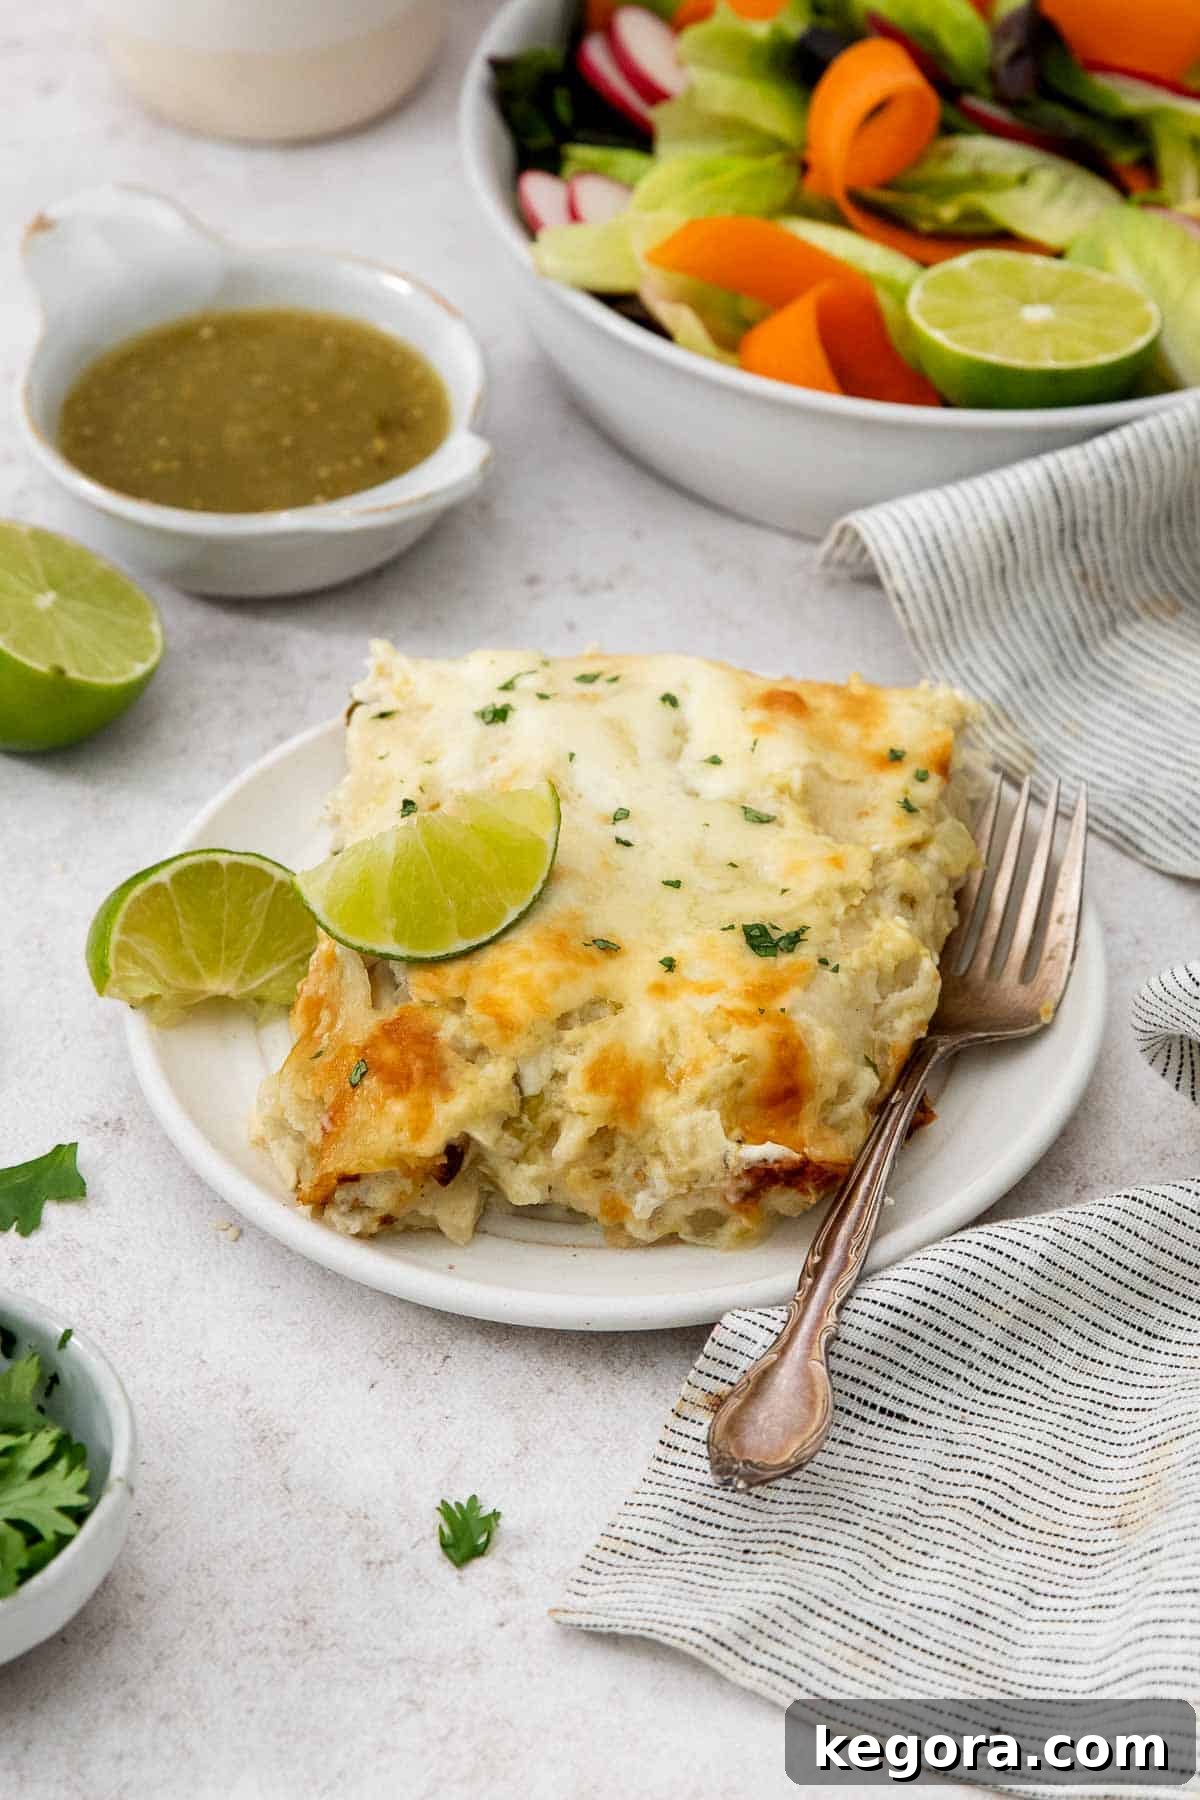
Essential Ingredients for Your Green Chile Chicken Enchiladas
Creating these heavenly gluten-free green chile chicken enchiladas starts with selecting the right ingredients. Each component plays a vital role in building the dish’s rich, complex flavors and creamy texture. Here are a few notes on some of the key players you’ll need. For the exact measurements and a complete list, please refer to the detailed recipe card below.
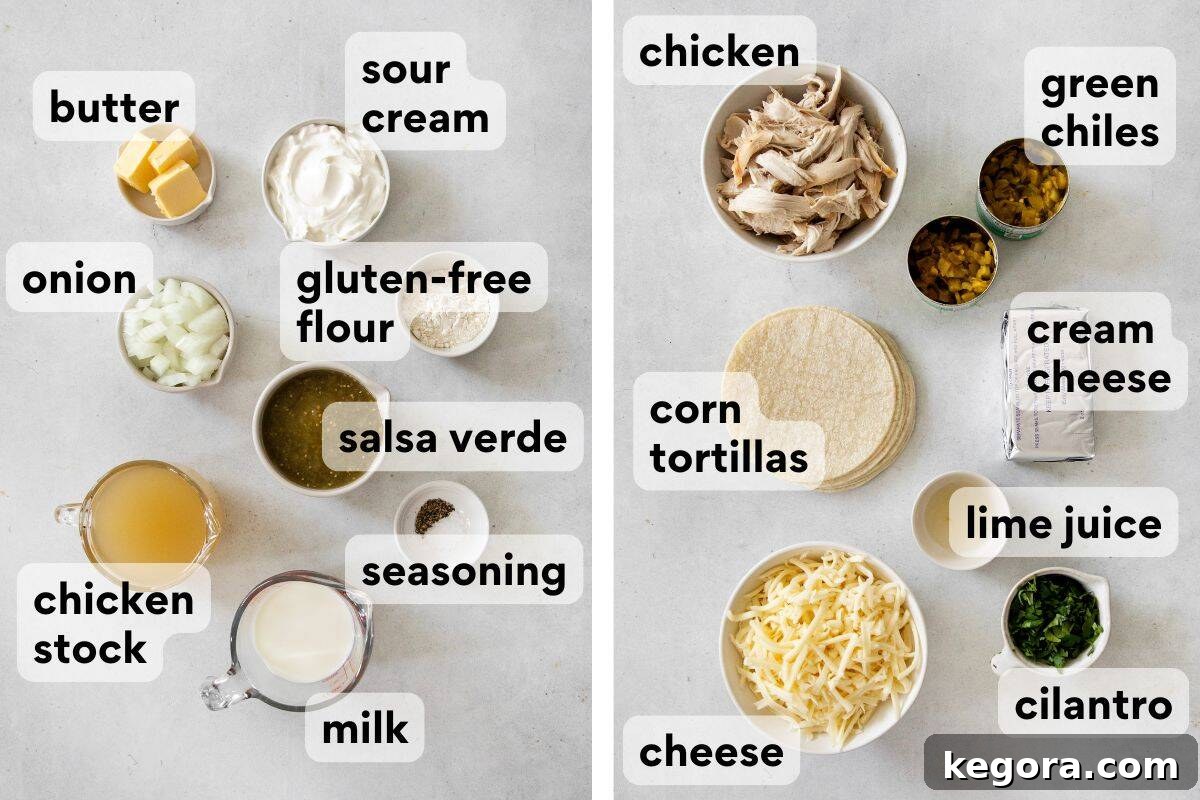
- Gluten-Free Flour: This is crucial for thickening our creamy green chile sauce without any gluten. You can use any high-quality gluten-free all-purpose flour blend you prefer. My personal favorite, and one that consistently yields excellent results, is King Arthur Gluten-Free All-Purpose Flour. Its fine texture helps create a smooth sauce that clings beautifully to the enchiladas.
- Cream Cheese: The unsung hero of the enchilada filling! Cream cheese contributes significantly to the dish’s signature creamy, rich texture and helps bind the chicken and chiles together. It’s absolutely essential that your cream cheese is at room temperature before you start. This ensures it mixes effortlessly with the shredded chicken, preventing lumps and creating a perfectly cohesive and spreadable filling.
- Salsa Verde & Green Chiles: These two ingredients are the heart and soul of this enchilada recipe, defining its distinct Mexican-inspired flavor profile.
- Salsa Verde: Provides a tangy, bright, and subtly spicy base for the sauce. It infuses the entire dish with a fresh, zesty flavor that is characteristic of authentic green enchiladas. Choose a mild or medium salsa verde based on your spice preference.
- Canned Green Chiles: These add a mild, smoky heat and depth to the chicken filling. They complement the salsa verde perfectly, balancing the flavors and bringing an extra layer of authenticity without overwhelming the dish with excessive spice.
- Sour Cream: Used in the sauce, sour cream plays a pivotal role in lightening the overall richness while simultaneously creating an incredibly velvety and luxurious finish. It adds a delightful tang and helps achieve that perfectly balanced, creamy consistency that makes this sauce so addictive. For a slightly lighter option, Greek yogurt can be used as a substitute, but sour cream offers the most authentic flavor and texture.
- Shredded Chicken: The star protein of our enchiladas. You can use leftover roasted chicken, boil and shred chicken breasts or thighs, or take a convenient shortcut with a store-bought rotisserie chicken. Aim for 3-4 cups of shredded chicken for a hearty filling.
- Monterey Jack Cheese: This cheese is a fantastic choice for enchiladas due to its excellent melting properties and mild, creamy flavor. It creates that irresistible gooey, golden-brown topping. Freshly shredded cheese always melts better than pre-shredded varieties, so consider grating your own for the best results.
- Corn Tortillas: The foundation of any great enchilada. Corn tortillas are naturally gluten-free and lend an authentic flavor. Remember our top tip: warm them thoroughly to make them pliable and prevent tearing during rolling.
How to Make Gluten-Free Green Chile Chicken Enchiladas: A Step-by-Step Guide
Creating these delectable gluten-free green chile chicken enchiladas is a straightforward process that yields incredibly rewarding results. We’ve broken it down into simple, manageable steps to ensure your success. You’ll be amazed at how easily this impressive dish comes together! For full, detailed instructions and precise measurements, remember you can jump directly to the recipe card below!
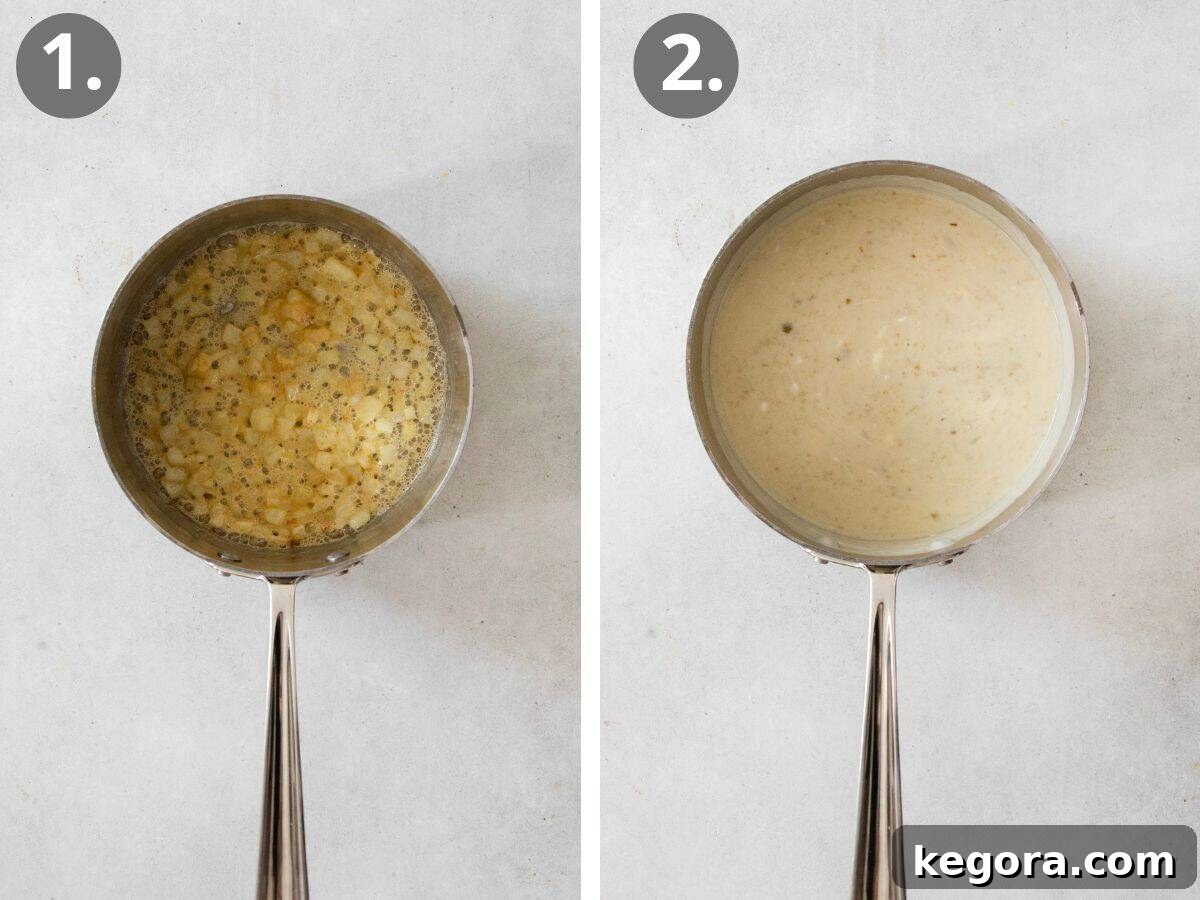
1. Craft the Creamy Green Chile Sauce
Begin by melting butter in a medium saucepan over medium heat. Add finely diced onions and sauté them gently until they become beautifully softened and translucent, a process that usually takes about 5 to 7 minutes. This step builds a foundational flavor for our sauce. Next, sprinkle in your gluten-free flour, cooking and stirring constantly for another 1 to 2 minutes to create a roux—this will be the thickening agent for your sauce. Slowly and steadily whisk in the chicken stock and milk, ensuring a smooth mixture. Season with kosher salt and black pepper to taste. Bring this mixture to a gentle simmer, whisking frequently for 3 to 4 minutes, allowing it to thicken slightly. Once it reaches the desired consistency, remove the saucepan from the heat. This is a critical step: now, whisk in the salsa verde and sour cream. Removing from heat prevents the sour cream from curdling and helps maintain the vibrant flavor of the salsa. The result is a wonderfully delicious, velvety green chile sauce!
2. Prepare the Flavorful Chicken Filling
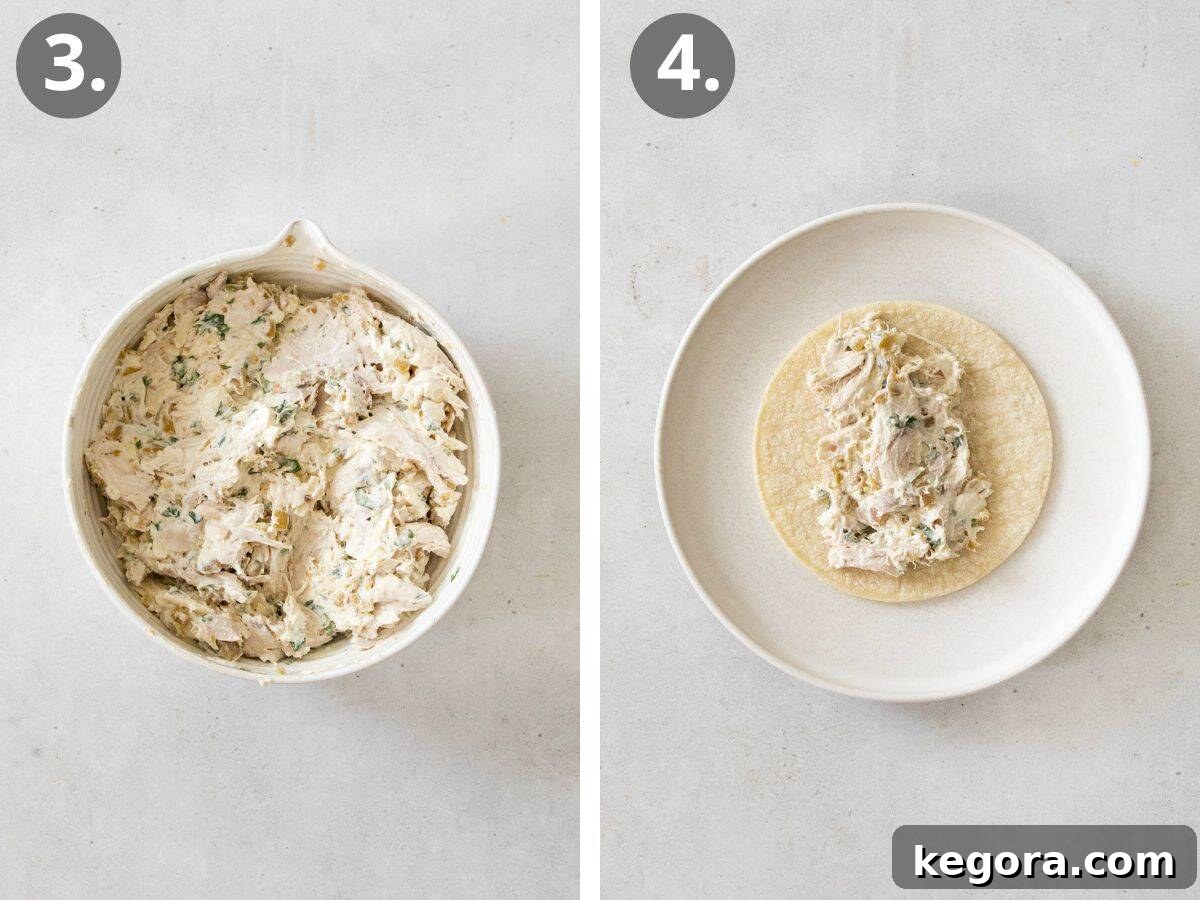
In a large mixing bowl, combine all the ingredients for your enchilada filling: the pre-shredded chicken, drained green chiles, softened cream cheese (at room temperature is key!), fresh chopped cilantro, and a squeeze of fresh lime juice. Using your hands or a sturdy spoon, mix everything together thoroughly until all components are evenly combined. The cream cheese will help bind the mixture and create a creamy texture, while the cilantro and lime juice add a burst of freshness that brightens the entire filling.
3. Fill and Roll the Enchiladas
The secret to working with corn tortillas without them cracking is proper warming. Place a stack of 2-3 tortillas on a plate, cover them with a damp paper towel, and microwave for 15-30 seconds, or until they are warm and flexible. Once softened, lay a tortilla flat and spoon about ½ cup of the delicious chicken mixture down the center. Roll the tortilla tightly and carefully place it seam-side down in a lightly greased 9×13-inch baking dish. Continue this process with the remaining tortillas and filling until your baking dish is full and all the filling is used up. Arrange them snugly in a single layer.
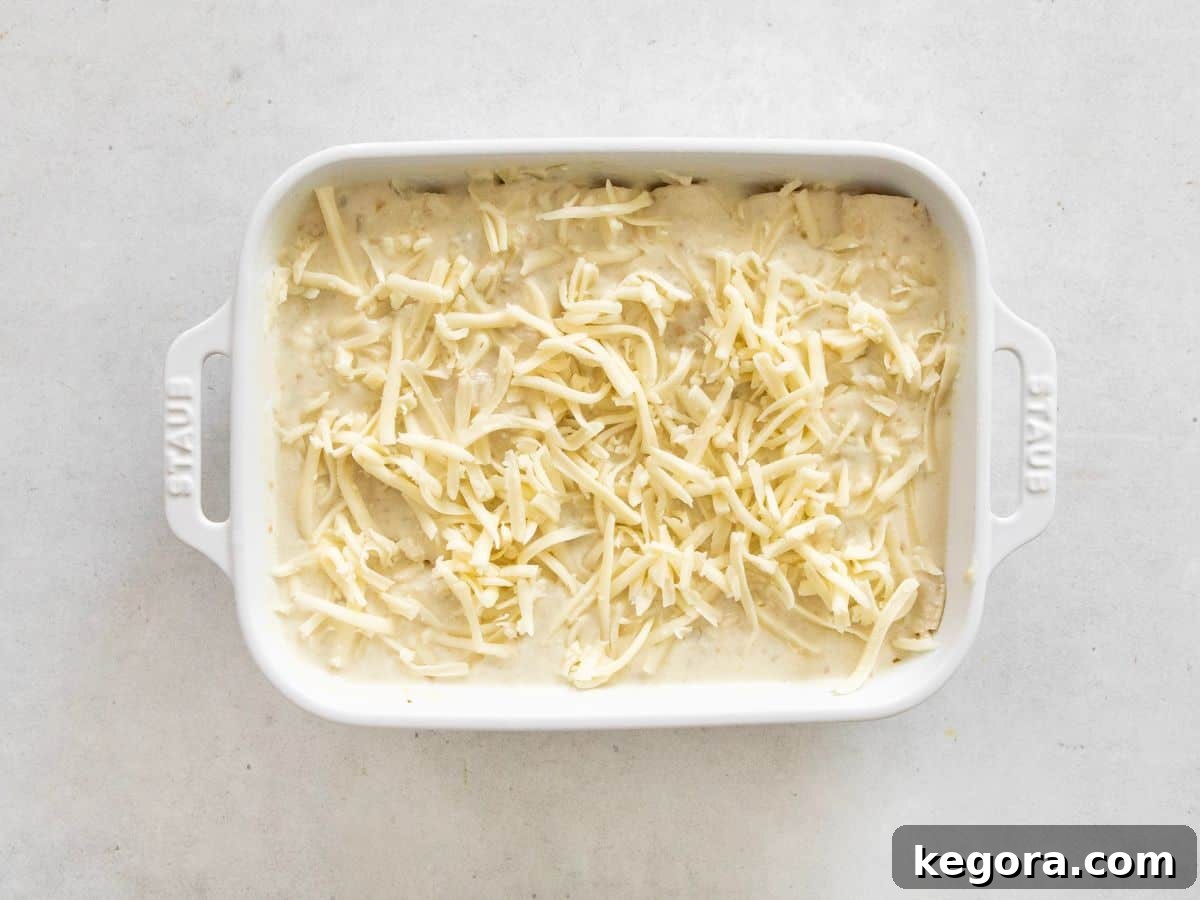
4. Bake to Golden Perfection & Serve
Once all your enchiladas are neatly arranged in the baking dish, evenly pour the prepared green chile sauce over them, ensuring every enchilada is generously coated. Next, sprinkle a full cup of shredded Monterey Jack cheese over the top. Transfer the dish to a preheated oven at 375°F (190°C) and bake for approximately 25 to 30 minutes, or until the enchiladas are bubbling merrily and the cheese has melted into a beautiful, light golden-brown crust around the edges. Allow the dish to cool for just a few minutes after baking; this resting period helps the enchiladas set and prevents them from falling apart when served. For an extra touch of freshness and vibrant color, I love to sprinkle on a little extra chopped fresh cilantro just before serving. Enjoy this comforting and utterly delicious meal!
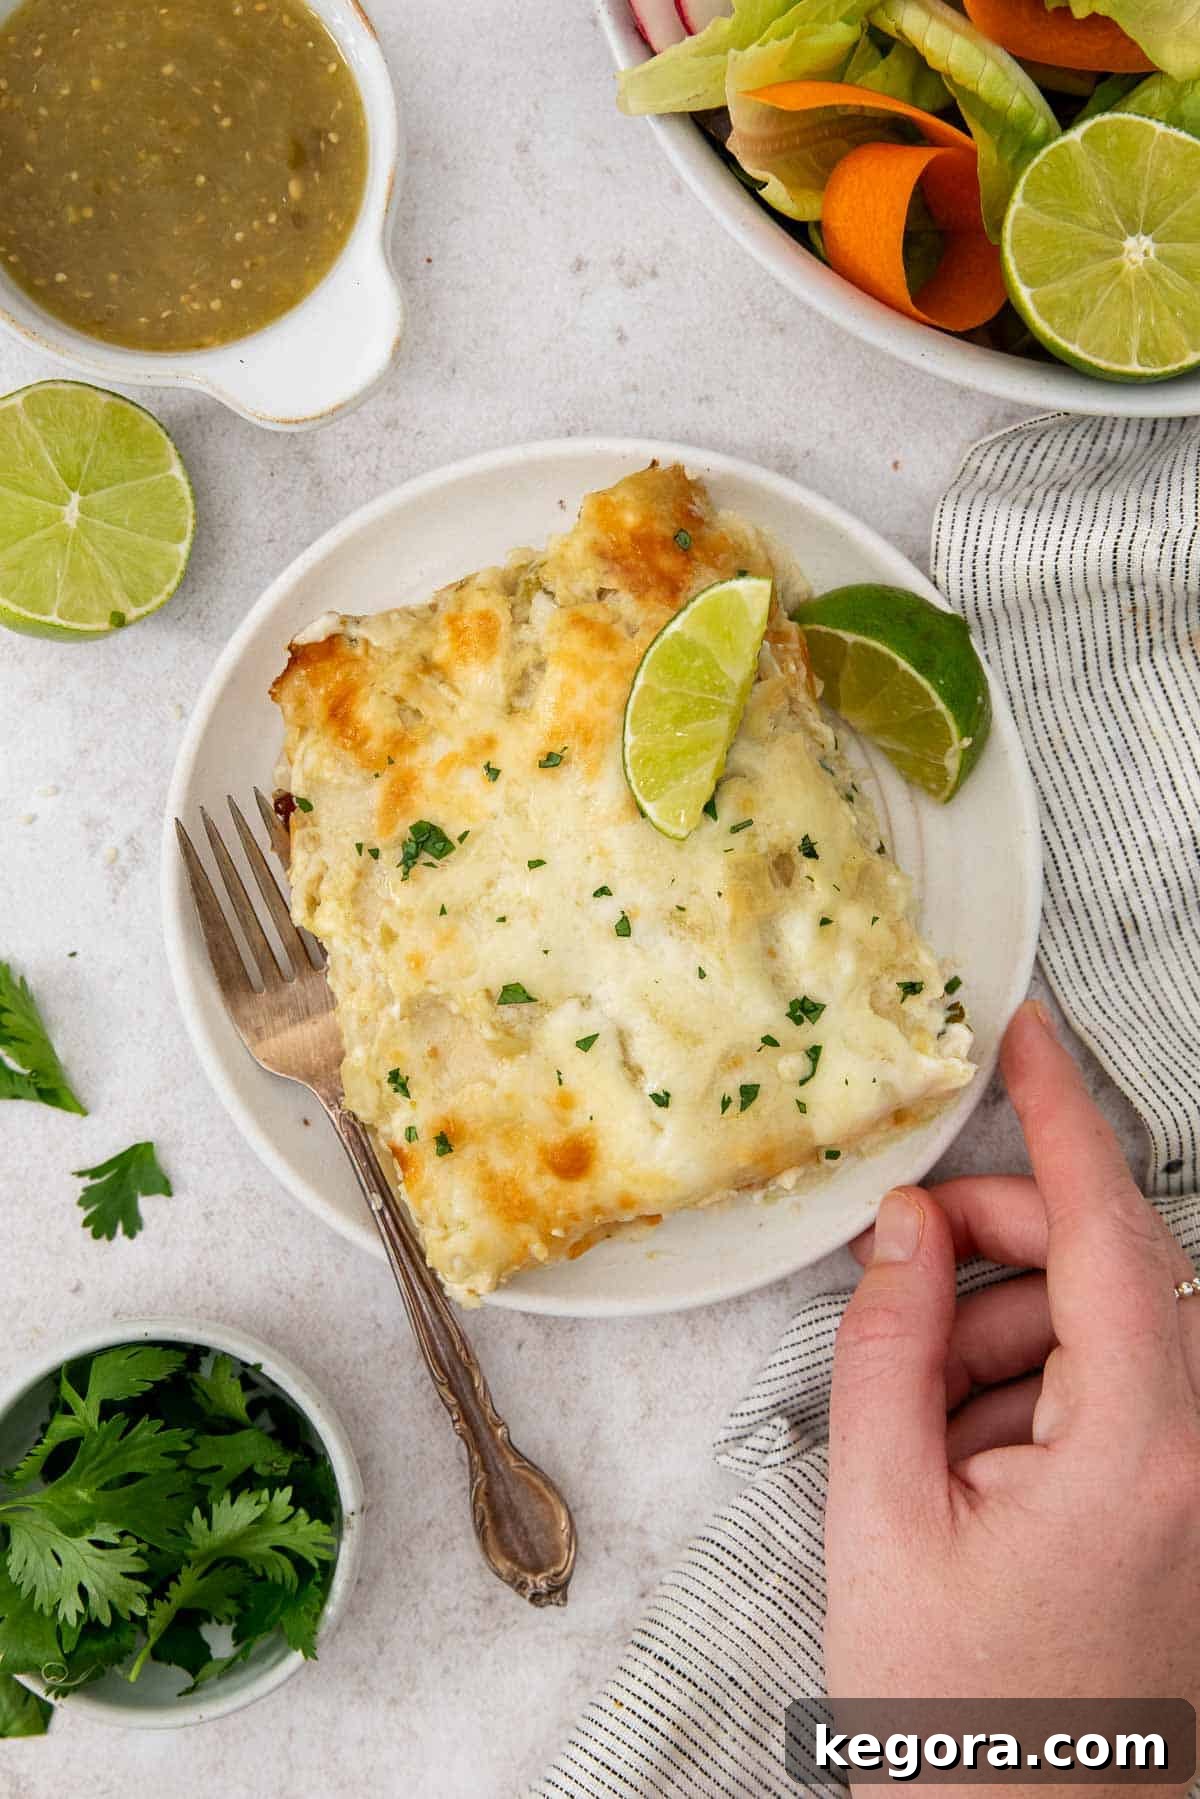
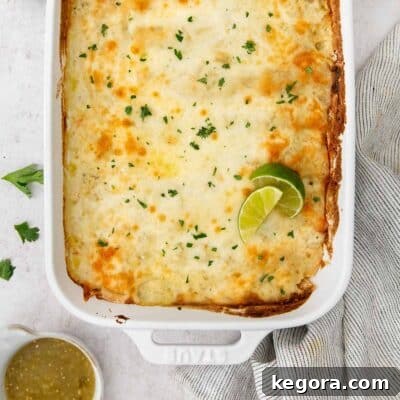
Gluten-Free Green Chile Chicken Enchiladas
Erin Collins
25 minutes
30 minutes
55 minutes
6
They’re cheesy, flavorful and comforting! I like to serve them with gluten-free Mexican rice and a big green salad tossed in cilantro lime vinaigrette.
Comments
Ingredients
Green Chile Sauce
- 3 tablespoons butter
- ½ cup diced onion
- 2 tablespoons gluten-free flour
- 1 cup chicken stock
- ½ cup milk
- ½ teaspoon kosher salt
- ½ teaspoon pepper
- 1 cup salsa verde
- ½ cup sour cream
Enchiladas
- 3-4 cups shredded chicken (I use the meat of one rotisserie chicken)
- 2 4-ounce cans green chiles, drained
- 8- ounce package cream cheese (at room temperature)
- ½ cup chopped fresh cilantro
- 1 tablespoon fresh lime juice
- 8 ounces Monterey Jack cheese (shredded, plus 1 cup reserved for topping)
- 10-12 corn tortillas
Instructions
For the Green Chile Sauce:
-
In a medium saucepan over medium heat, melt the butter. Add the diced onion and sauté until softened, 5–7 minutes. Sprinkle in the gluten-free flour and cook for another 1–2 minutes, stirring constantly. Slowly whisk in the chicken stock and milk. Stir in the salt and pepper.
-
Bring the sauce to a simmer and cook for 3–4 minutes, whisking often, until slightly thickened. Remove from heat and whisk in the salsa verde and sour cream. Set aside.
Assemble the Enchiladas:
-
Preheat the oven to 375°F (190°C). Lightly grease a 9×13-inch baking dish with cooking spray.
-
In a large bowl, combine the shredded chicken, green chiles, room temperature cream cheese, cilantro, and lime juice. Mix until evenly combined.
-
To soften the tortillas, place them on a plate and cover with a damp paper towel. Microwave for 15–30 seconds, until warm and pliable. Repeat with remaining tortillas as needed.
-
Spoon about ½ cup of the chicken mixture down the center of each warmed tortilla. Roll them up tightly and place seam-side down in the prepared baking dish. Repeat with all the tortillas until the filling is used up.
-
Pour the green chile sauce evenly over the assembled enchiladas. Sprinkle the reserved 1 cup of shredded Monterey Jack cheese over the top.
-
Bake for 25–30 minutes, until the enchiladas are hot and bubbly and the cheese topping has turned a light golden-brown around the edges.
-
Let cool for a few minutes before serving. Top with extra fresh cilantro before serving, if desired, for a burst of freshness.
Notes
Make-Ahead Instructions: For ultimate convenience, you can assemble the entire enchilada casserole up to 1 day in advance. Simply cover the baking dish tightly with aluminum foil or plastic wrap and refrigerate. When you’re ready to bake, you might need to add an extra 5-10 minutes to the total baking time to ensure it heats through evenly from the cold state.
Storage: Leftover enchiladas are fantastic! Allow the dish to cool completely, then cover it tightly and refrigerate for up to 4 days. Individual portions can be easily reheated in the microwave, or you can warm the entire dish in an oven preheated to 350°F (175°C) until thoroughly heated through and bubbly.
Freezing (Unbaked): These enchiladas freeze beautifully, making them perfect for future meals. Assemble the enchiladas in a freezer-safe baking dish, cover tightly with foil (or a freezer-safe lid), and freeze for up to 3 months. When ready to bake, remove from the freezer and bake from frozen at 375°F (190°C) for 50-60 minutes while covered. Then, uncover and bake for an additional 10-15 minutes, or until golden brown and bubbly.
Freezing (Baked): If you have leftovers of a baked casserole, let it cool completely. Cover tightly and freeze for up to 3 months. To reheat, thaw overnight in the refrigerator (or partially thaw), then reheat in the microwave for individual servings or in the oven at 350°F (175°C) until warmed through.
Nutrition
Carbohydrates: 31g |
Protein: 38g |
Fat: 29g |
Saturated Fat: 15g |
Polyunsaturated Fat: 3g |
Monounsaturated Fat: 8g |
Trans Fat: 0.2g |
Cholesterol: 121mg |
Sodium: 1147mg |
Potassium: 583mg |
Fiber: 3g |
Sugar: 8g |
Vitamin A: 997IU |
Vitamin C: 4mg |
Calcium: 512mg |
Iron: 2mg